Design of the Night Stands, cutting, jointing, dry assembly, finishing, gluing.
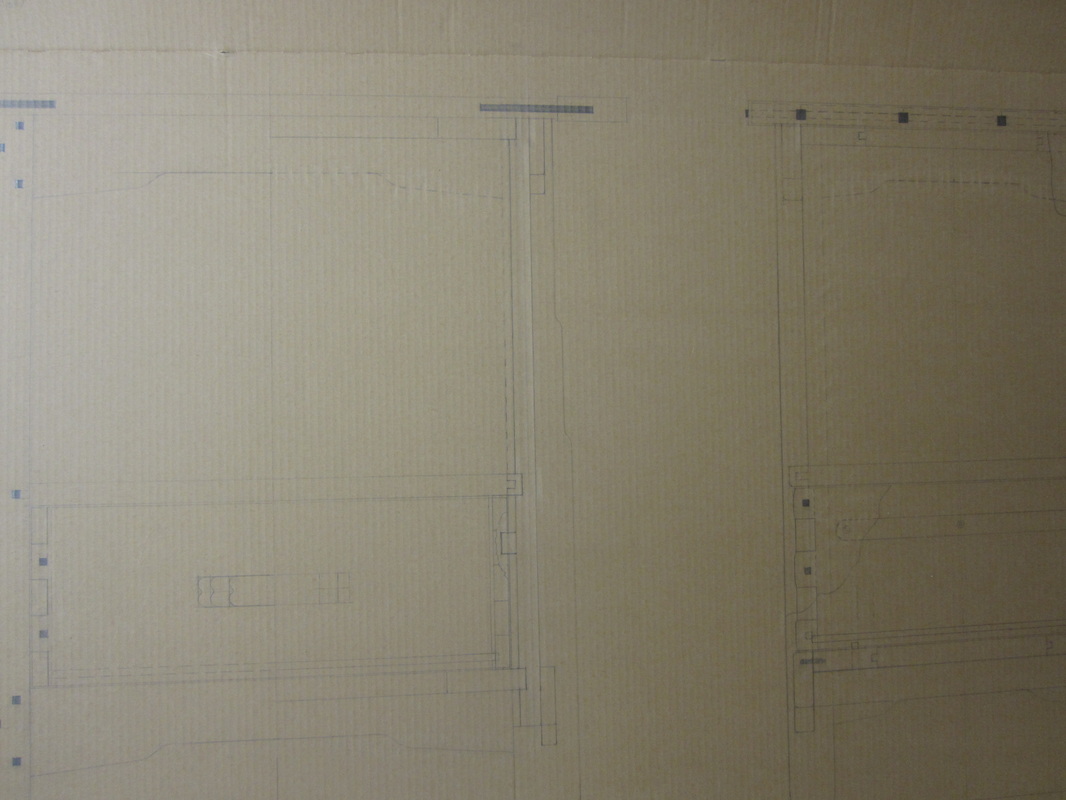
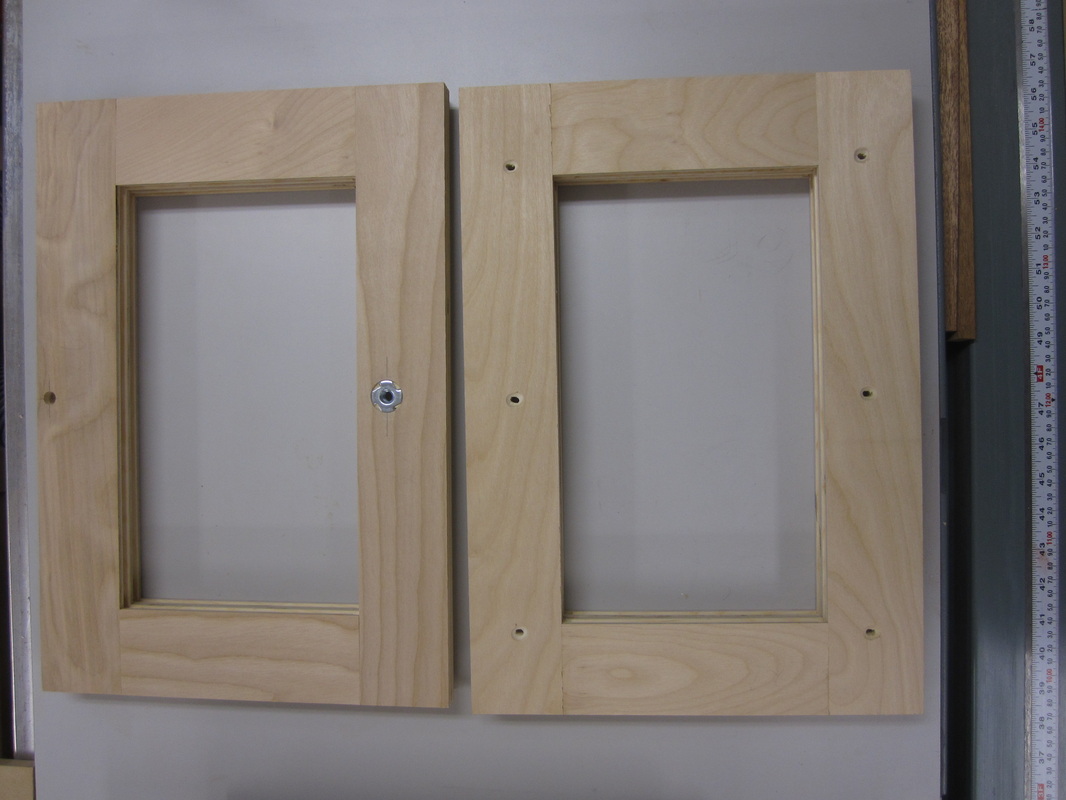
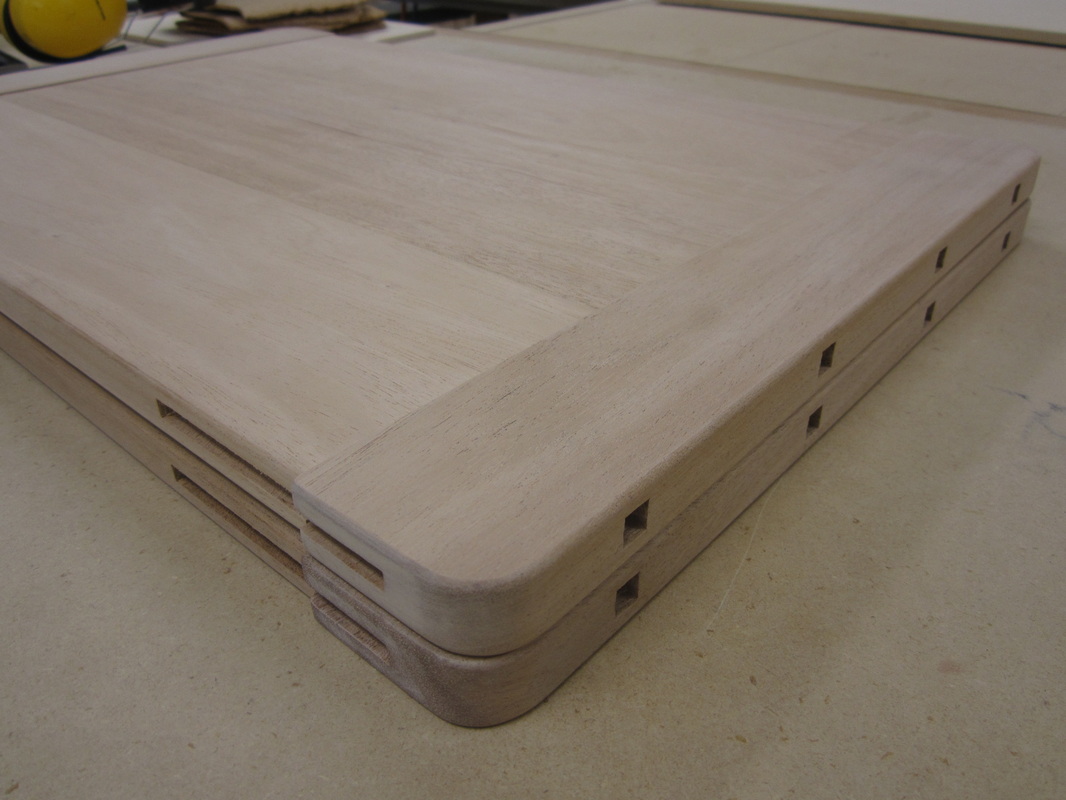
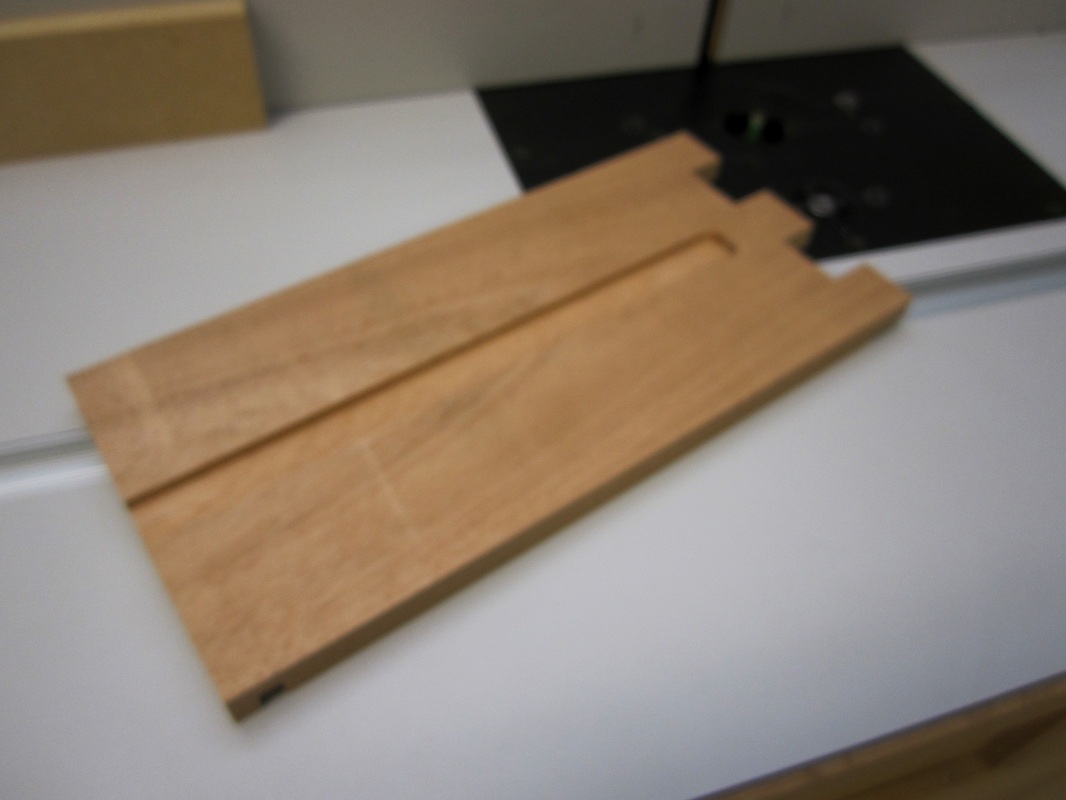
The night stands started out, similarly to the bed, with a full-size drawing on cardboard which allowed me to assess the design, set the dimensions and figure out the joinery that would be best suited. I then made the top and bottom carcass frames out of birch plywood. These frames establish the spacing of the sides and as a means to attach the top. I used groove and stub-tenon joinery which helped to keep the frames square at the corners. I drilled and slotted six holes in one frame to use when securing the top and drilled a hole and inserted a threaded nut in the other one so I could add a short bolt after final drawer insertion; to keep it from pulling all the way out.
|
|
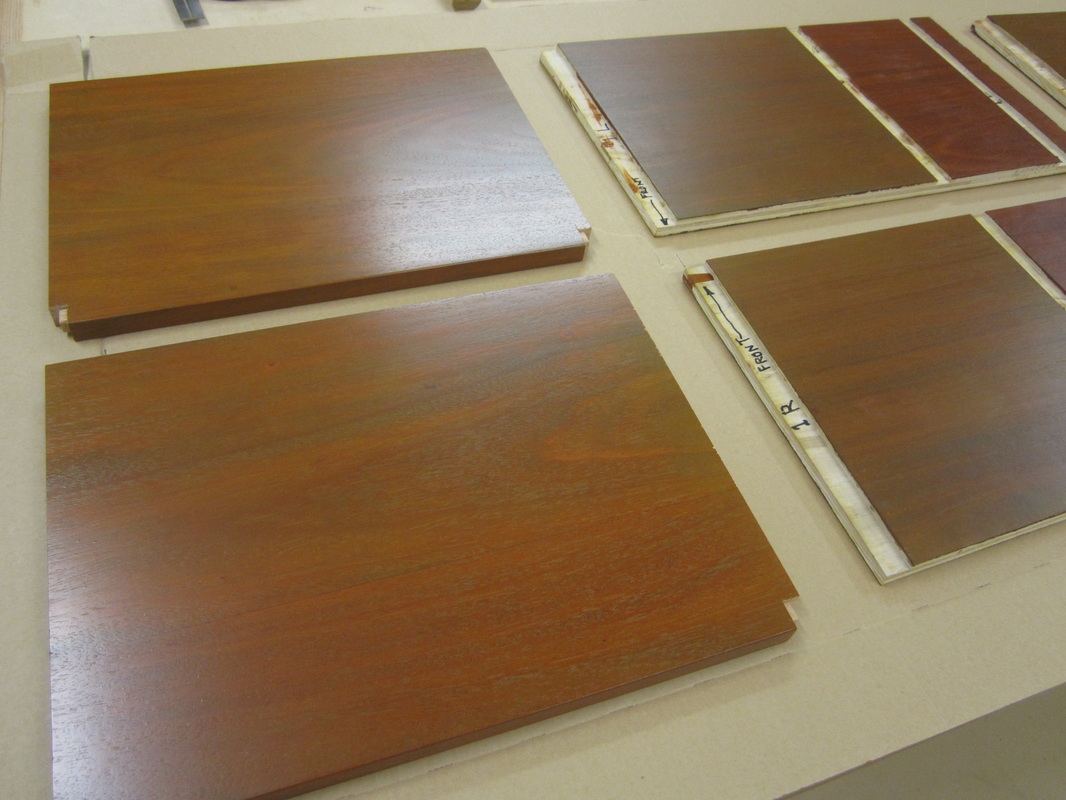
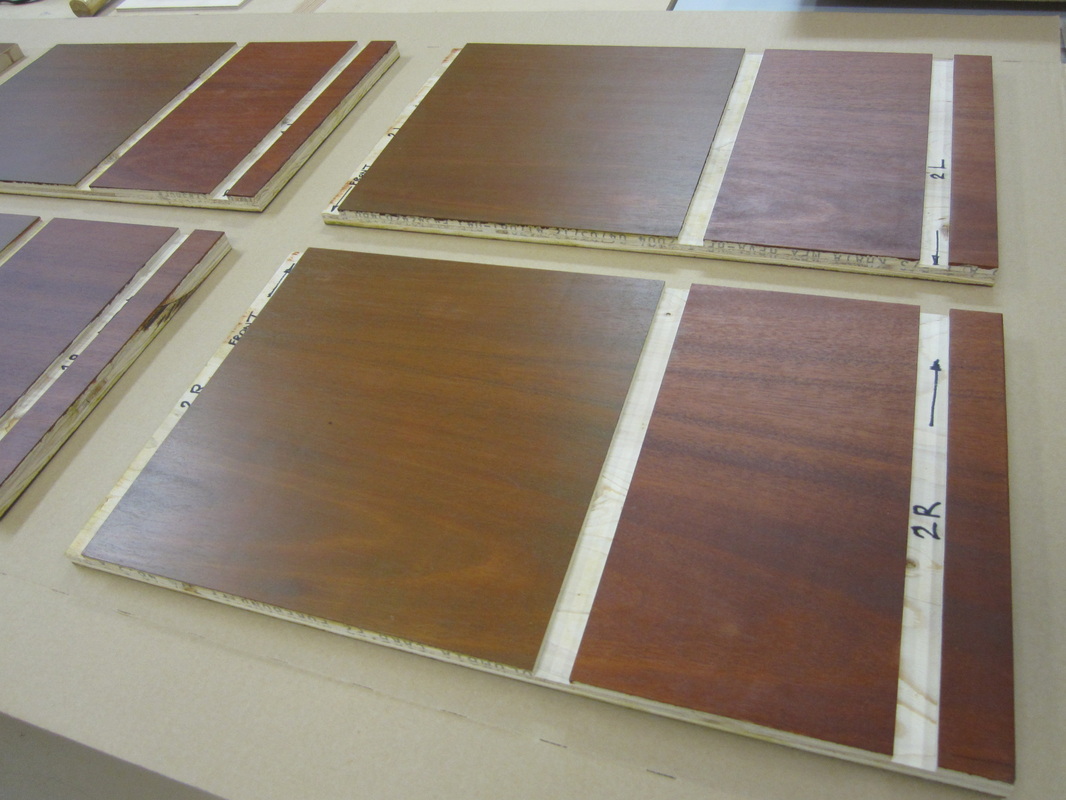
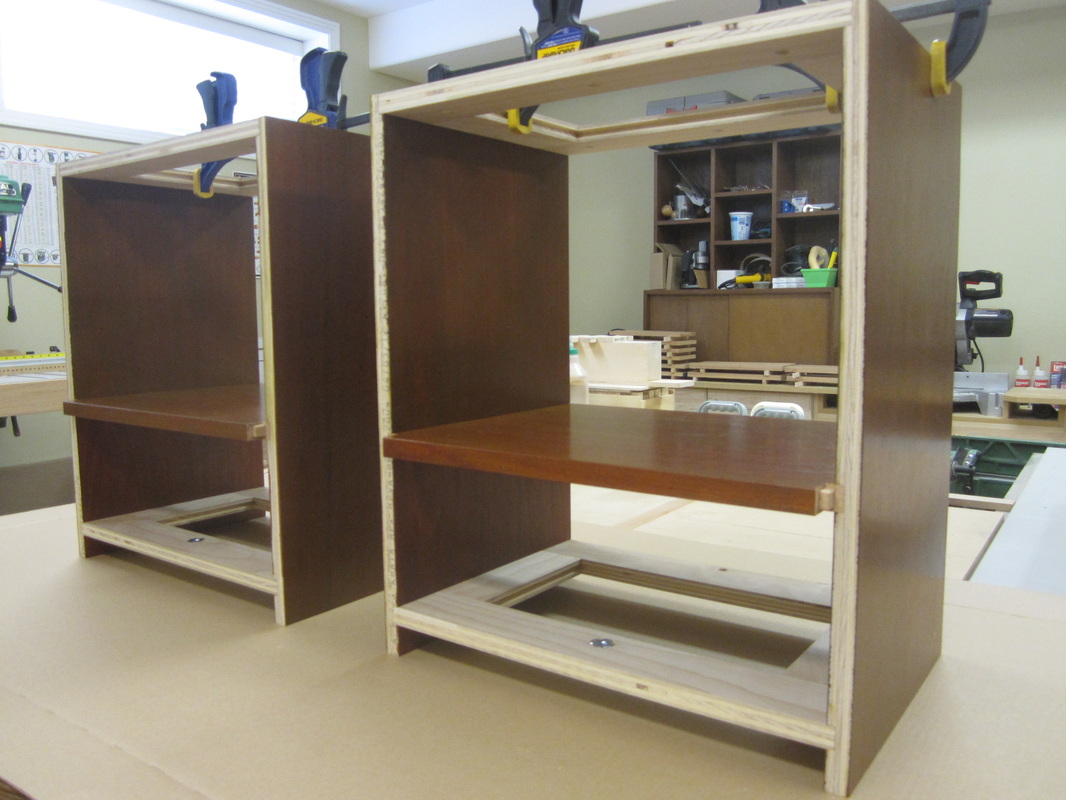
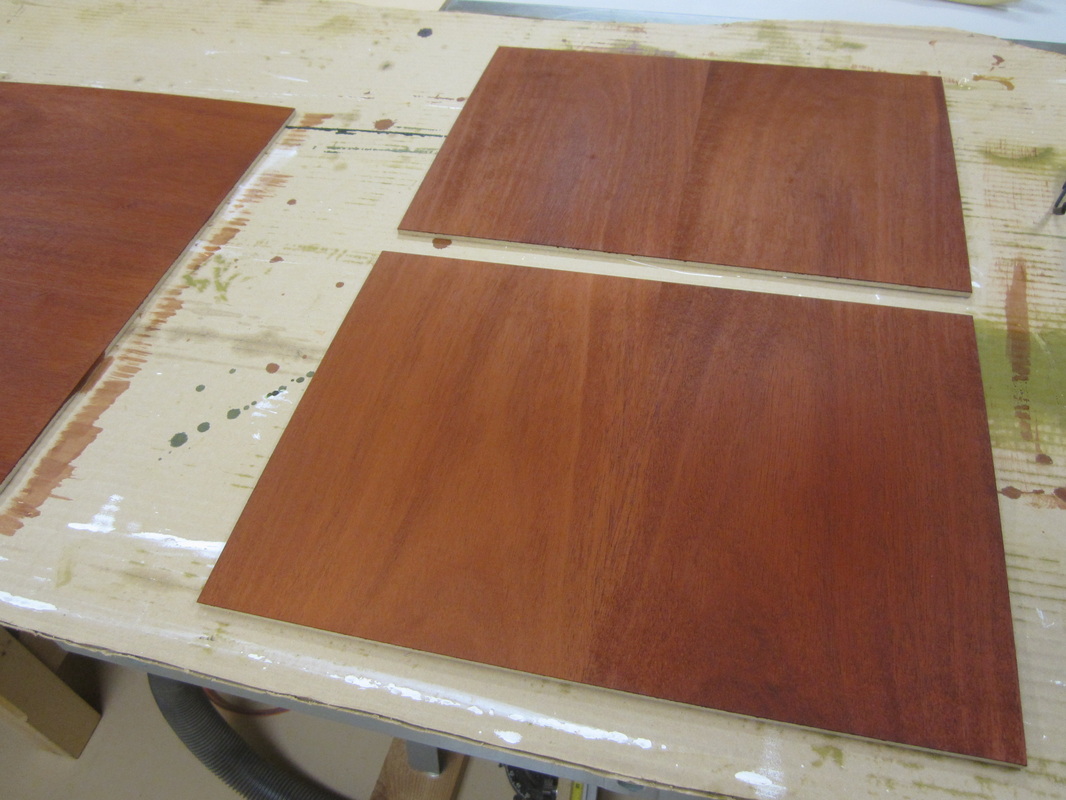
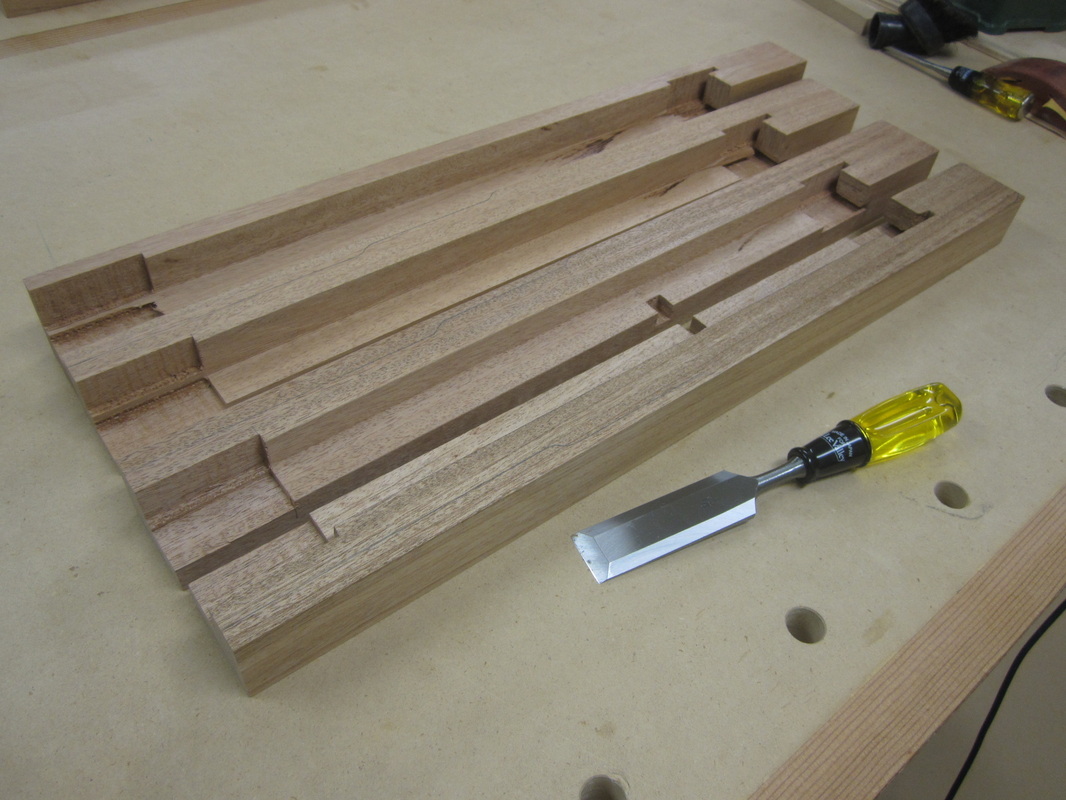
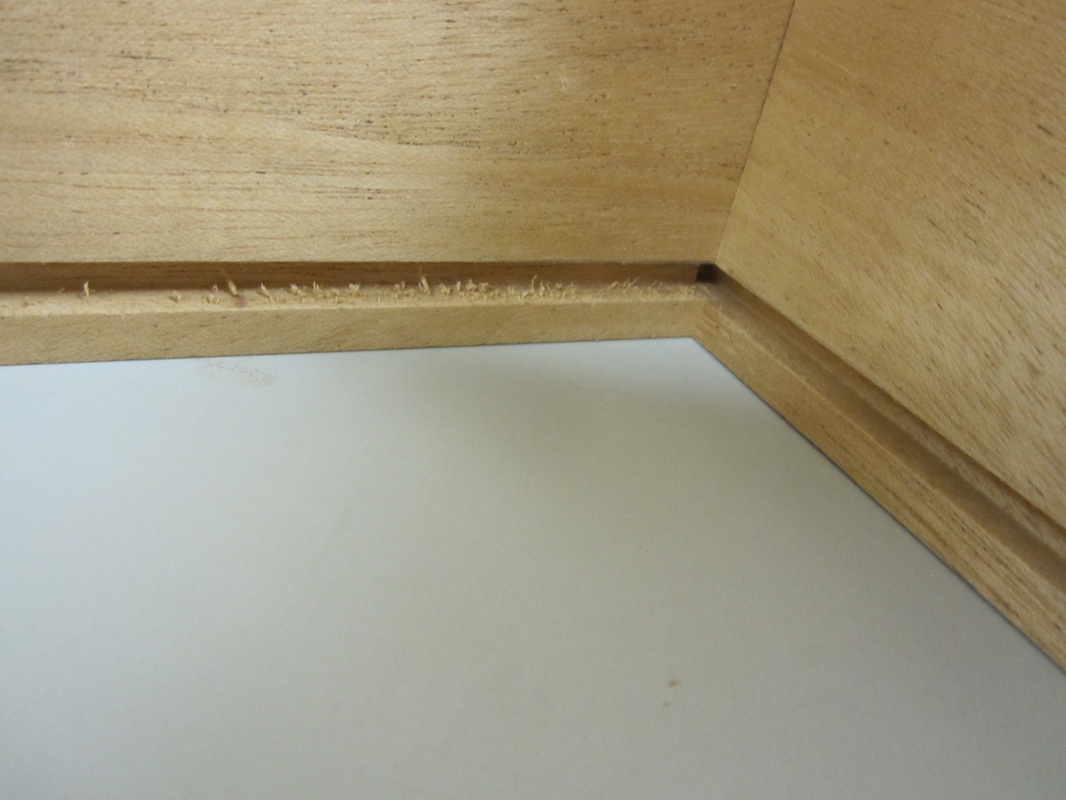
I then cut the sides from Khaya mahogany plywood and made dadoes across the top, middle and near the bottom to receive the top and bottom carcass frames and the middle shelf. I made the shelf from solid African mahogany. All these pieces were pre-finished before assembly as I thought it would be easier than trying to get into the inside corners later.
|
|
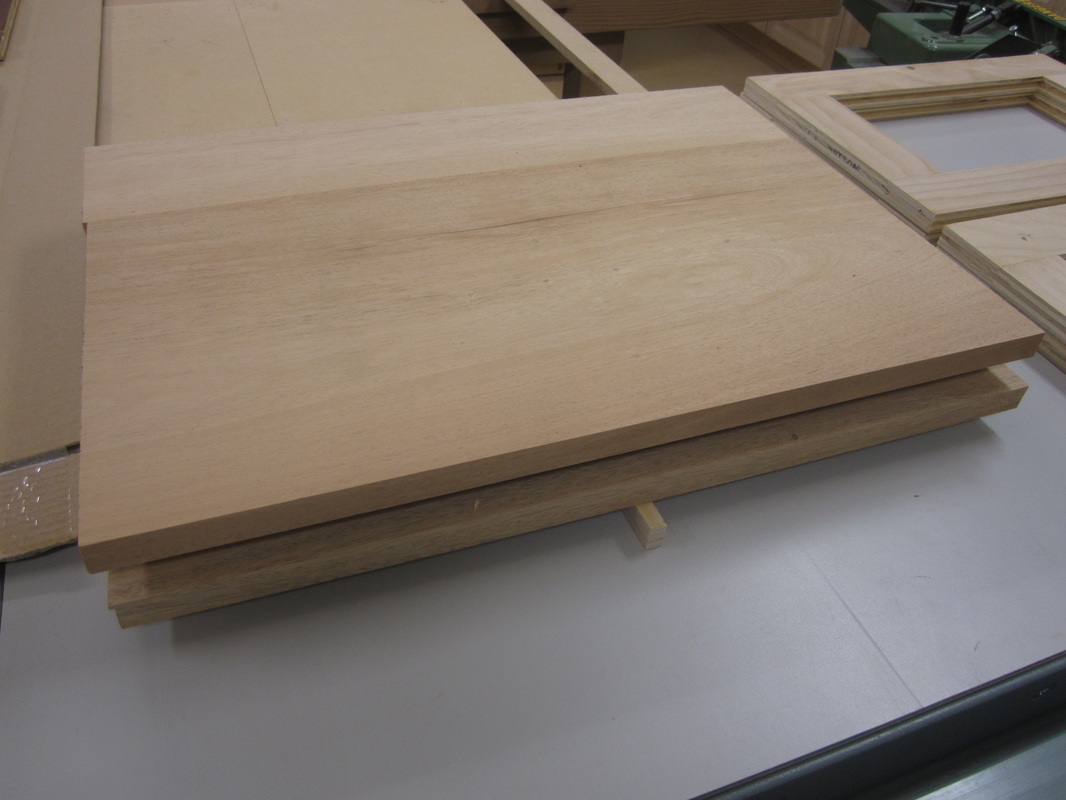
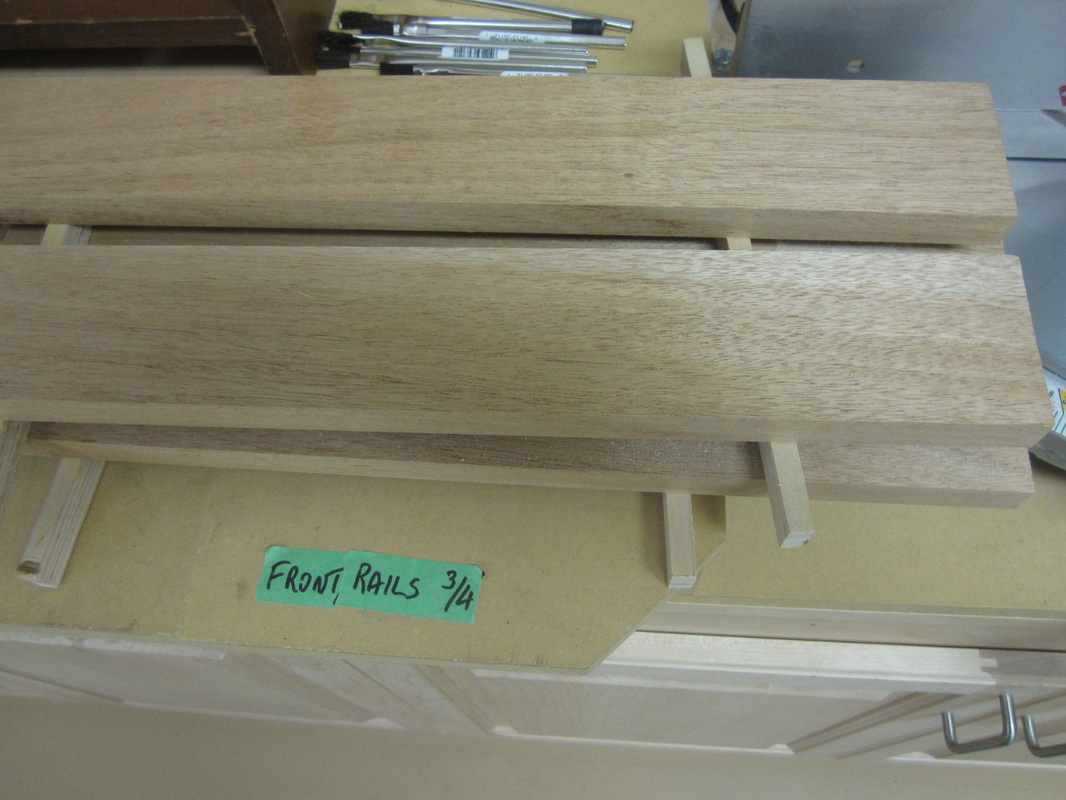
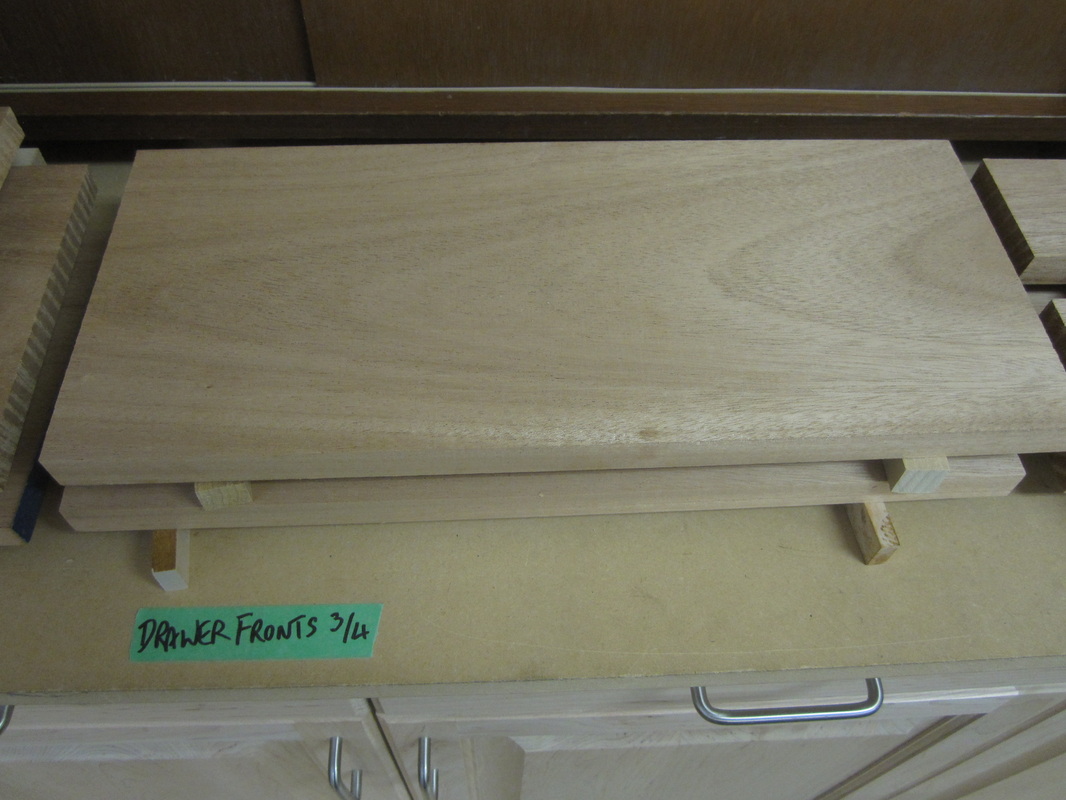
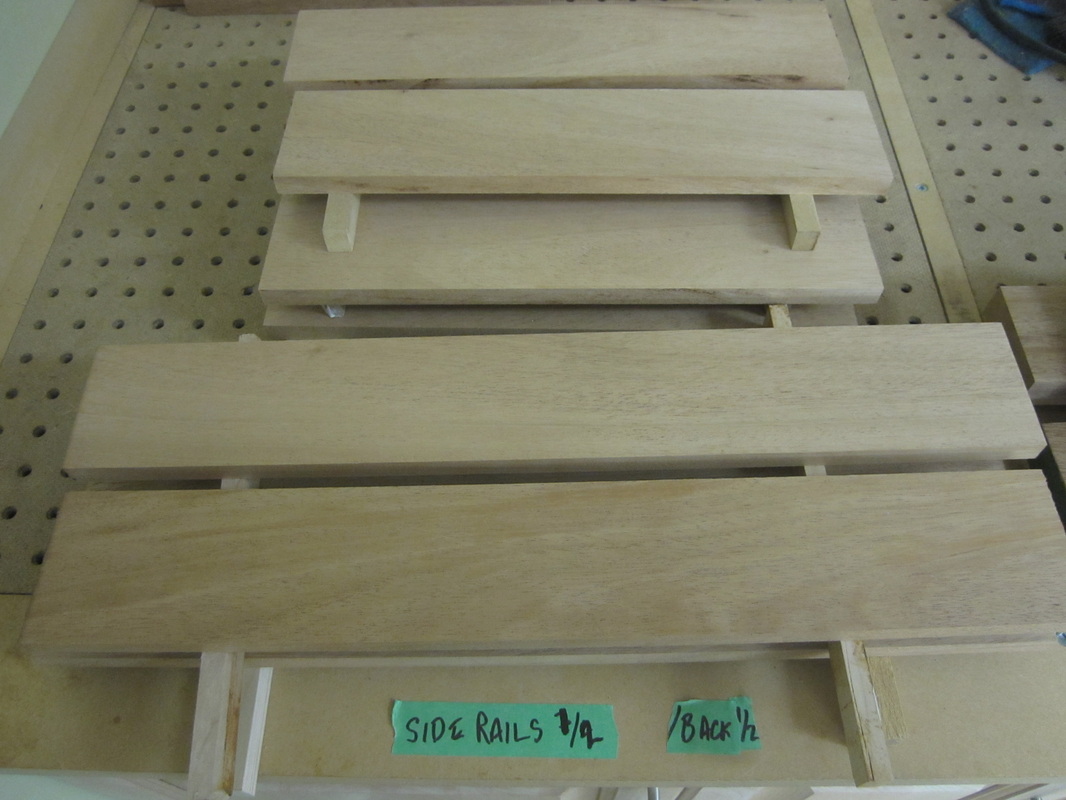
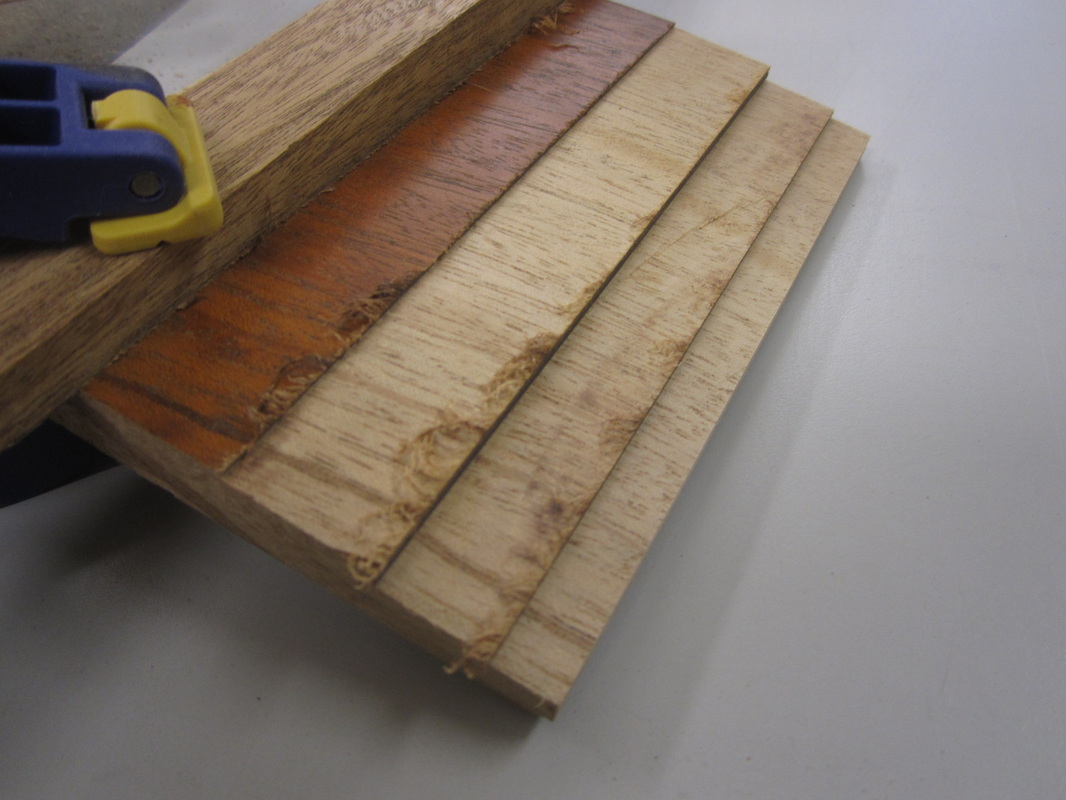
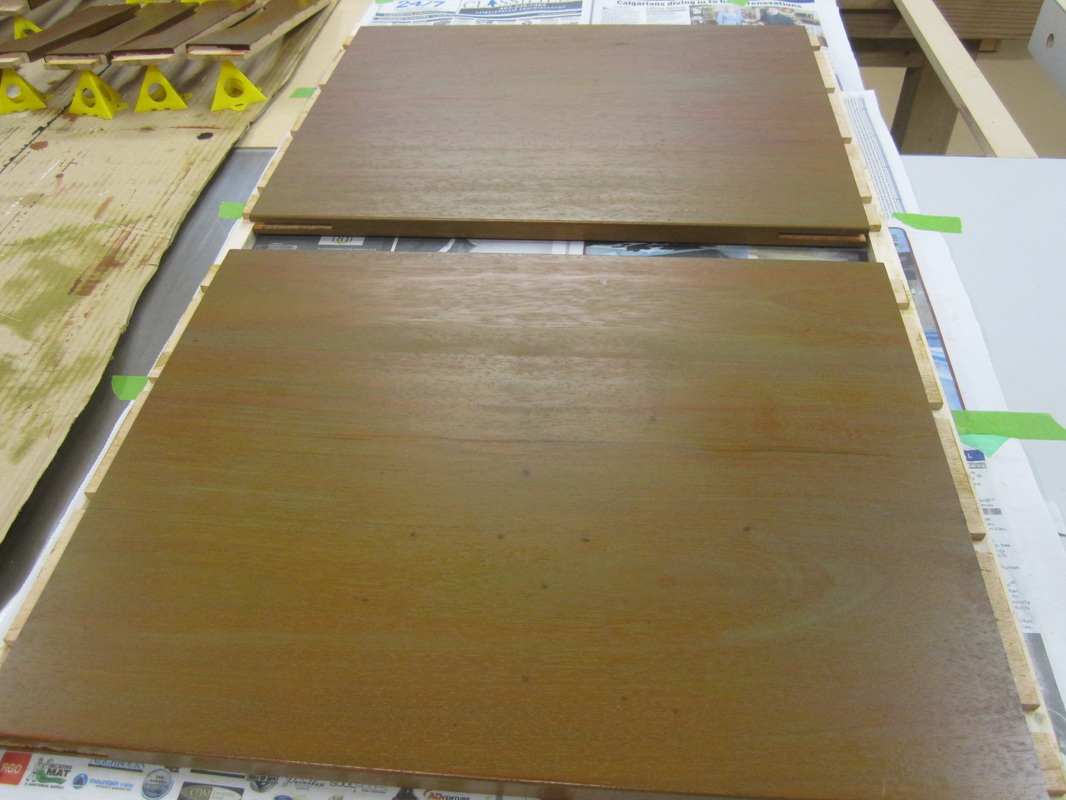
All the solid parts were rough sized and stickered to allow them to acclimatize before bringing to final dimensions and joinery. The tops were glued up into one piece from three narrower boards, being careful to match the grain so it would look like one solid piece.
|
|
|
|
|
|
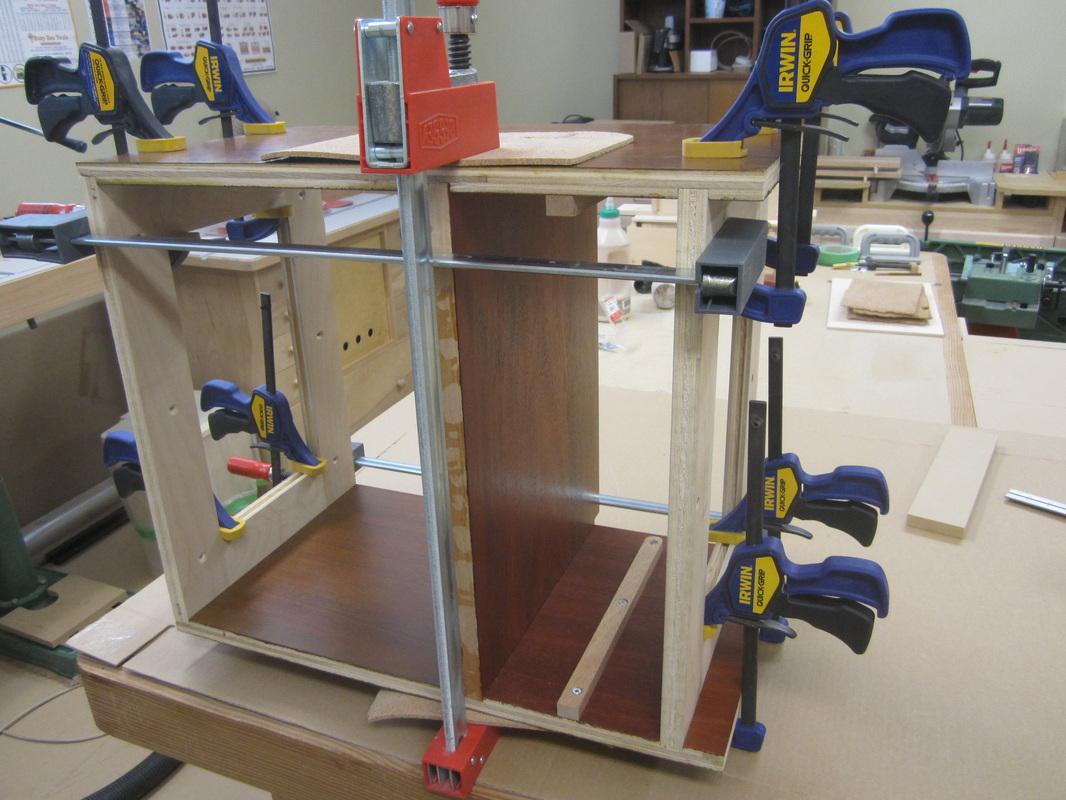
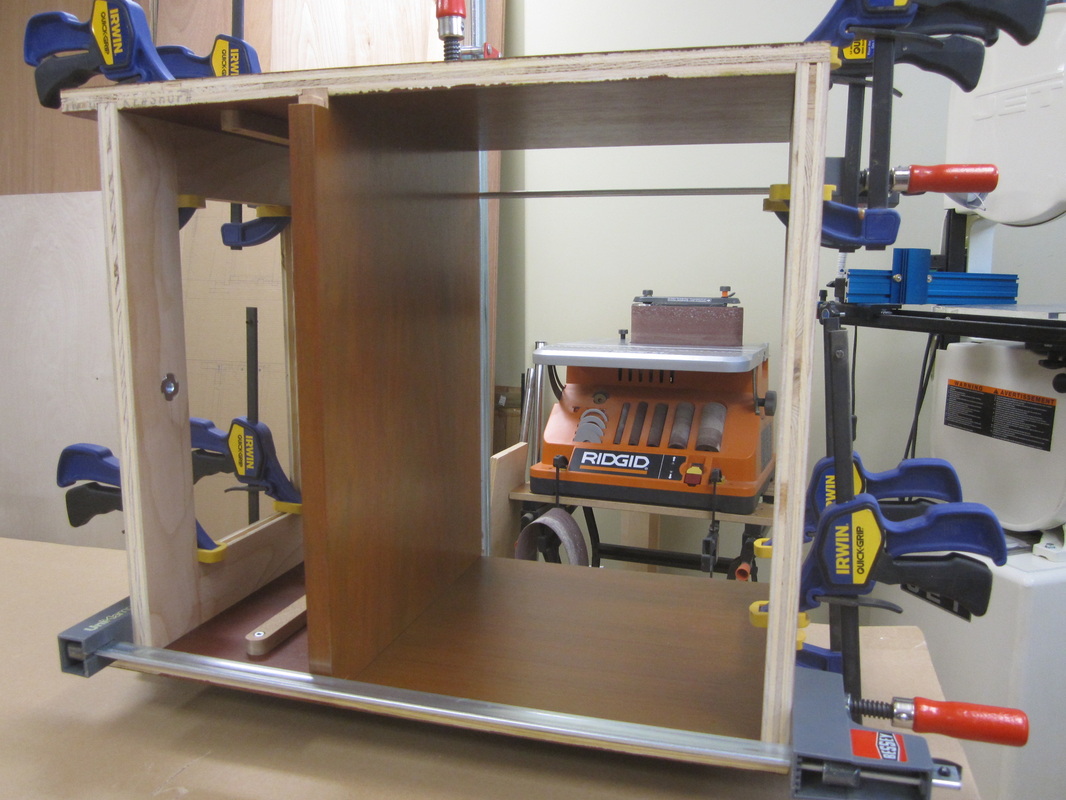
While the solid parts acclimatized, I clamped up the carcass temporarily to check the fit and confirm dimensions for cutting the solid parts to final size. I made up some drawer supports and screwed them to the sides, using a spacer piece to position them level and at the same height on both sides. No glue on these, just in case….
|
|
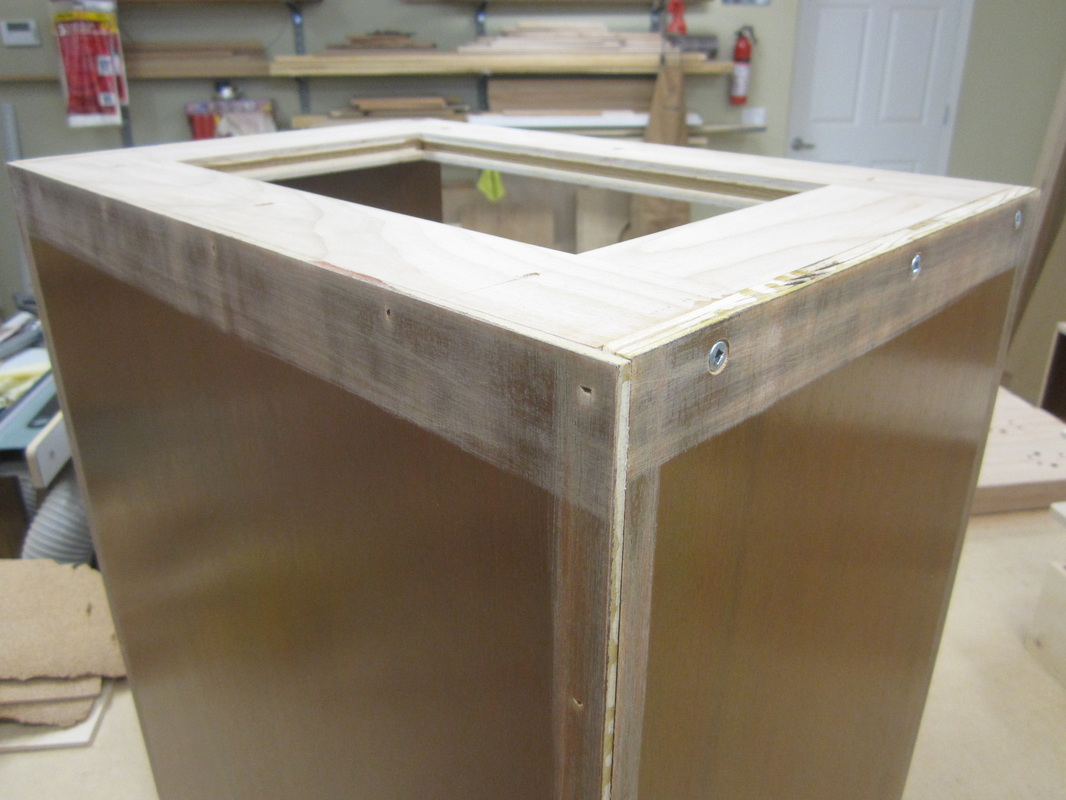
Then it was time to glue-up the carcasses and move them out of the workshop temporarily so I could clear some space to work on the other parts.
|
|
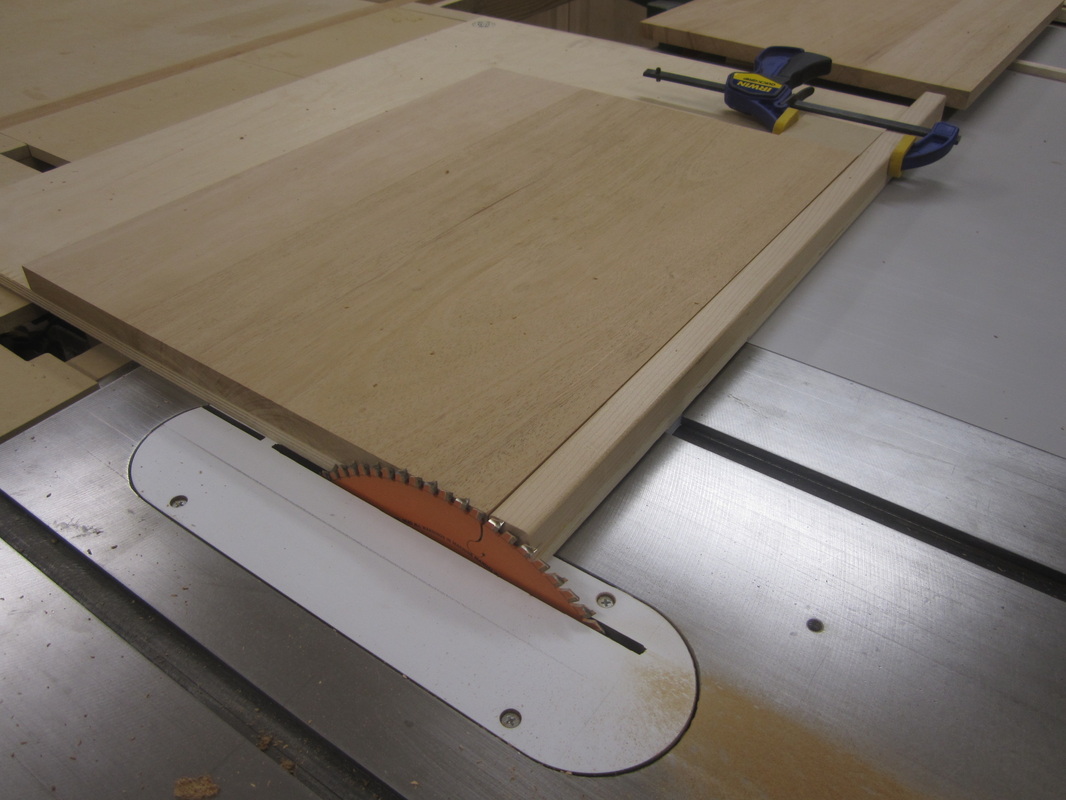
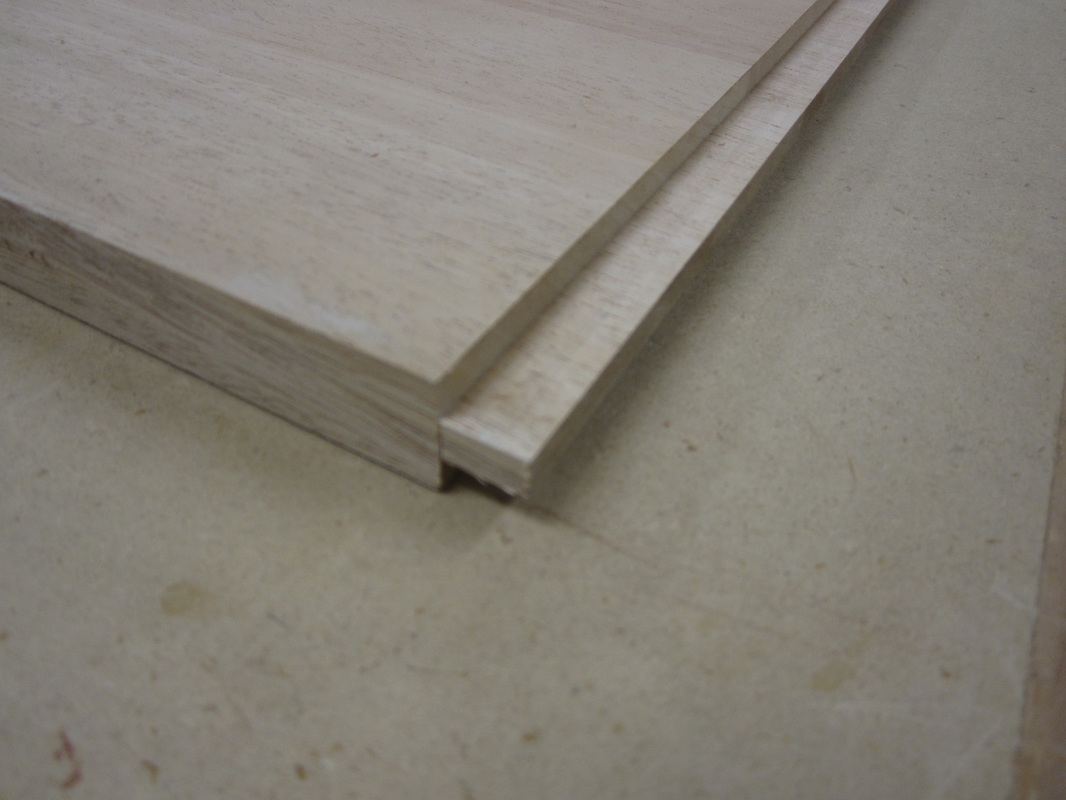
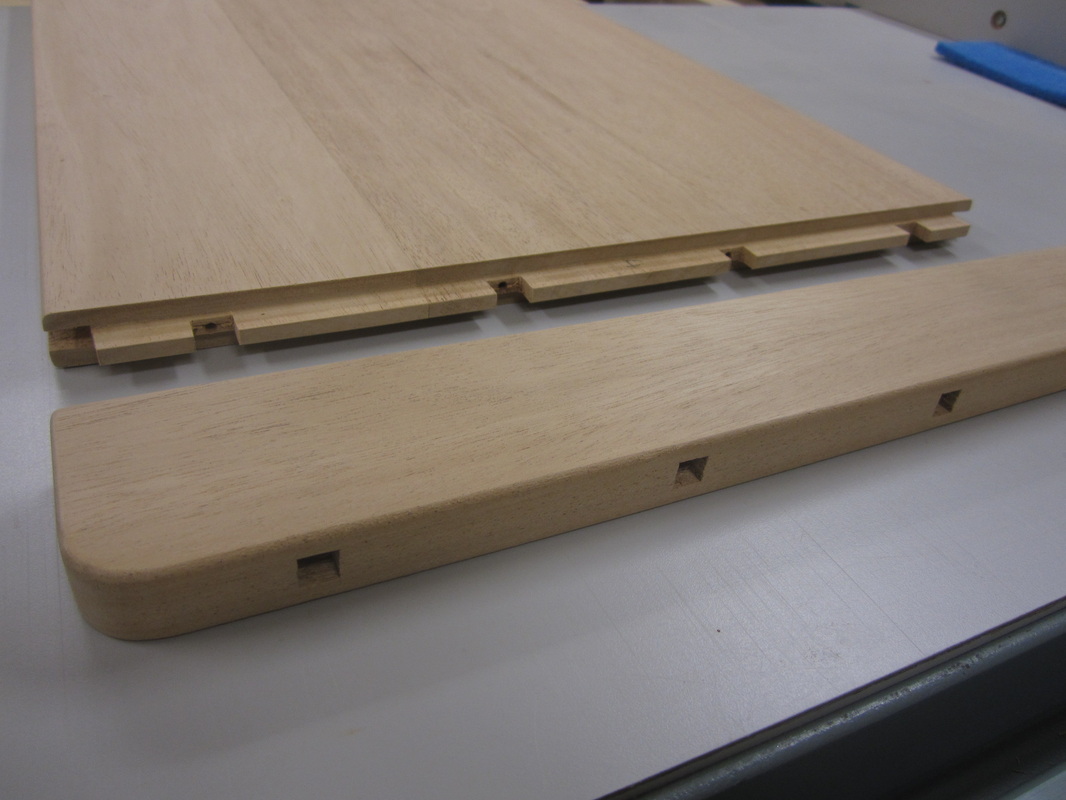
Next, I cut the tops to final size and marked the position of the tongues on the ends that would fit into the bread-board ends. The small cuts from the marking gauge help to prevent tear-out at the table saw, although my cross-cut sled and the steep beveled teeth of the outer dado-blade do a pretty good job.
|

|
The dado-blade set is used with a sacrificial fence at the table saw cut the tongue, flipping the piece over to cut the opposite side so the tongue is in the centre.
|
|
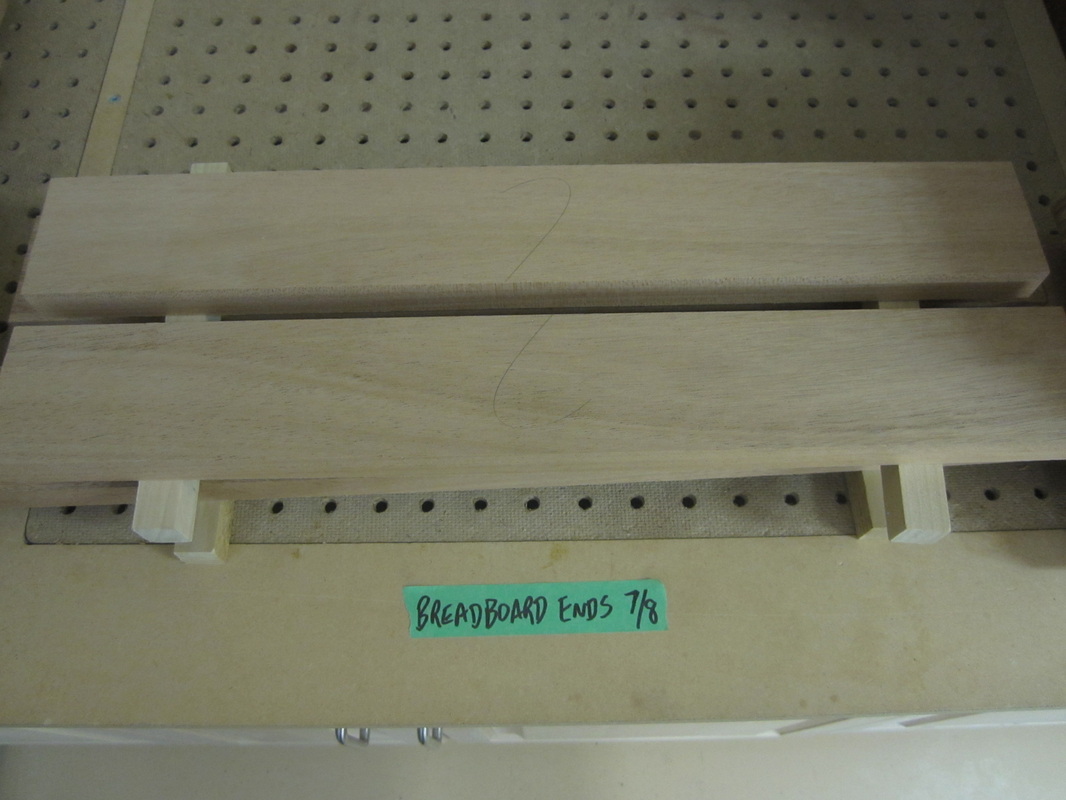
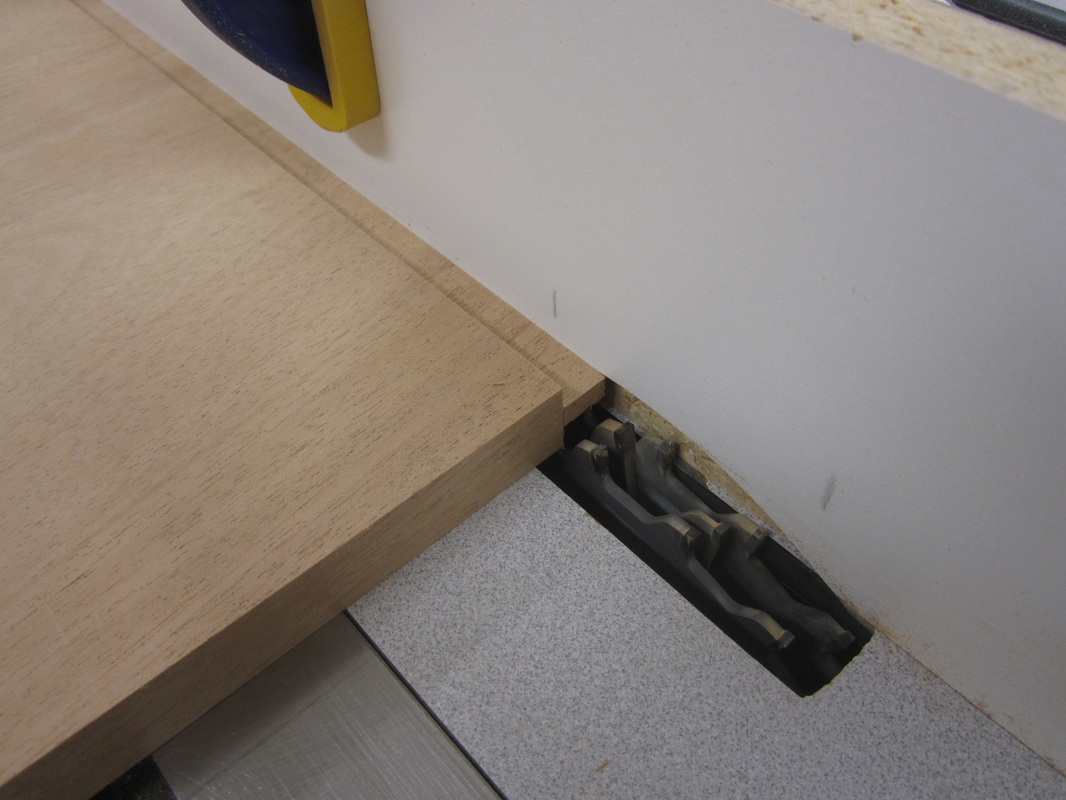
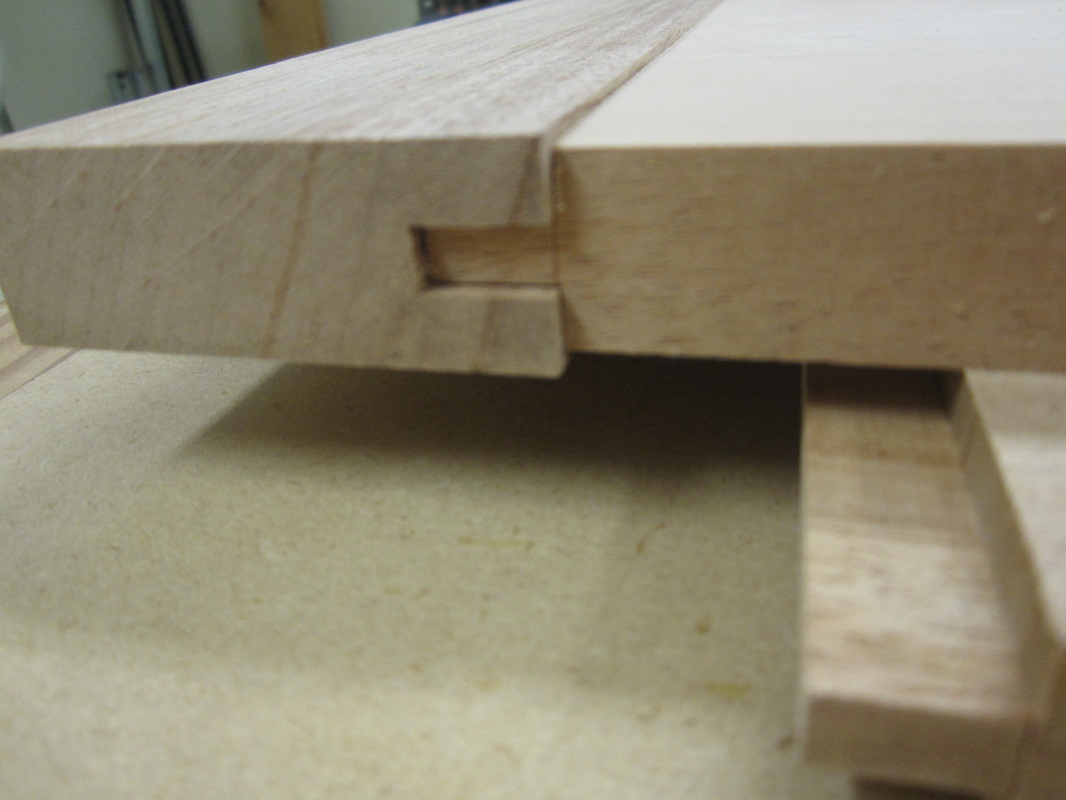
Next I cut the matching grooves in the bread-board ends. On my project, the bread-board ends are 7/8” thick while the main top is ¾” thick. I centre the groove in the bread-board ends using two passes at the table-saw, flipping the piece end-for-end for the second pass. They fit perfectly, just a little friction.
|
|
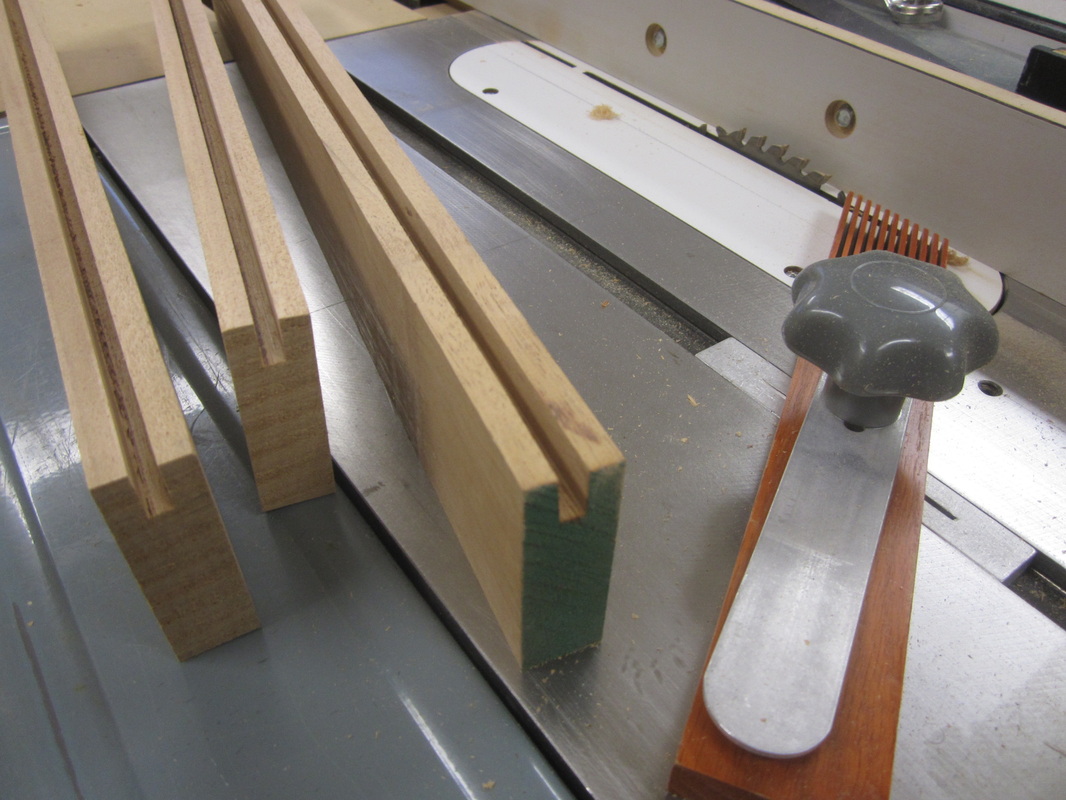
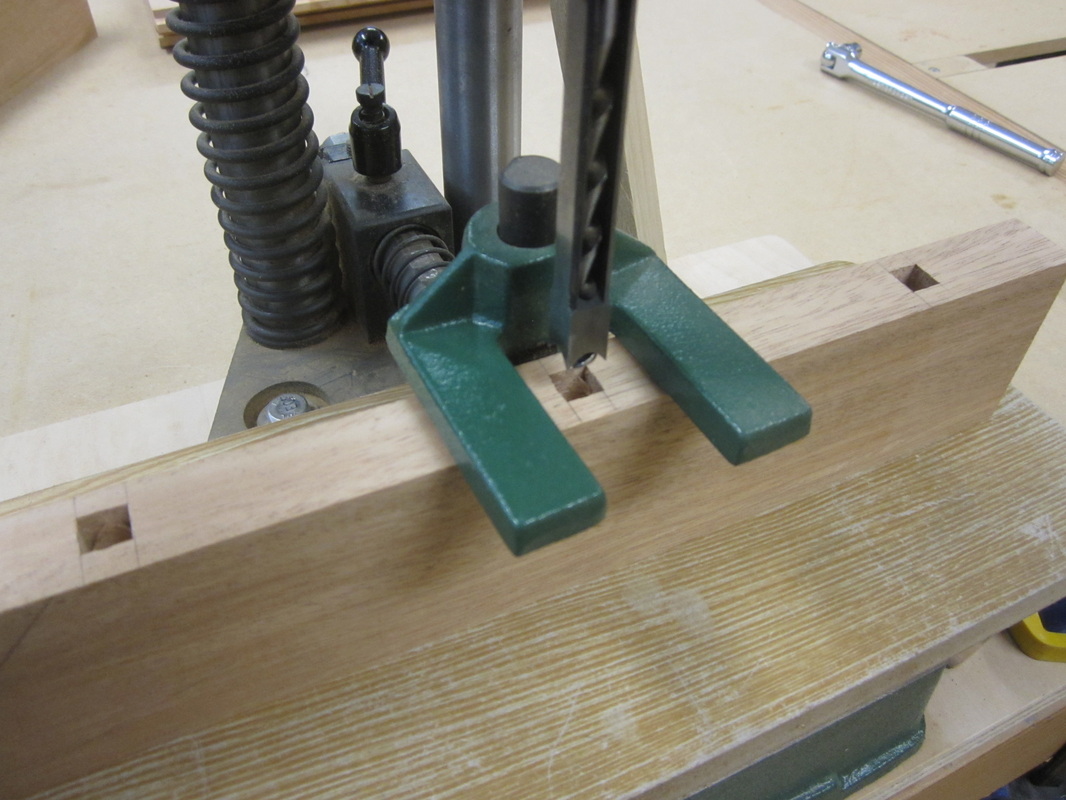
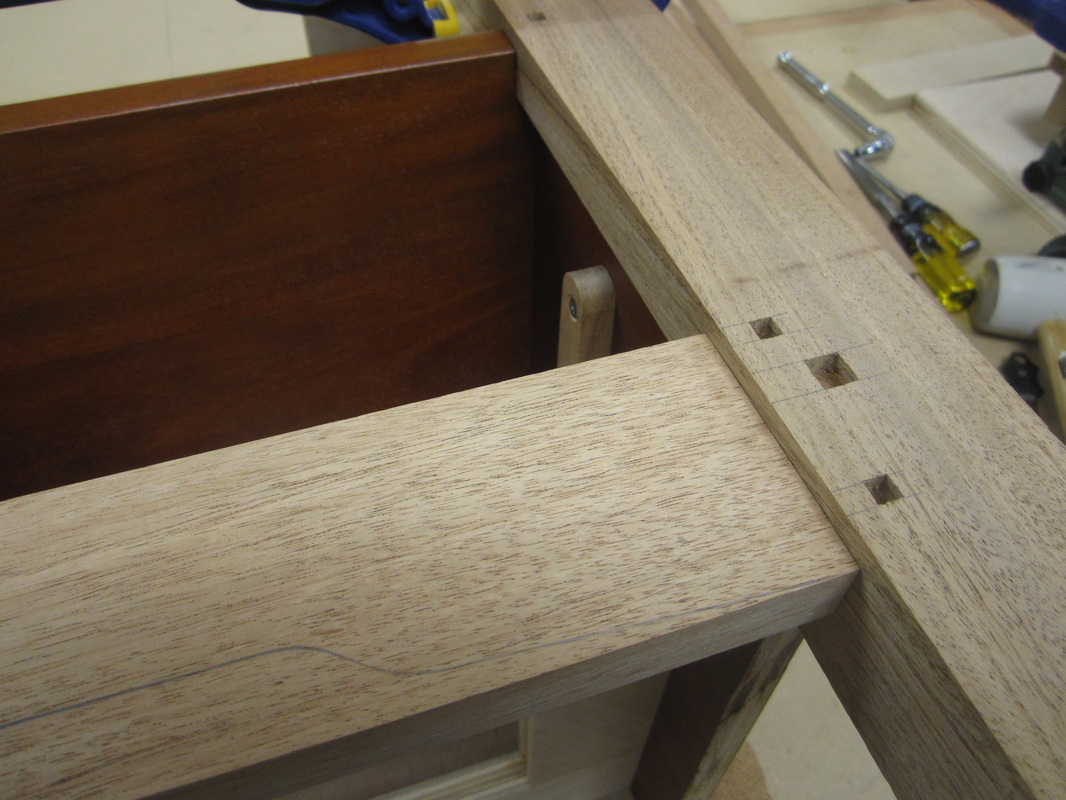
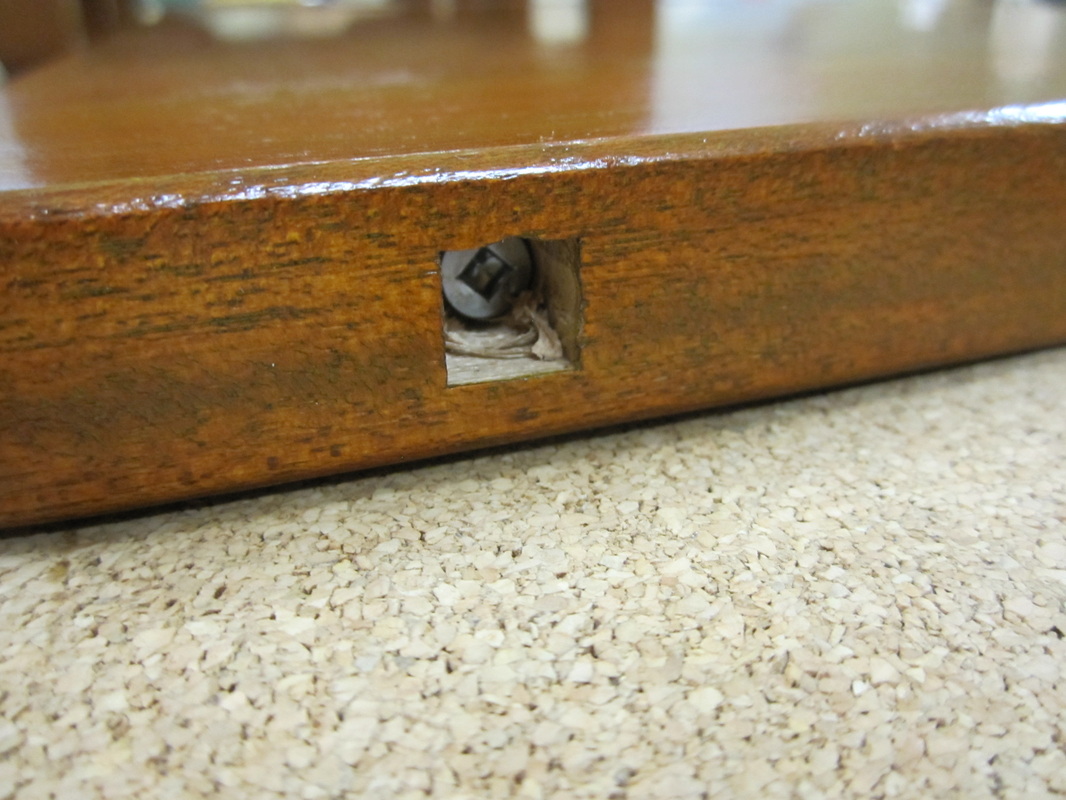
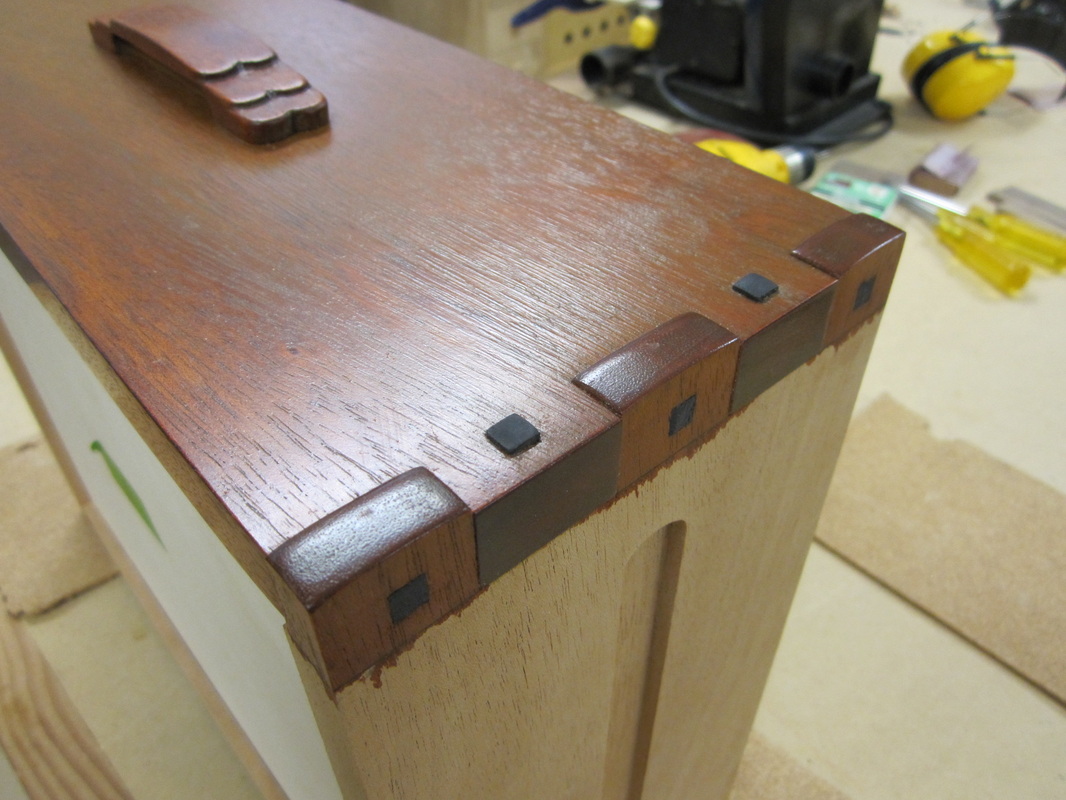
The bread-board ends are glued only in the centre to allow for cross-grain dimension changes due to humidity. At the outsides the bread-board ends are secured with screws in slotted holes which are concealed with square plugs. I cut the plug holes with my 3/8” square mortising bit and then switched to the ¼” bit to deepen the grooves at the ends for the splines that help to keep the pieces aligned.
|
|
Centered ¼” wide grooves were then cut with a router along the edges of the top and the ends squared off with a chisel. These grooves will hold the alignment splines in the top. All the edges were then rounded over with the router and a 1/8” radius bit. The pieces are dry-fitted to check the joints and make sure that the grooves line up in the tops and bread-board ends. Pilot-holes are then drilled through the centre of the square holes in the bread-board ends into the top for screws that will ultimately secure the ends. The holes are elongated on the inside to allow the screws to compensate for dimensional changes in the top due to humidity changes. I also cut out small pieces of the tongue on the tops to assist this movement.
|
|
I then cut and pre-finished the plywood panels for the backs. One piece fits over the entire back while the other smaller piece fits inside the open shelf area with the “good” side out. The lower section is hidden by the drawer so it has just the secondary veneer on the inside. During assembly, the pieces are spot-glued together and weighted down until the glue sets up.
|
|
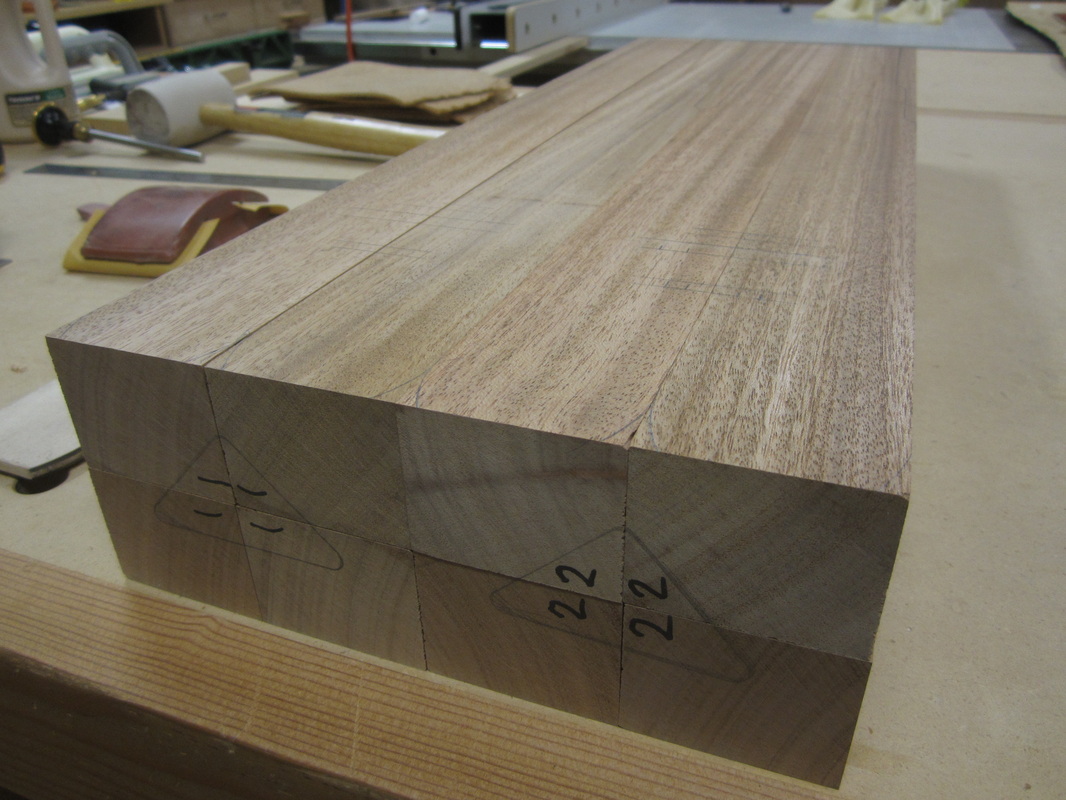
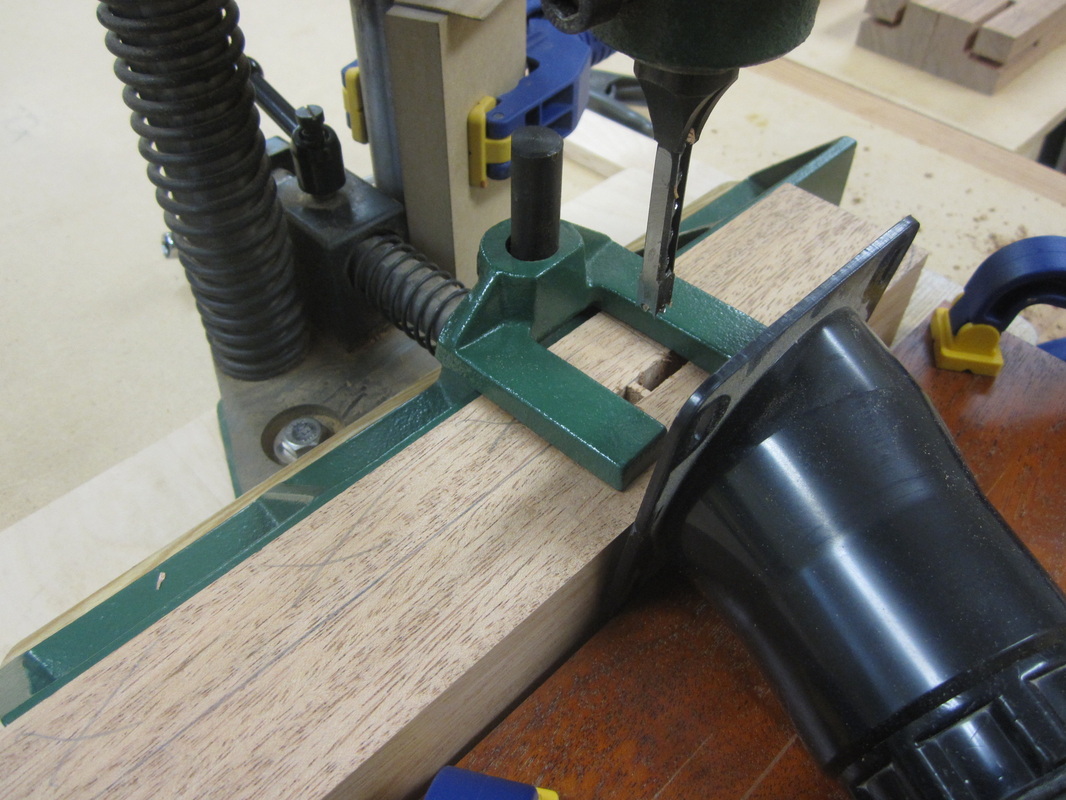
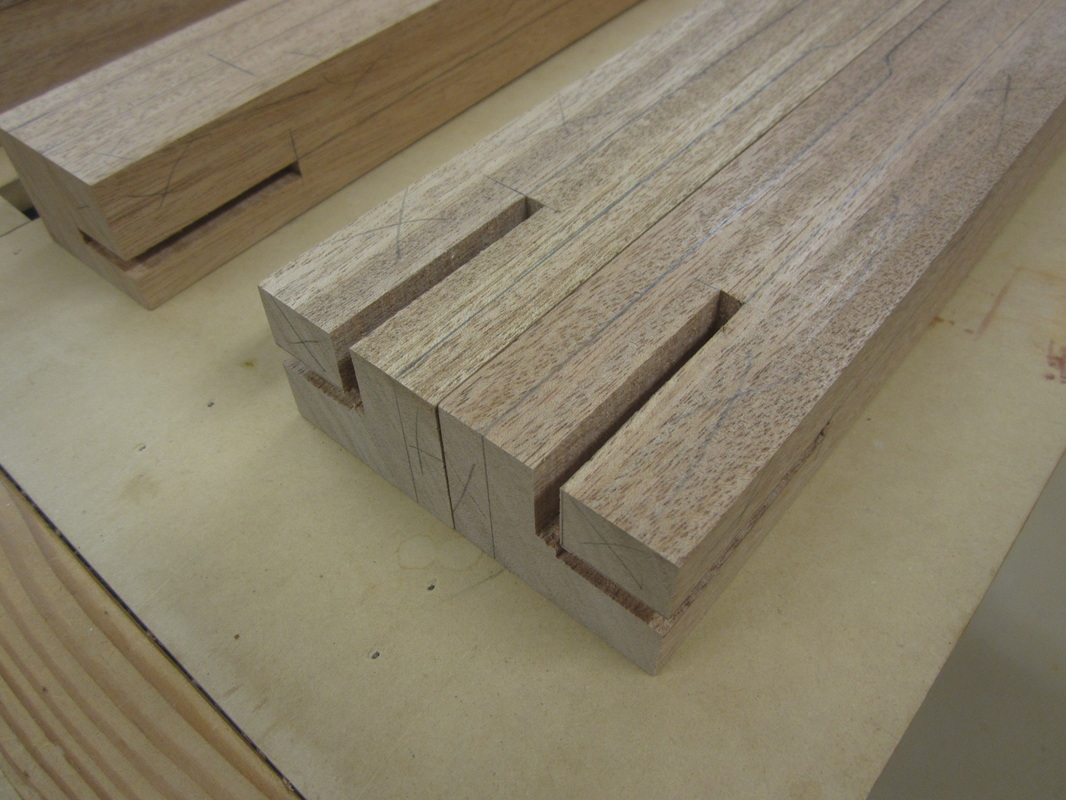
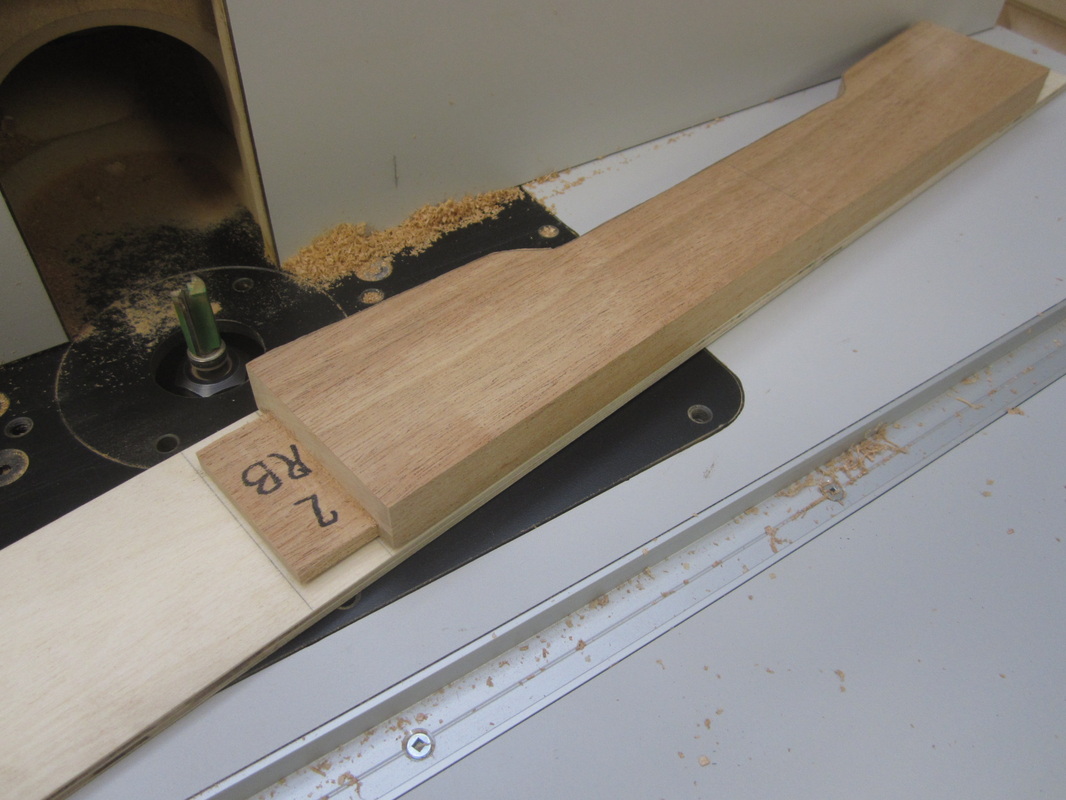
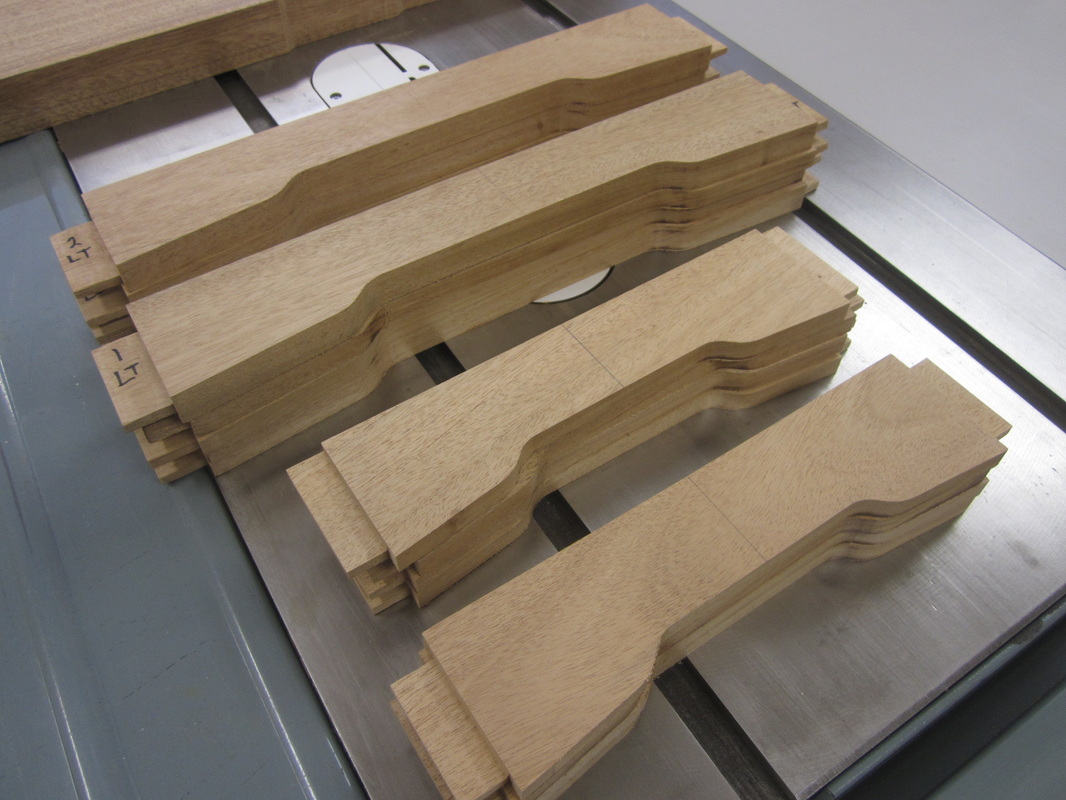
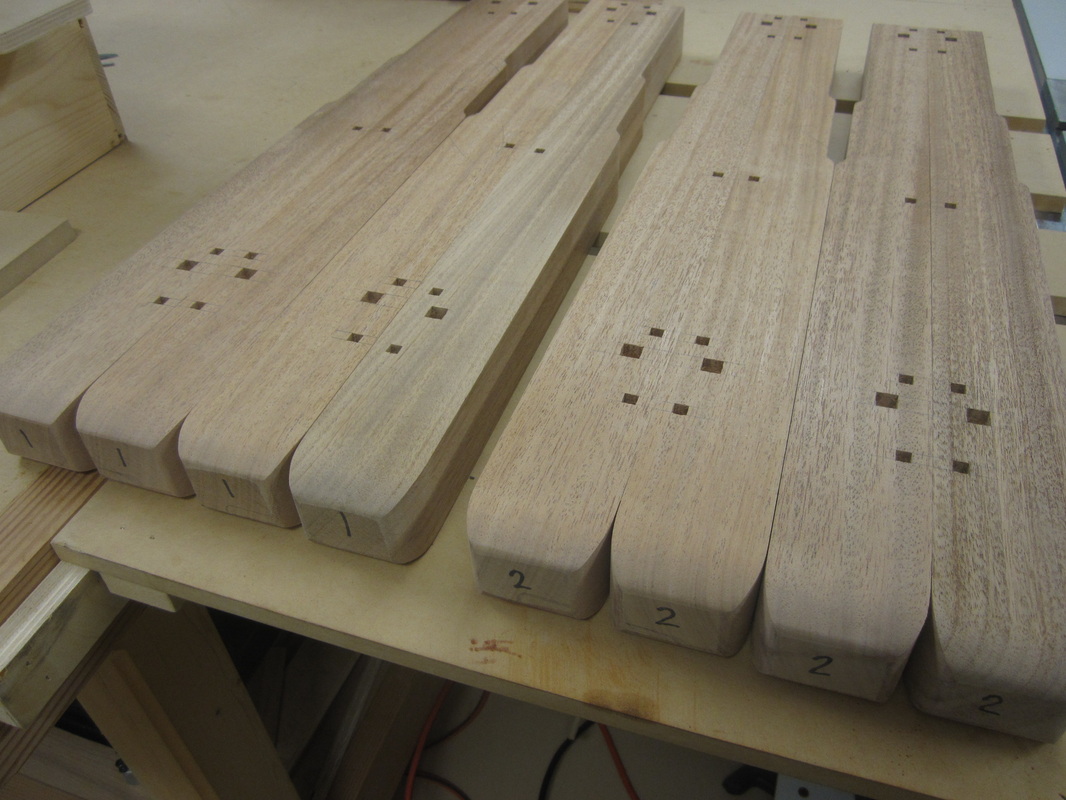
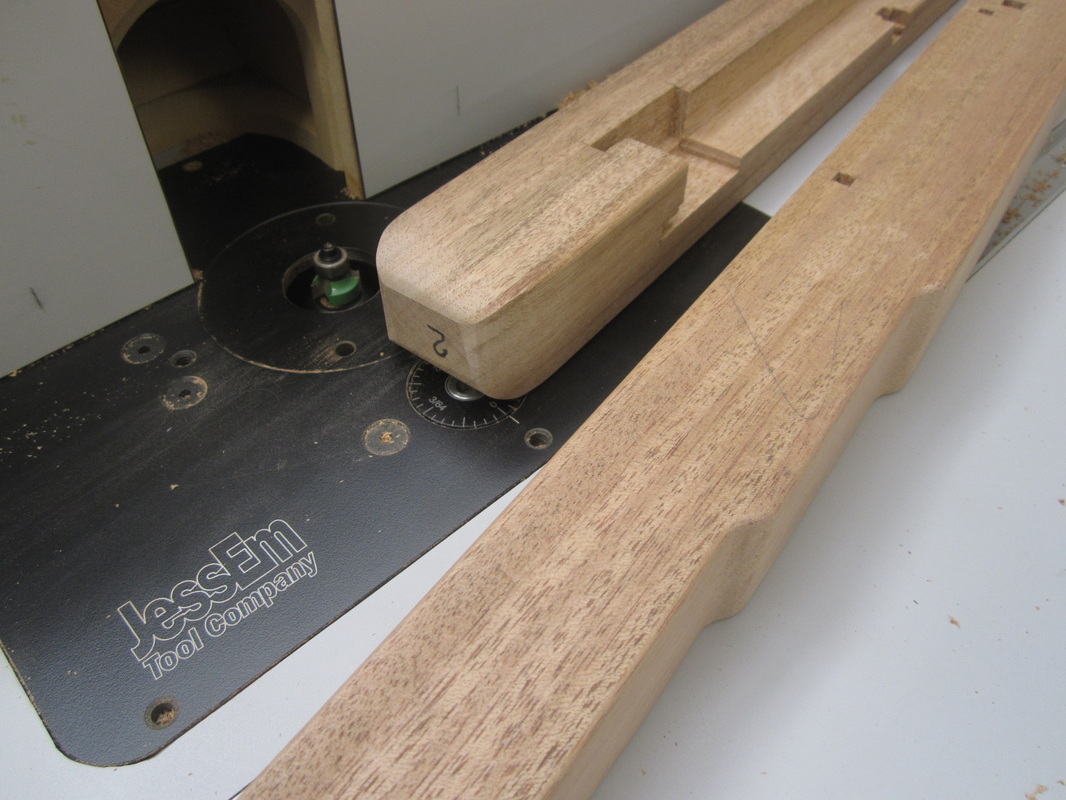
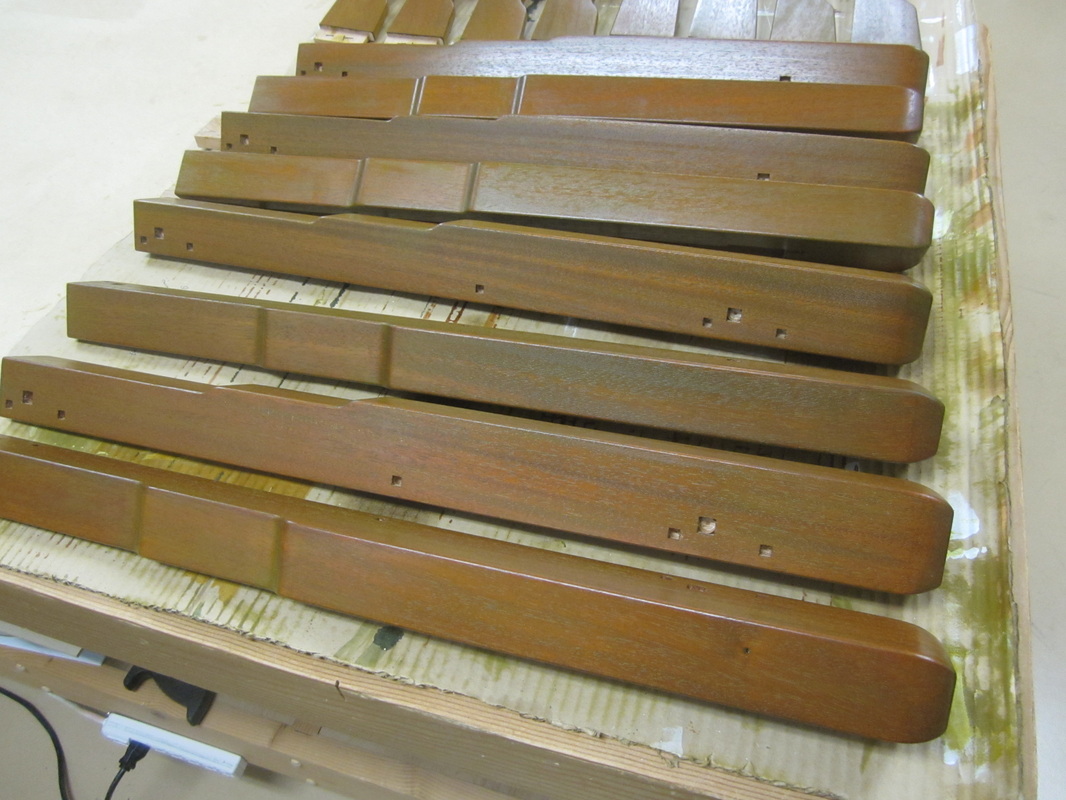
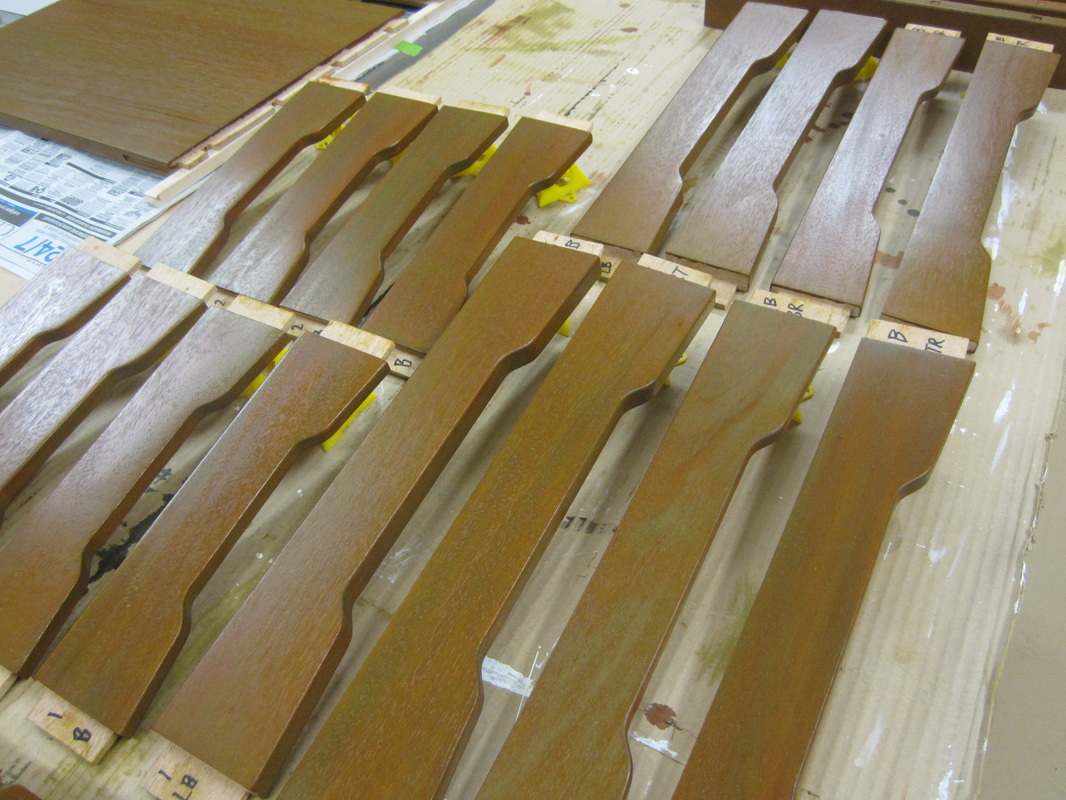
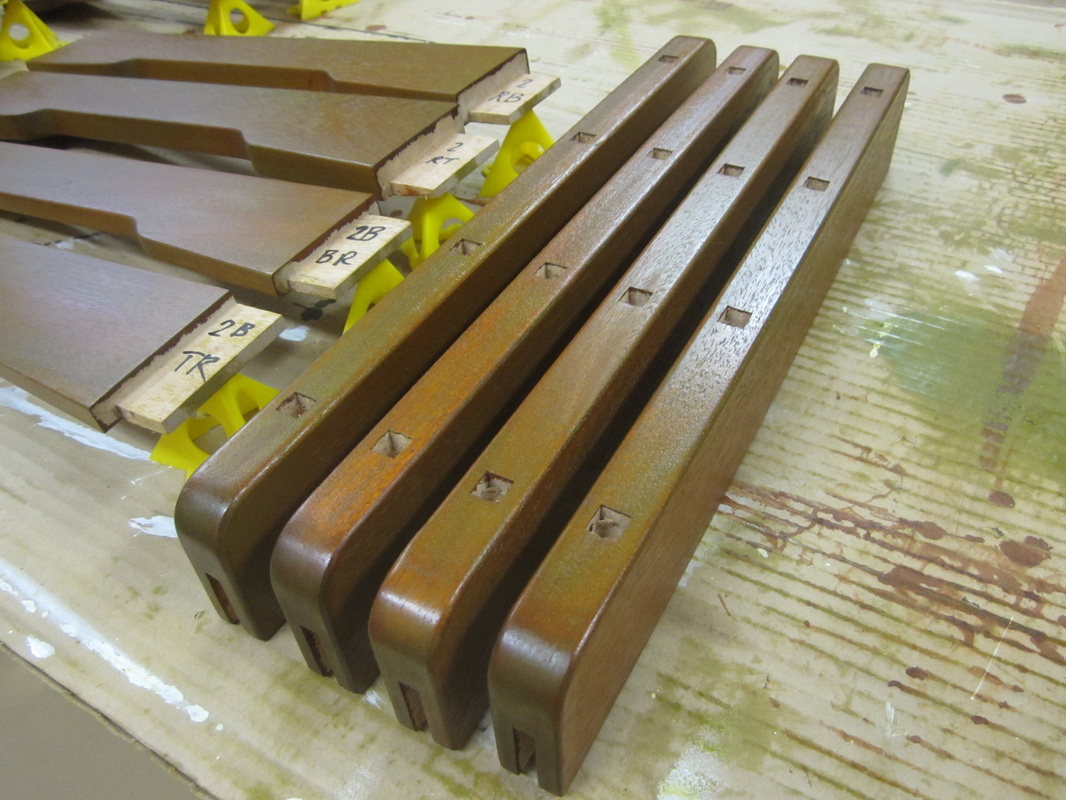
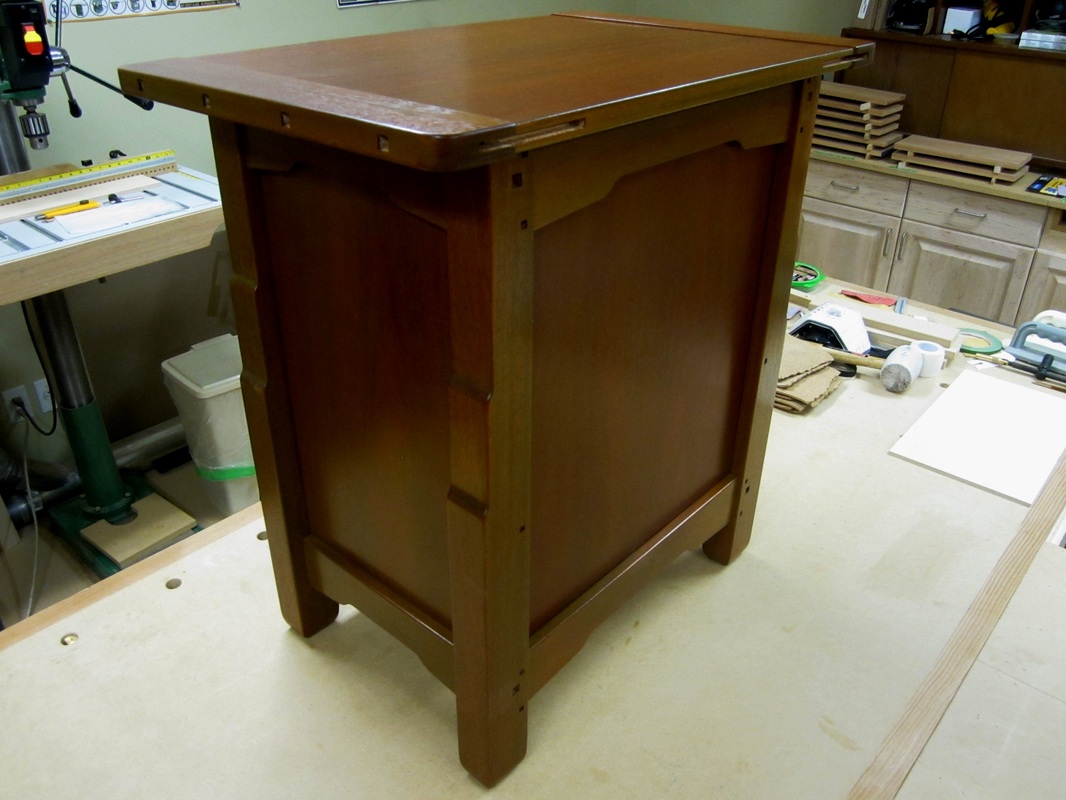
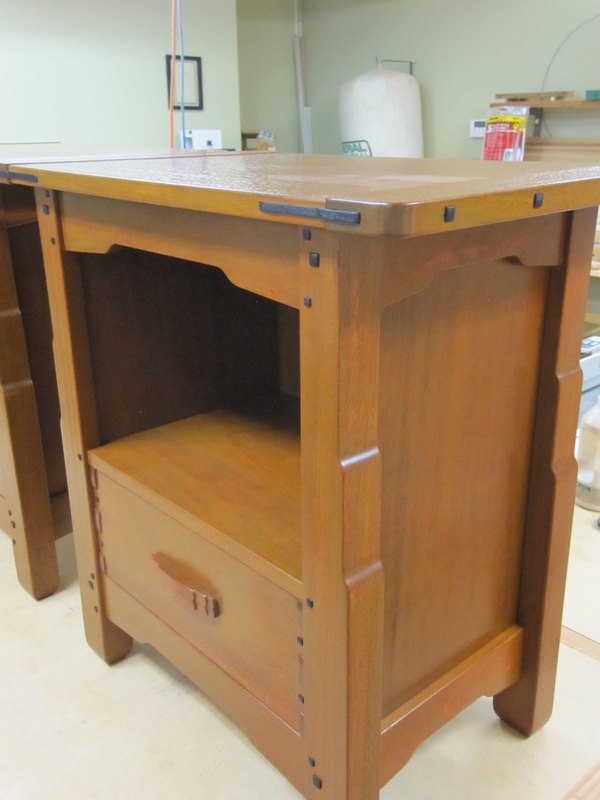
With the carcass pieces assembled and the backs fitted, it is time to work on the legs and cross-rails that give the pieces their Greene & Greene features. The leg blanks are jointed and thickness-planed to final dimensions and marked with a triangle to keep their orientation correct for marking out and cutting the joints. Since I was making two night-stands, I marked them with a “1” and a “2” to help identification. Then it was time to cut the mortises for the cross-rails. These are cut initially with my mortising machine but later, the inside corners are removed from each leg so that they cover the plywood carcass, leaving the carcass to form one side of the mortise. This was also necessary to allow the legs to be assembled to the carcass, as mentioned later.
|
|
The inside corners are removed at the table saw using stops to avoid over-cutting and kick-back. I also had to be careful with the fence position as the settings change from front legs to back legs.
|
|
The tenons on the cross-rails are then rough-cut at the table-saw and trimmed to fit using the shoulder plane. Note that the tenons are flush with the inside of each rail so that they sit against the carcass and can be glued in place.
|
|
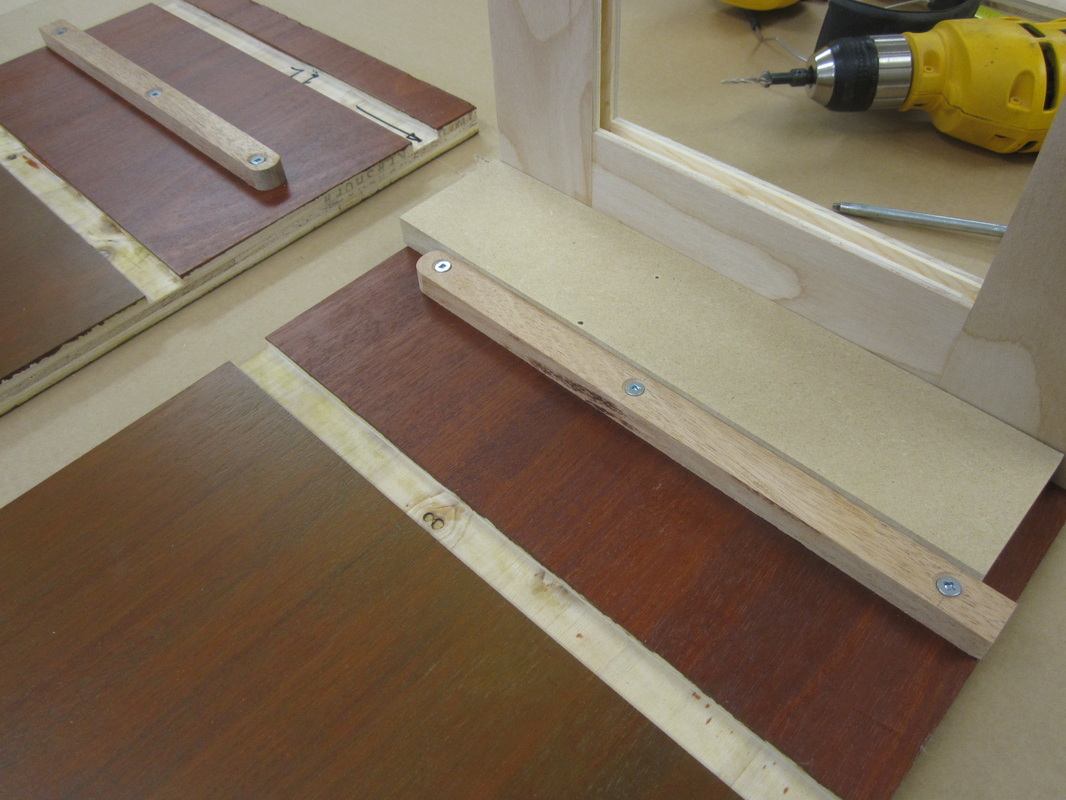
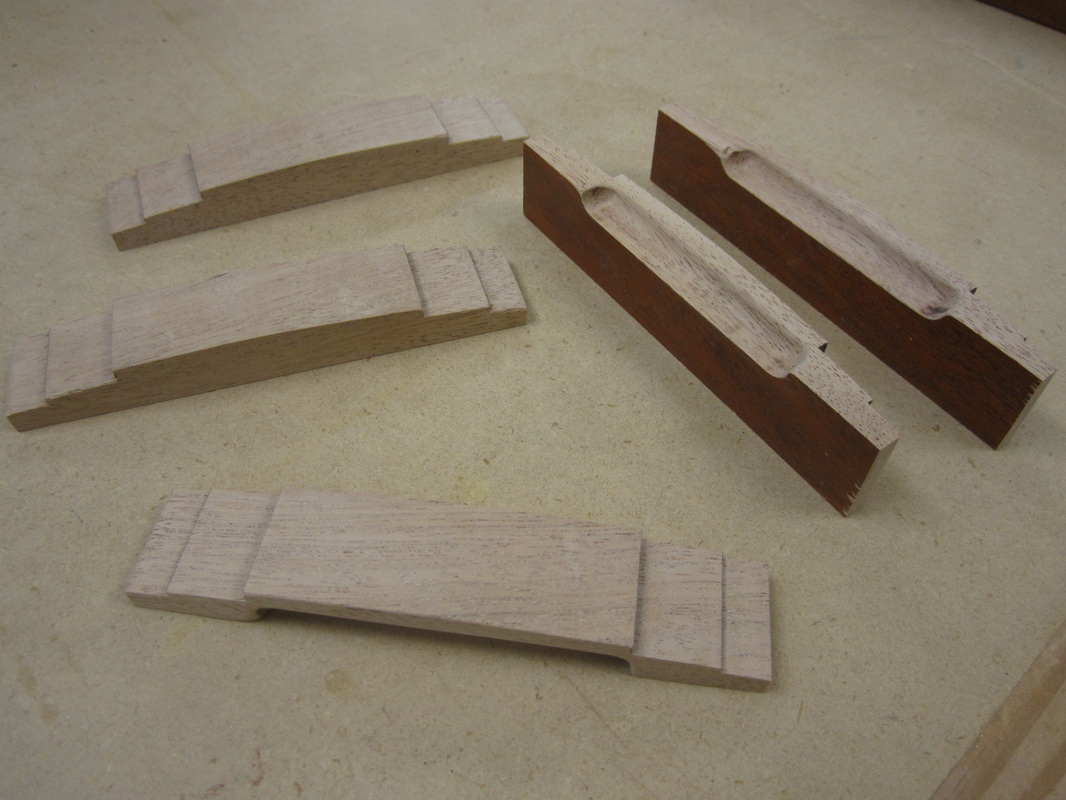
The cloud-lift profiles on the cross-rails are rough-cut at the band-saw and finished using the templates and a pattern bit at the router table. Double-sided adhesive tape holds the piece to the template and the piece is flipped to avoid making up-cuts across the grain.
|
|
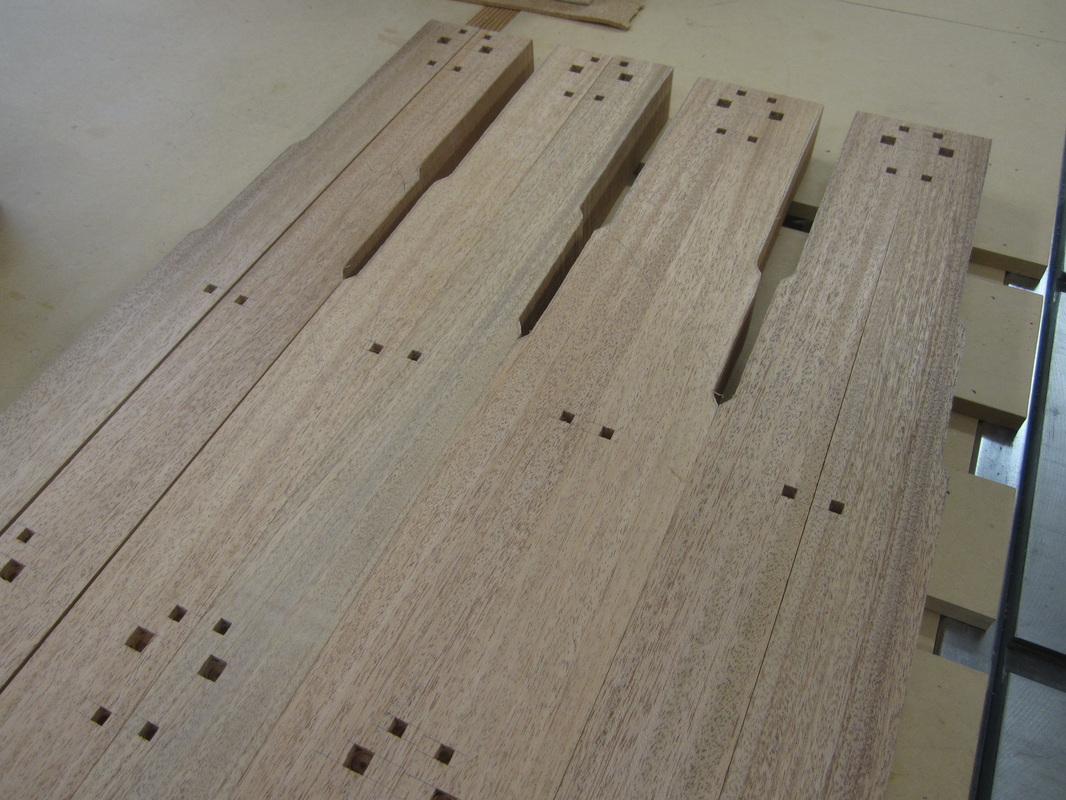
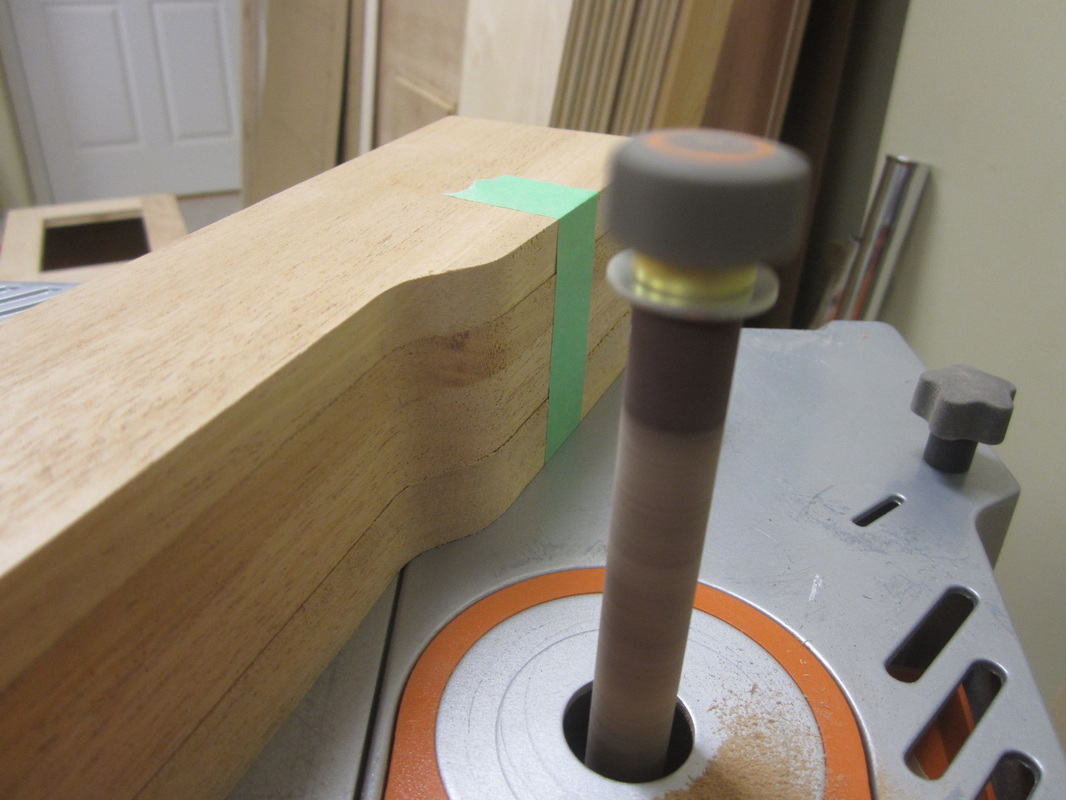
After cutting all the square peg holes in the legs using the mortising machine, I then rough-cut the cloud-lift profiles using the band-saw and finished them using a longer pattern bit and template at the router table. The bottoms are also profiled at this time using the pattern bit for the shallower face and the belt-sander for the deeper face.
|
|
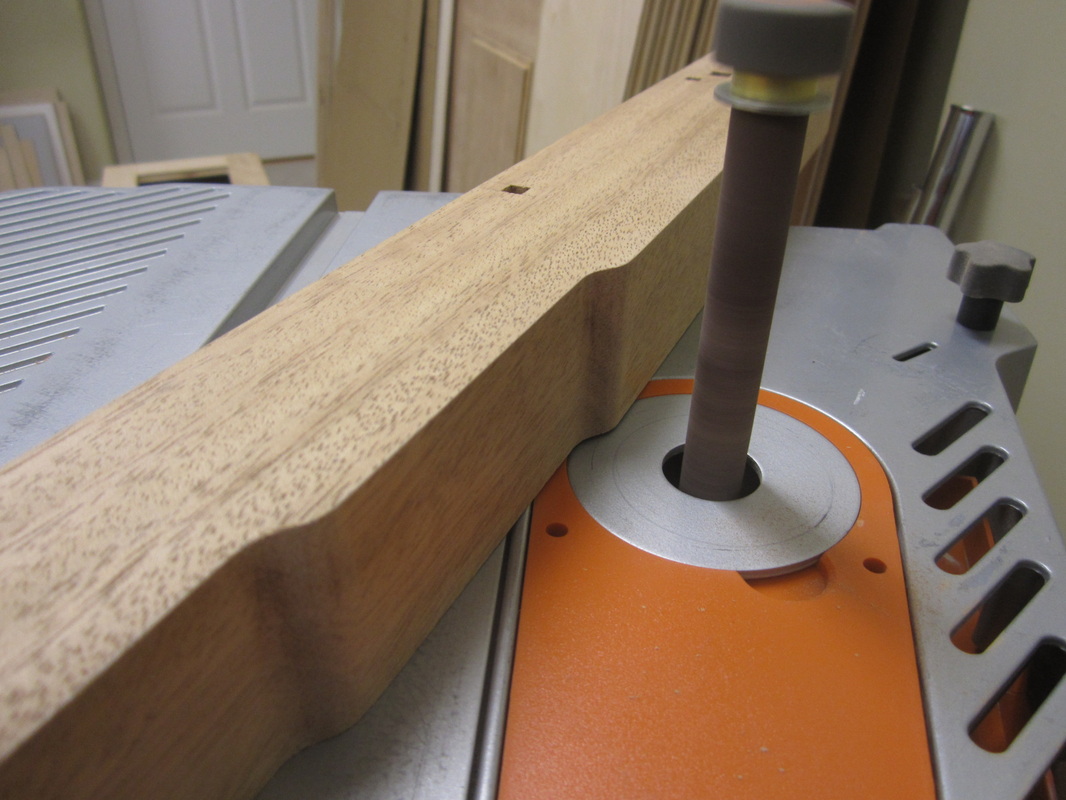
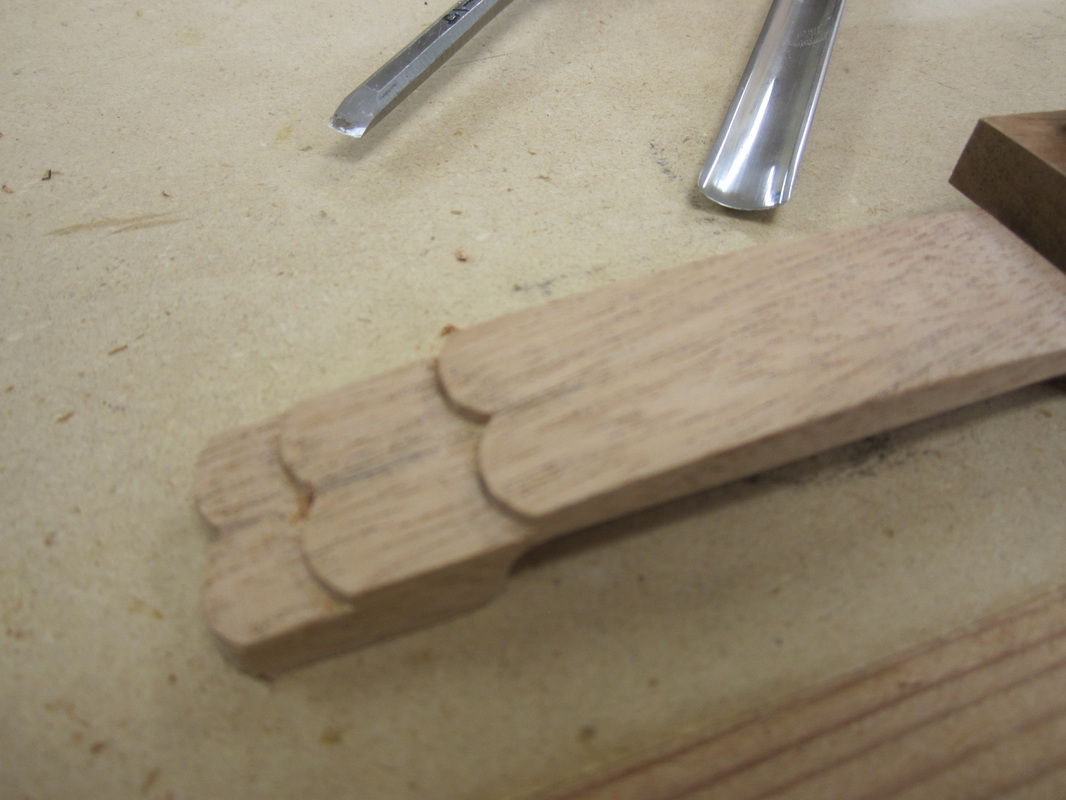
After routing, the cloud-lifts on the legs and cross-rails are sanded smooth using the spindle sander and finished by hand.
|
|
Next, the outside corners of the legs and the visible edges of the cross-rails are rounded over with the 1/8” radius round-over bit at the router table. The curved portions at the bottom of the legs are rounded and blended in by hand.
|
|
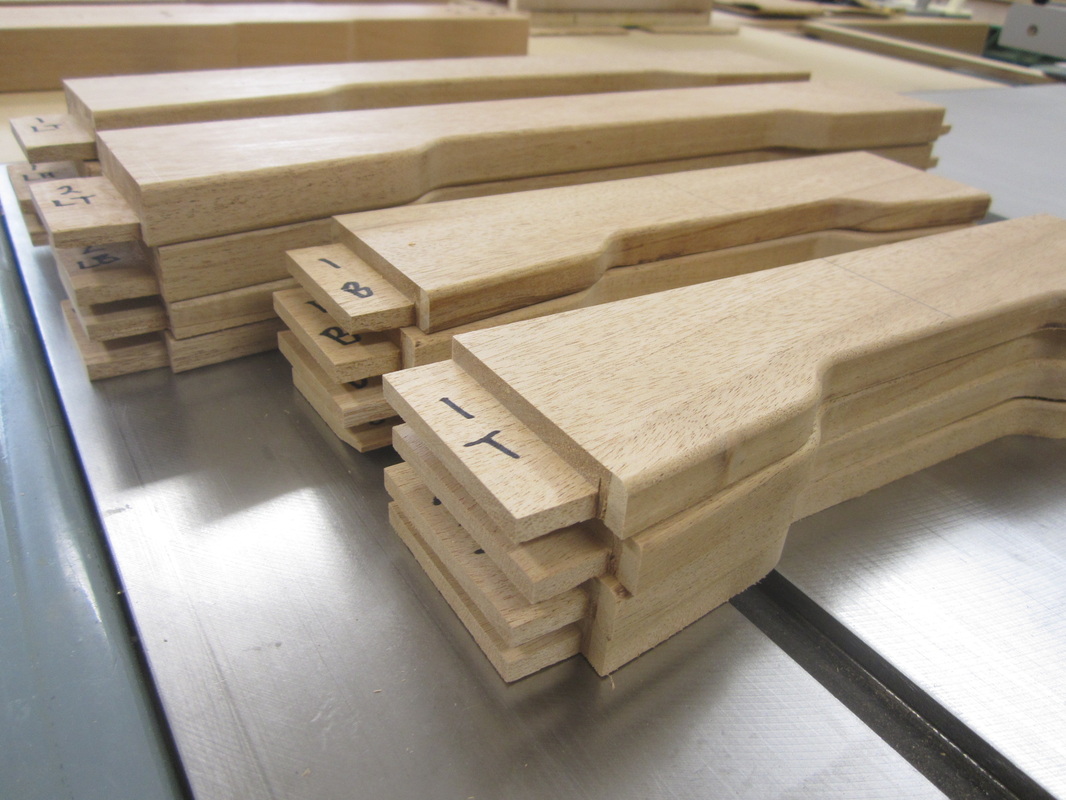
The edges of the pre-finished carcass parts that will be covered with the legs and cross-rails are sanded to remove the finish in preparation for gluing. The pieces are shown stacked up prior to pre-finishing.
|
|
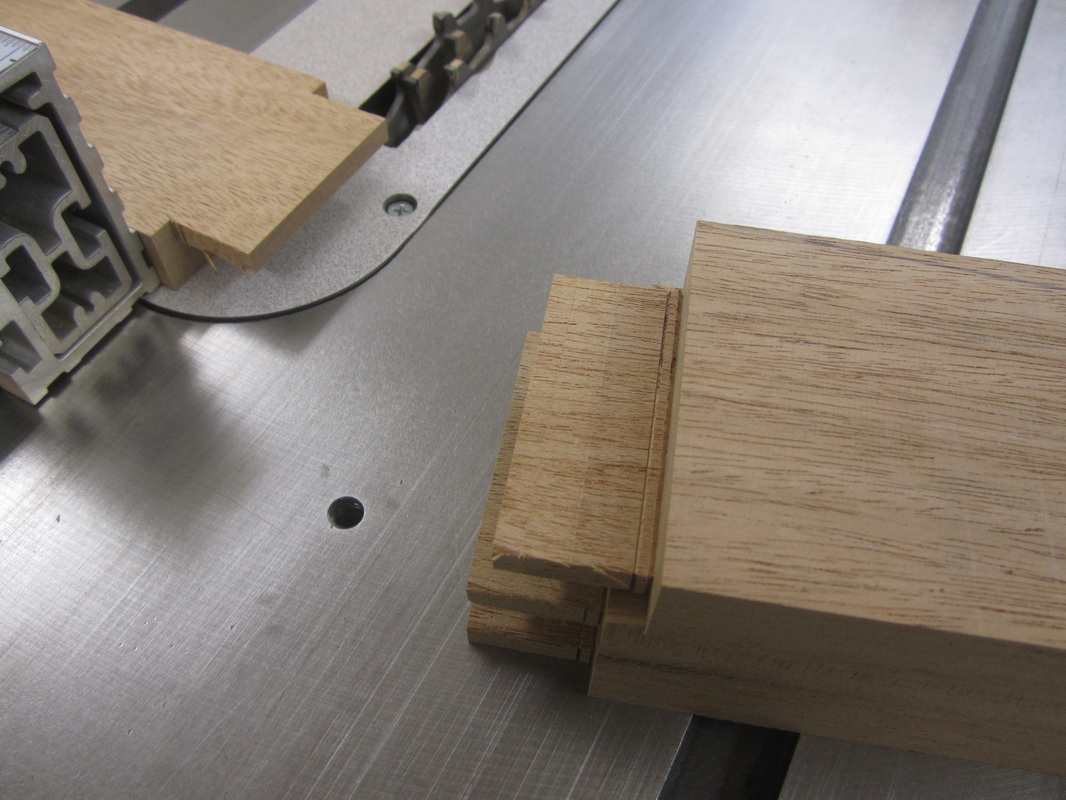
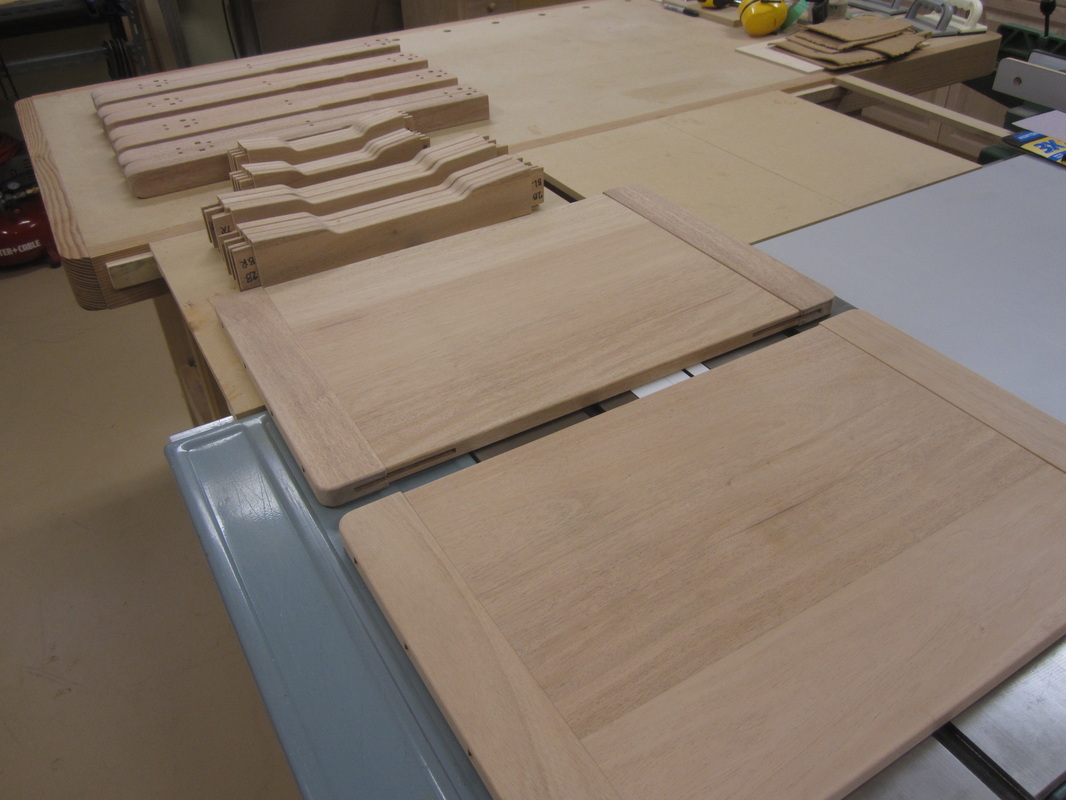
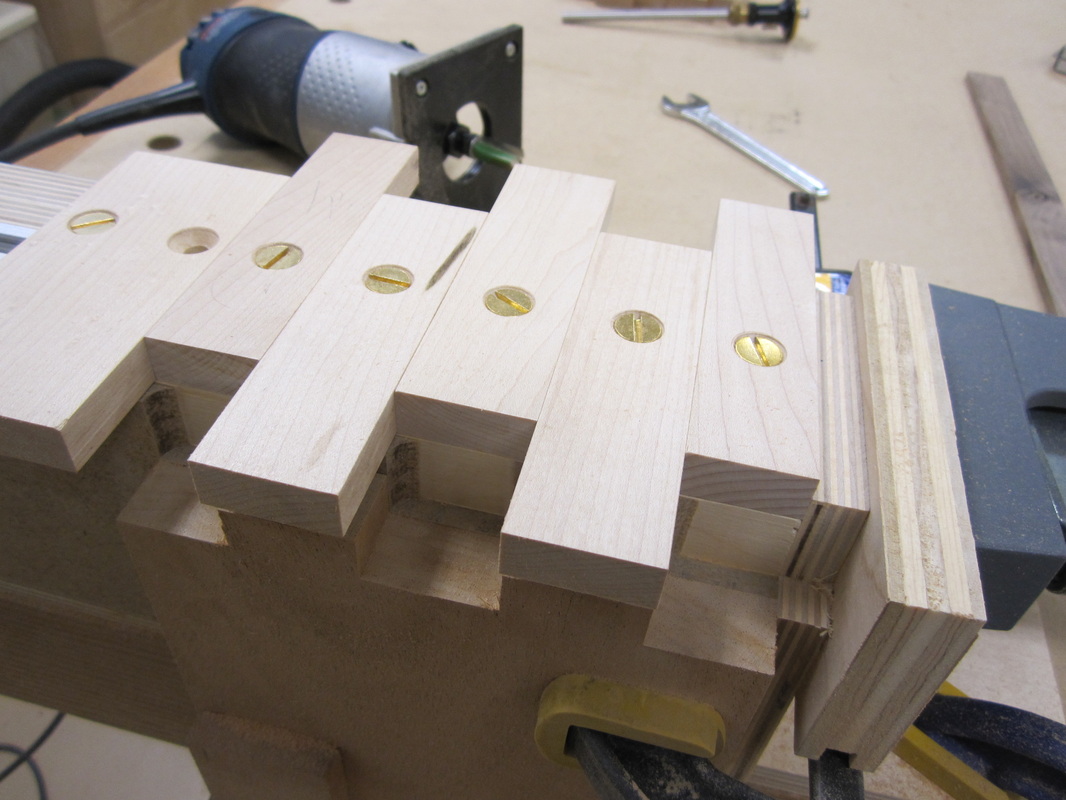
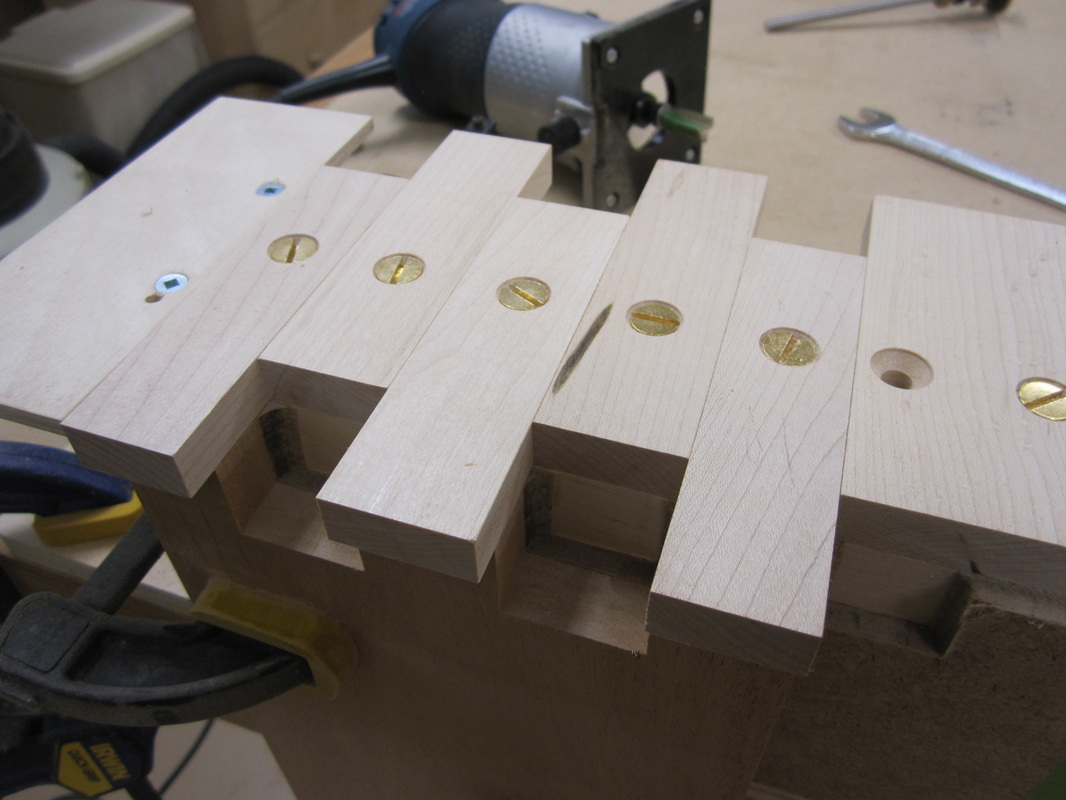
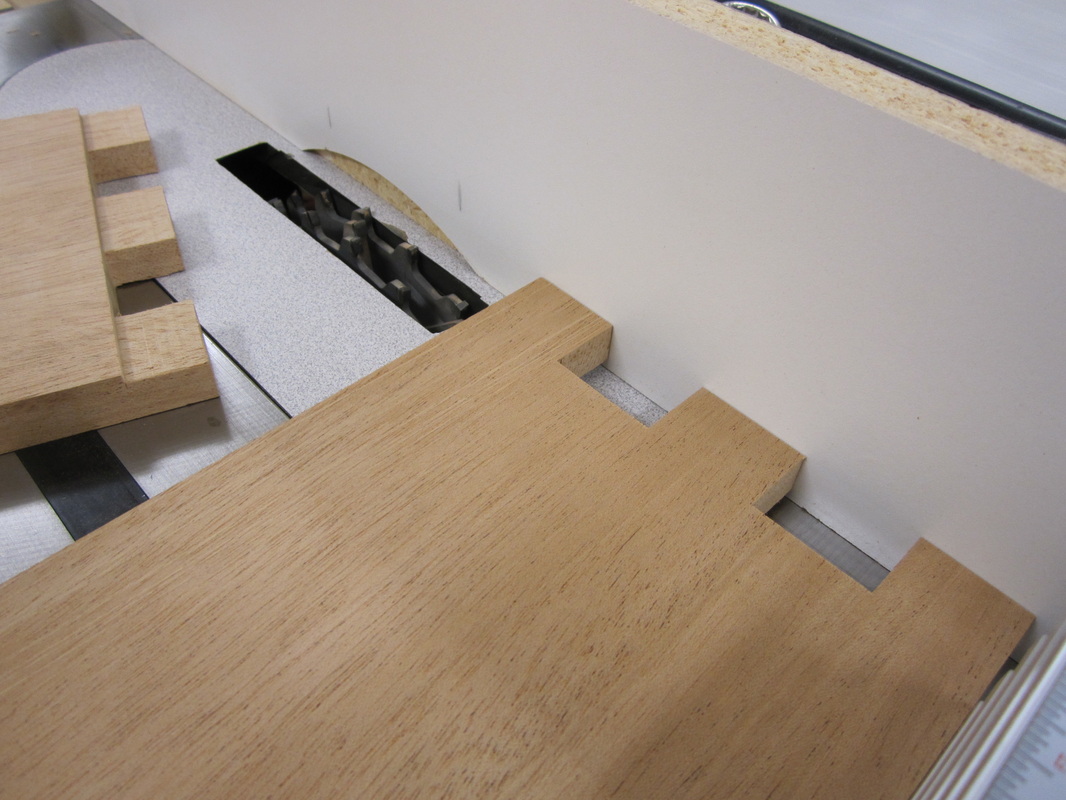
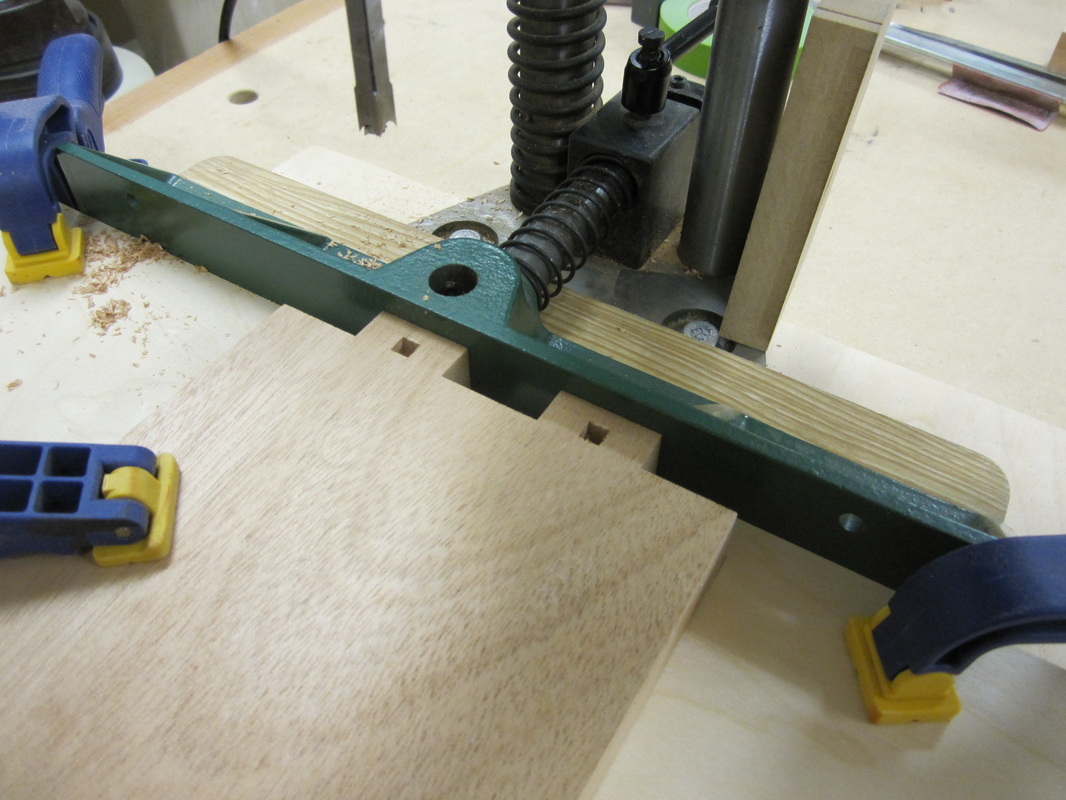
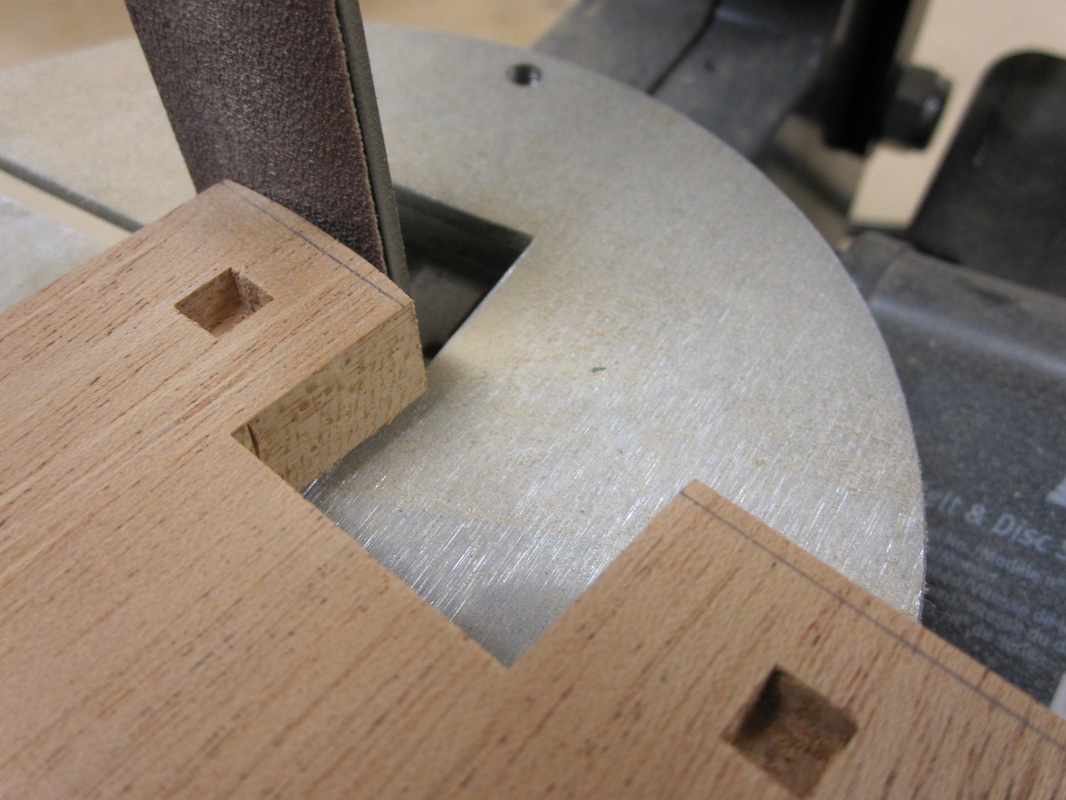
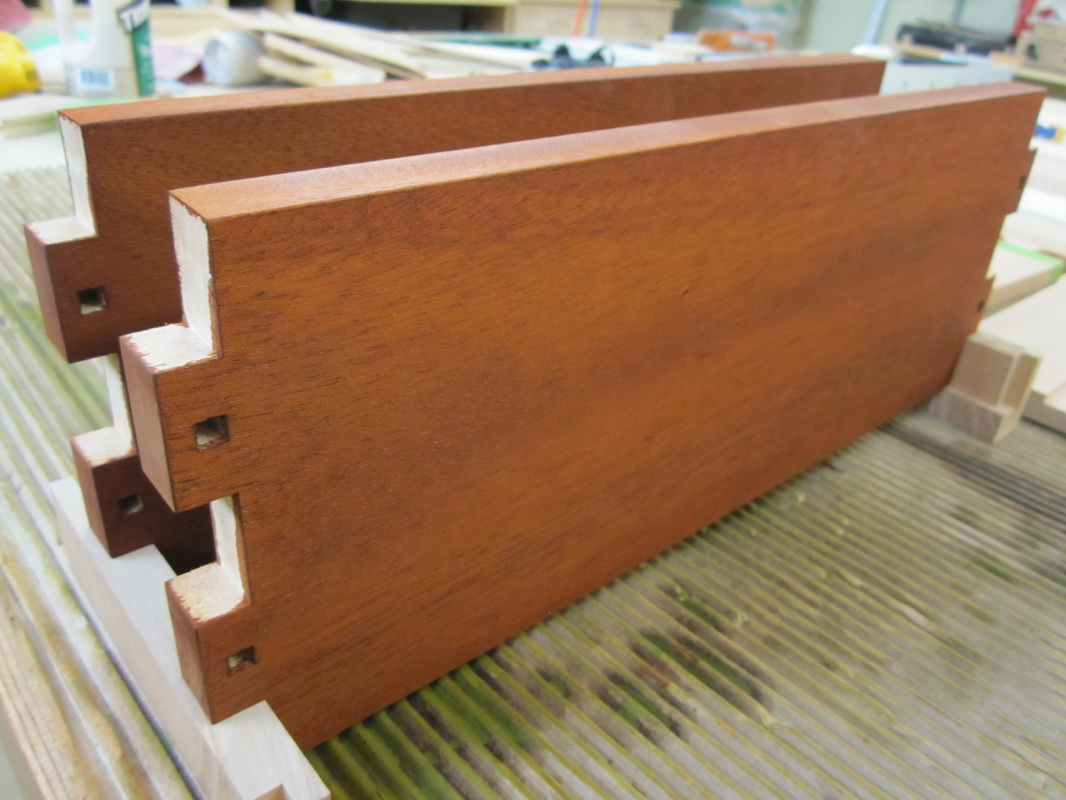
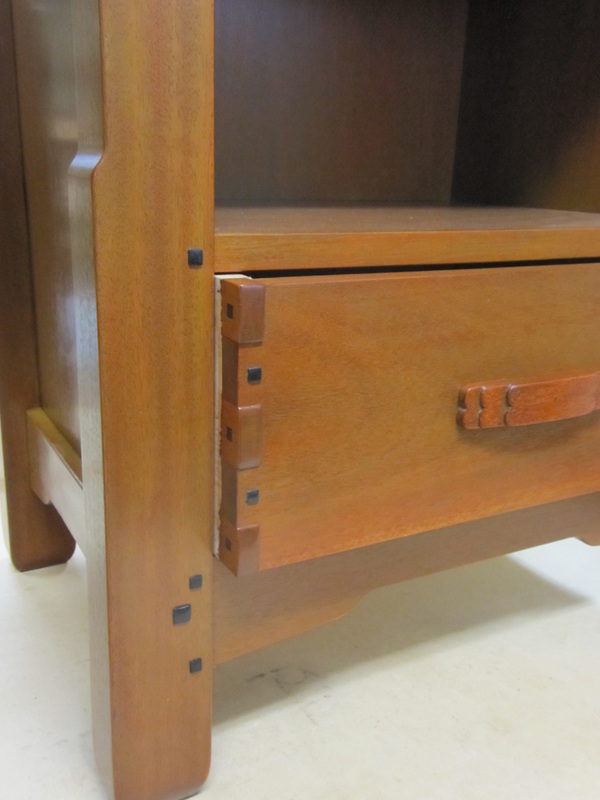
Next it was time to work on the drawers. The Greene & Greene design feature that predominates is the “proud” box-jointed fronts interspersed with square pegs that are flush on the sides and proud on the fronts. I had earlier made the excellent jig for box joints following the design in the magazine “Shop Notes”. Since I anticipated making a number of different drawer widths, I made up many “keys” of different widths to use in the jig. One side of the jig is used for the fronts while the opposite side is used for the sides. The key locking screws are then re-positioned and locked with a thin slip of paper inserted between the first and second key and the sides are re-cut. This removes about 0.002” off the fingers of the joint and allows for easier assembly and glue-up. The set-up requires careful setting of the router bit depth to allow for the depth of the keys and the necessary depth of cut, which varies between fronts and sides. I added a small support table at the end of the jig to improve the stability of the router when making the cuts close to the front alignment fence (see second photo).
|
|
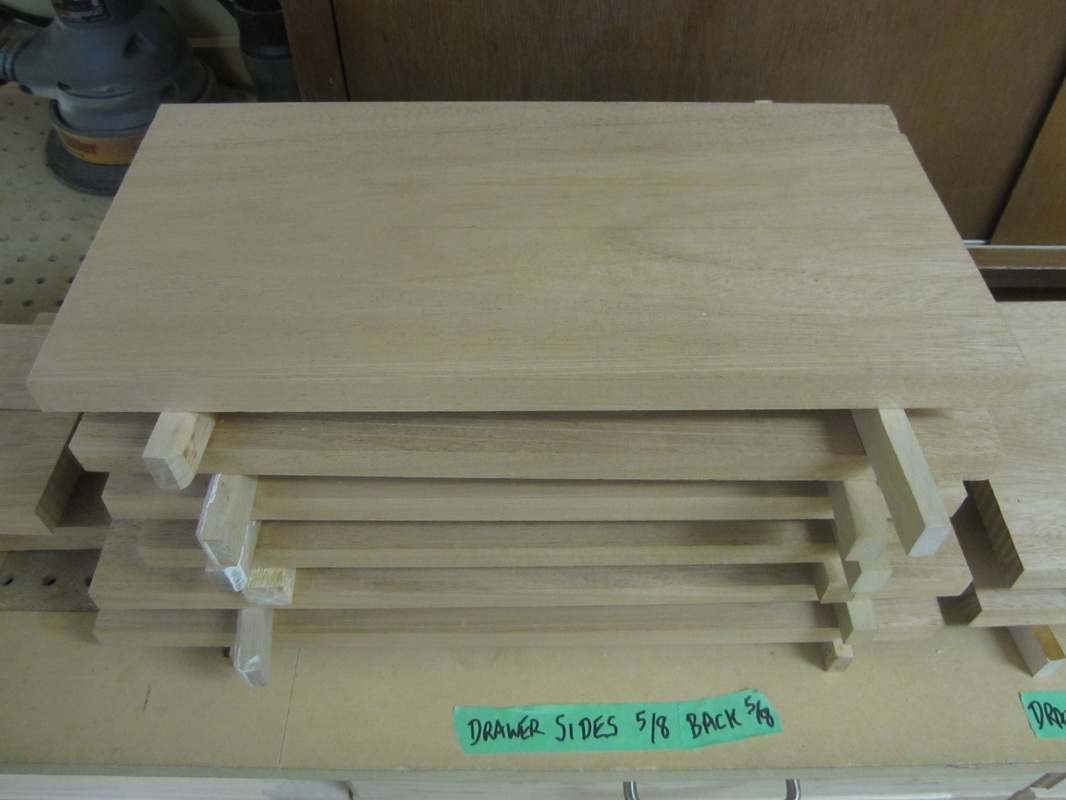
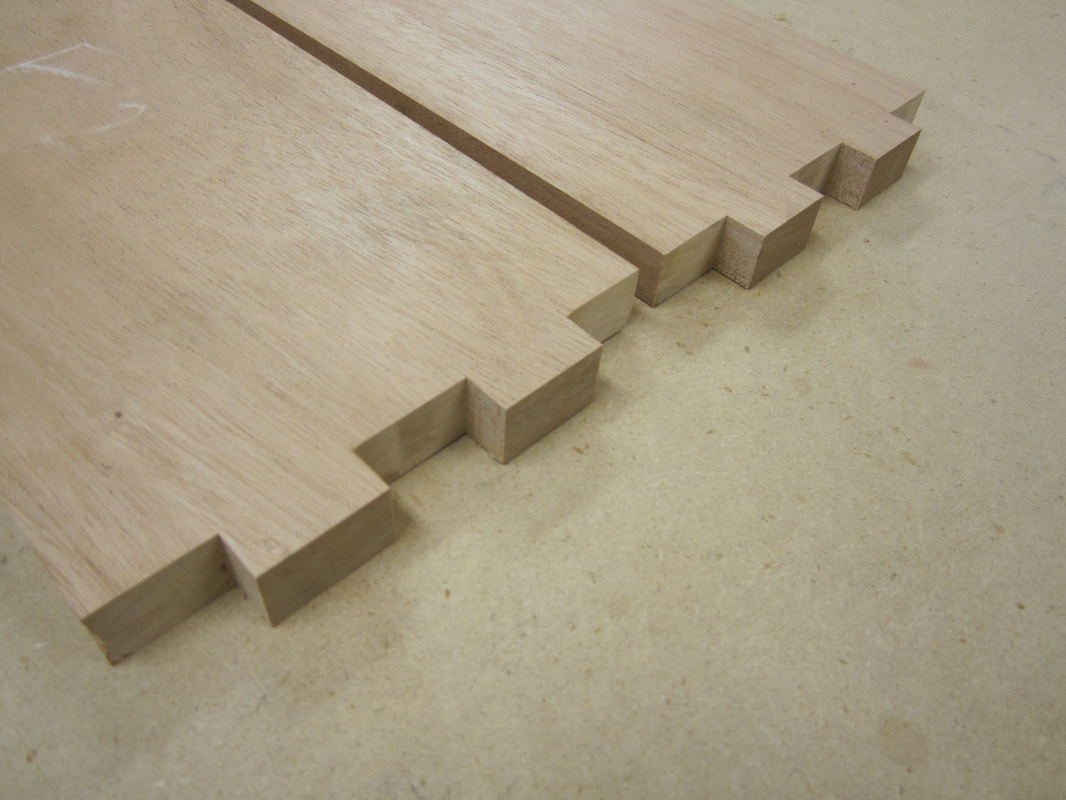
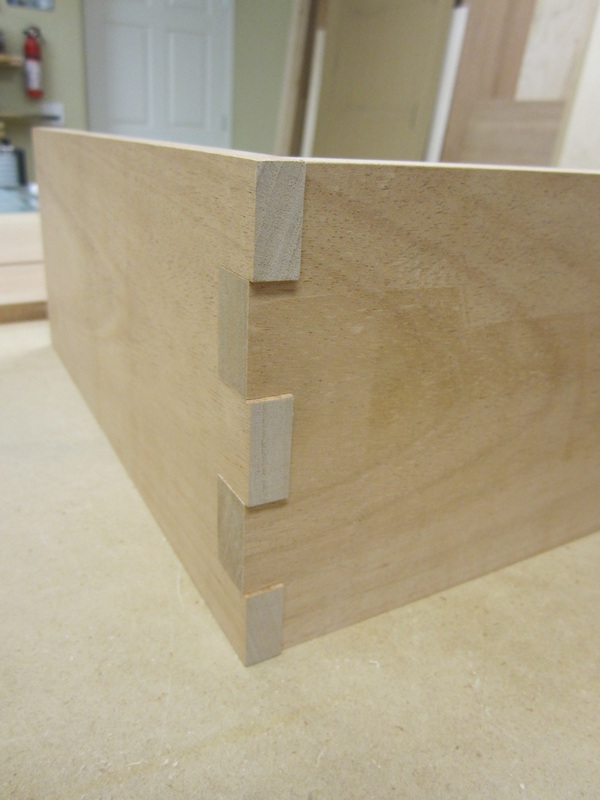
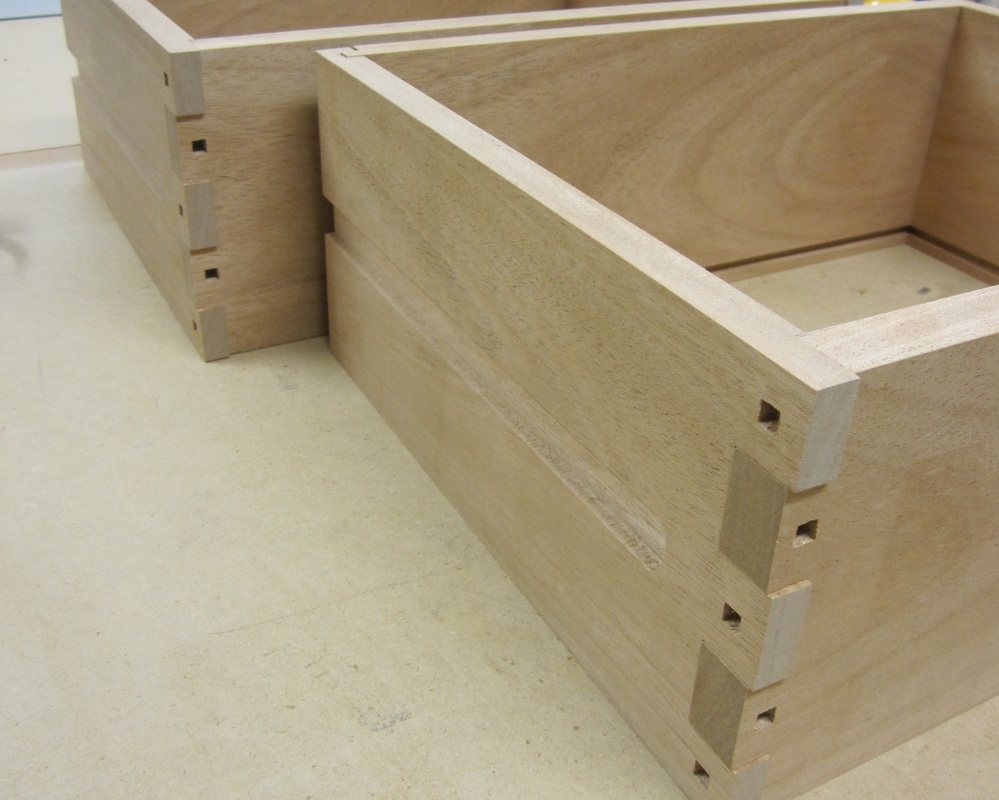
The drawer fronts are ¾” thick with the box joints cut to ½” depth. The drawer sides are 5/8” thick with the box joints cut to 7/8” depth. This allows the side fingers to project about 1/8” beyond the drawer front while the sides of the fingers are reduced to ½” thick using the dado blade at the table-saw.
|
|
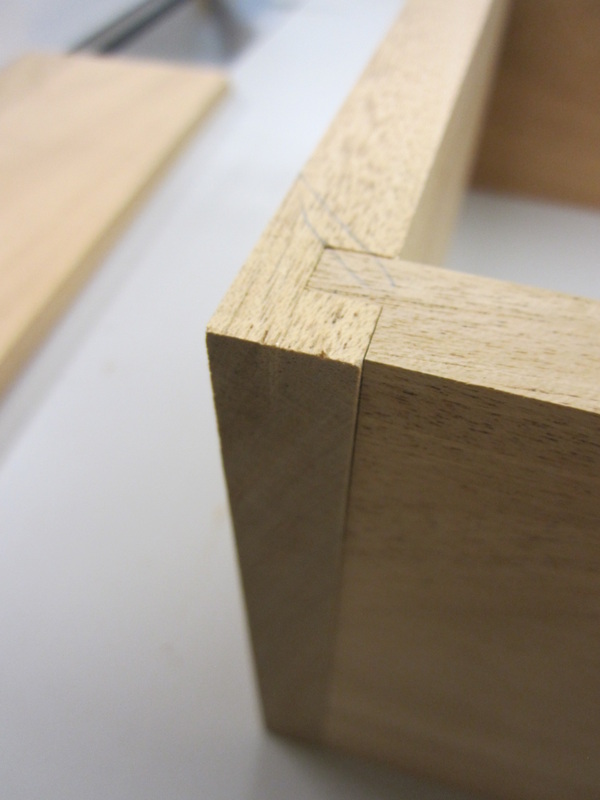
The joints are dry-fitted to ensure good fit and appearance before final profiling. The drawer backs use a locking tongue and groove joint, cut at the table saw.
|
|
Grooves are cut at the bottom of all the drawer fronts, sides and backs to hold the ¼” Baltic Birch plywood bottoms. The grooves in the sides are cut at the router table so that they do not go through to the front of the drawer.
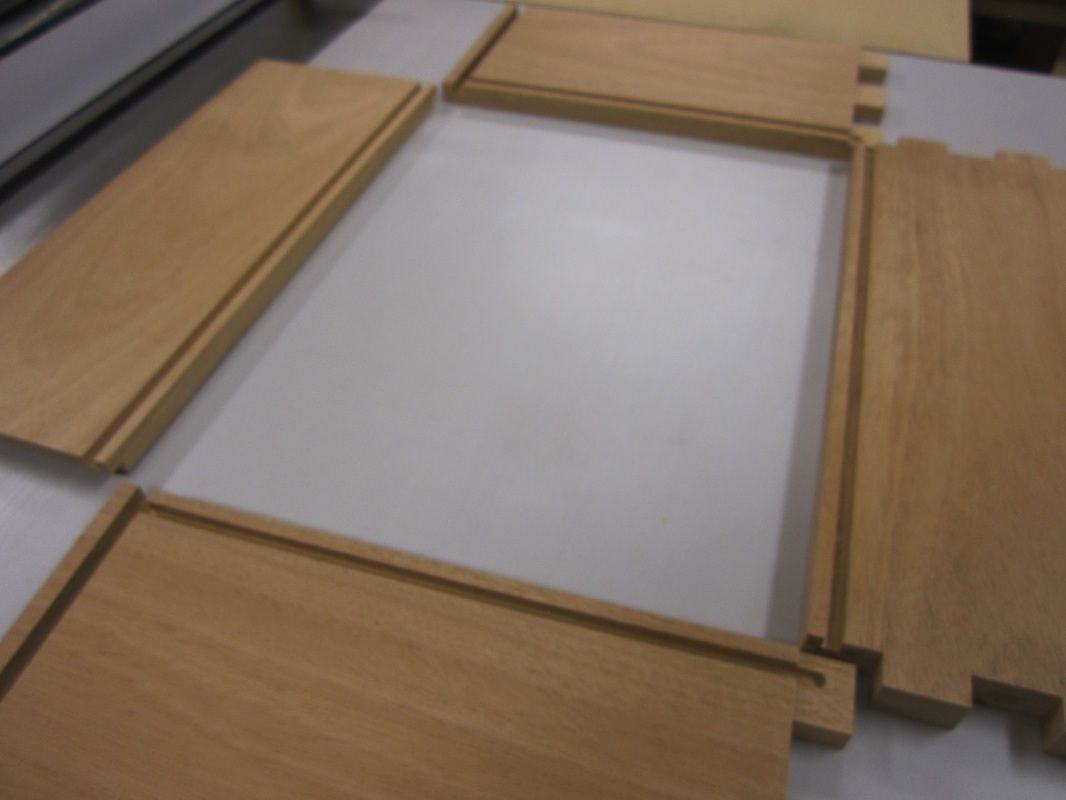
|
|
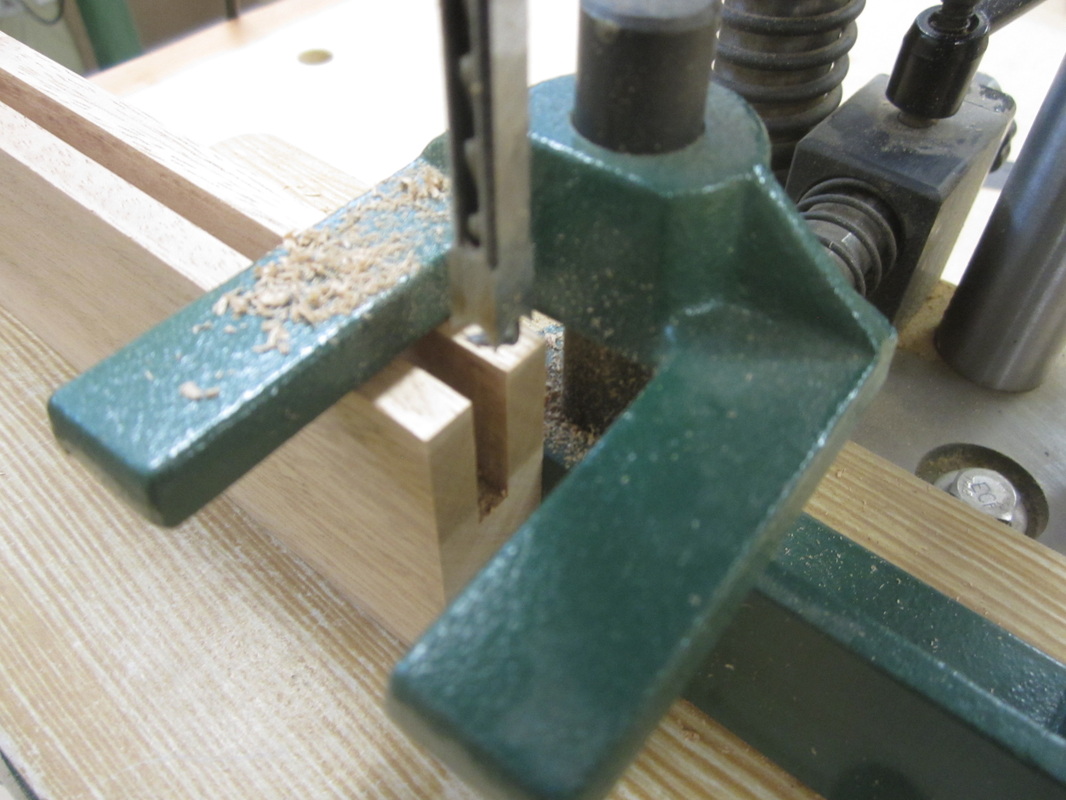
I used my router table to cut the grooves in the drawer sides that fit over the drawer runners mounted in the carcass. Square holes were then cut, at the mortising machine, in the drawer fronts and sides, centered on the fingers, for the decorative plugs that will be applied after finishing.
|
|
The joint was dry fitted to get the appearance of the finished drawer corners. Then the protruding portions of the fingers of the sides are “pillowed” using the small belt sander and hand finished with sandpaper down to 320 grit.
|
|
The drawer pulls are fashioned after the design used on the beautiful Chiffonier in the Gamble house in Pasadena, CA. I made mine from a piece of 5/8” thick material that was left over from the bed and I had used it for finishing tests. Three passes each side at the table saw with the blade set at different height and angle for each pass yielded a rough blank that I could finish shape with my shoulder plane and sandpaper.
|

|
I then cut the blank into 1” wide strips at the table saw and shaped a recess to assist with grip using a cove bit at the router table. The curved ends were cut and shaped with a gouge, small chisel and a few grades of sandpaper. During assembly these are screwed to the drawer fronts from the inside.
|
|
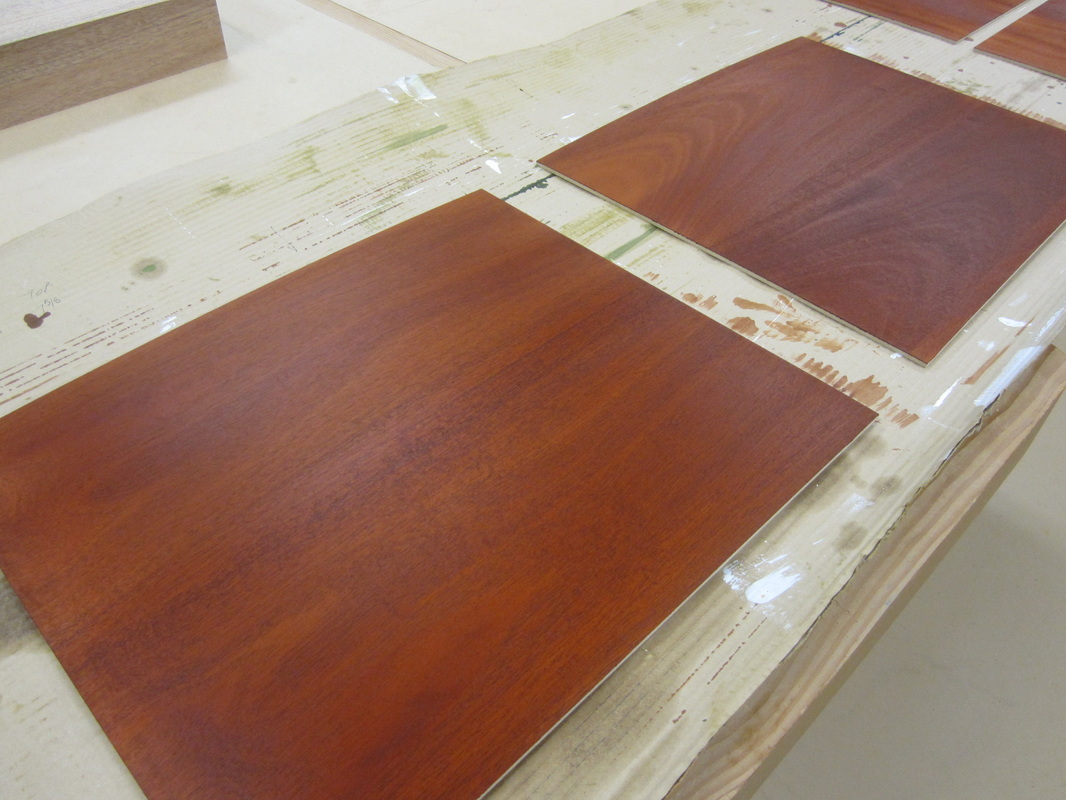
Again, I decided to pre-finish the legs, cross-rails and drawer parts before final glue-up to avoid any staining problems from squeeze-out. The same water-based dye stain followed by the green oil based concoction used for the bed was again used for the night-stands. After wiping off the excess oil and letting it dry, I applied three coats of hand-rubbed satin polyurethane, sanding lightly with 320 grit paper before applying the last coat. Photos show various stages of progress.
|
|
|
|

|
|
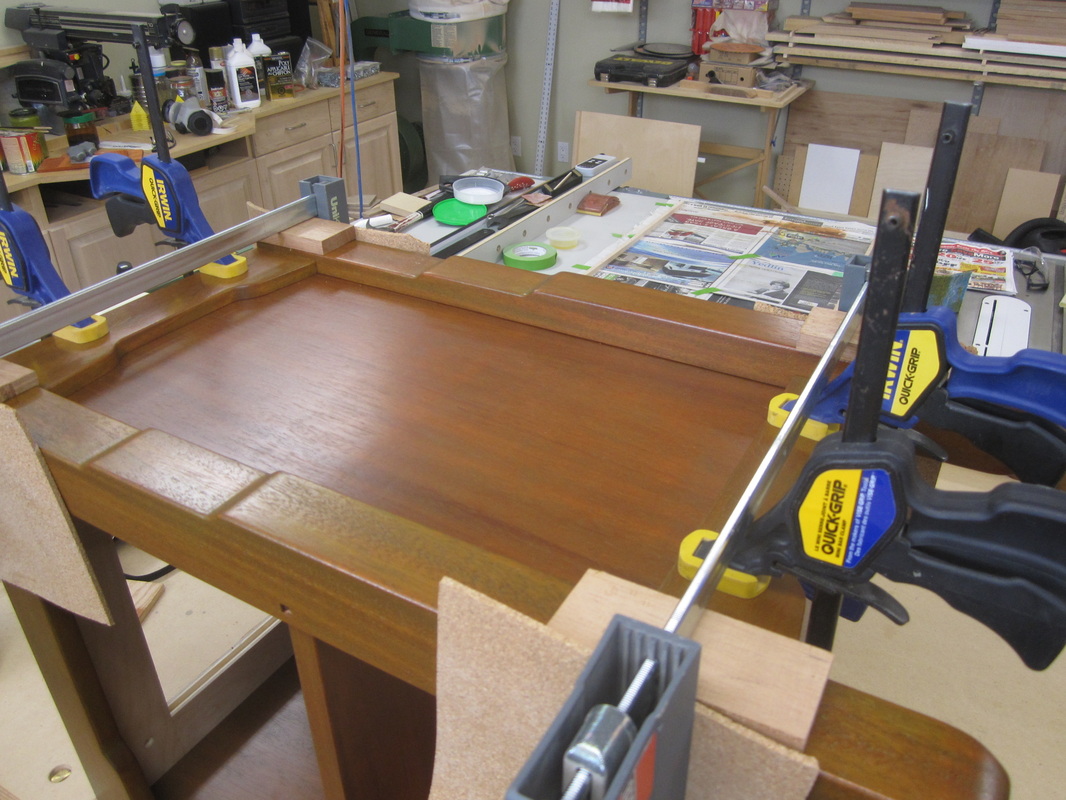
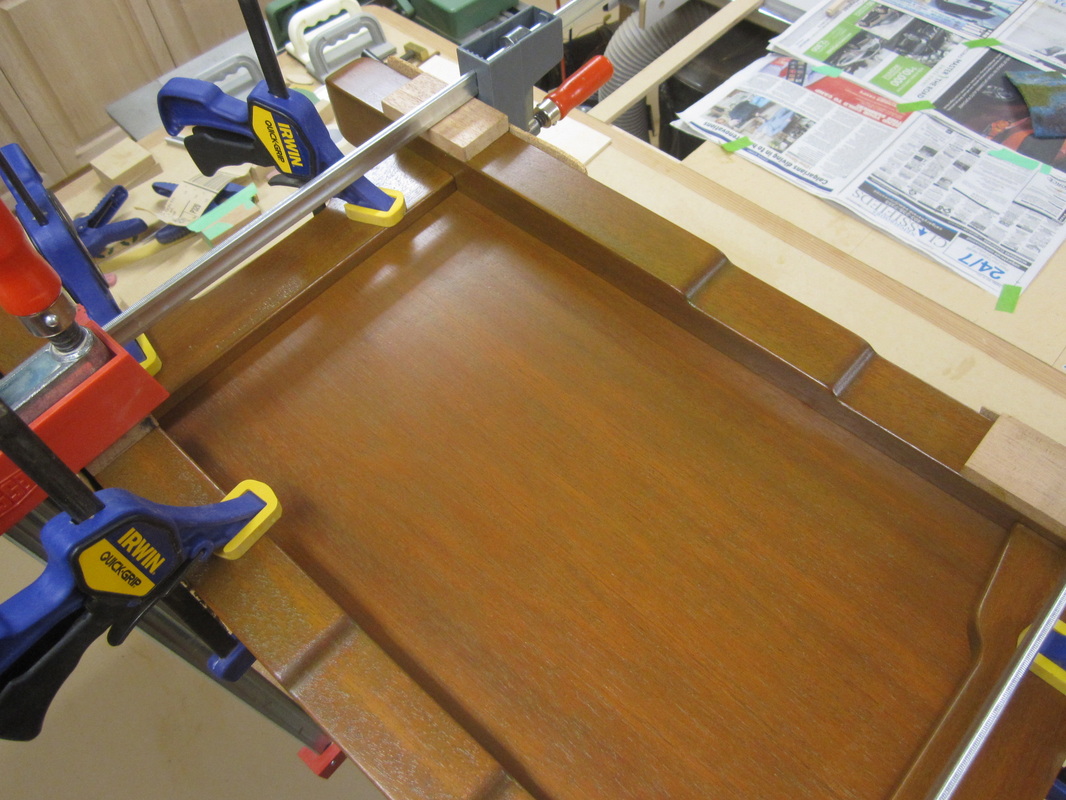
It was finally time to glue-up which required some careful planning, temporary dry-fitting and clamping to ensure it would all come together as planned. The side cross-rails were glued on to the carcass first, using the dry-fitted legs and front and back cross-rails to ensure that they stayed in the correct position. Next, the front legs and corresponding cross-rails were added and glued together and finally the rear legs and corresponding cross-rails.
|
|
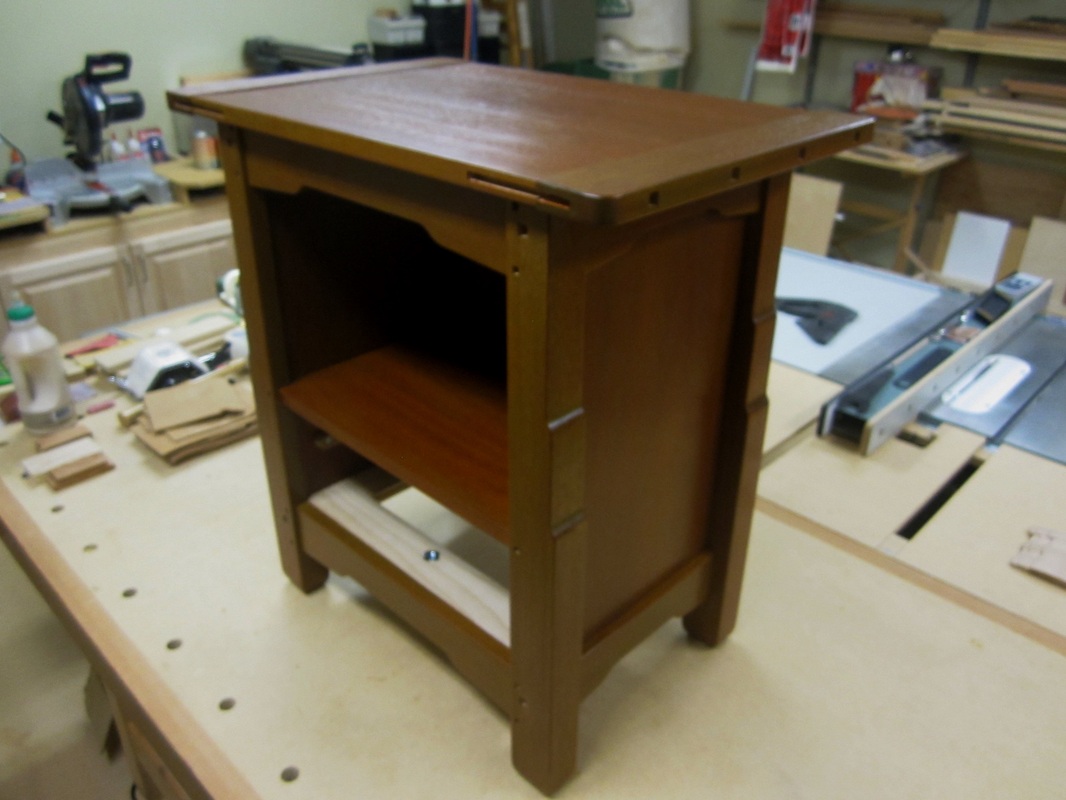
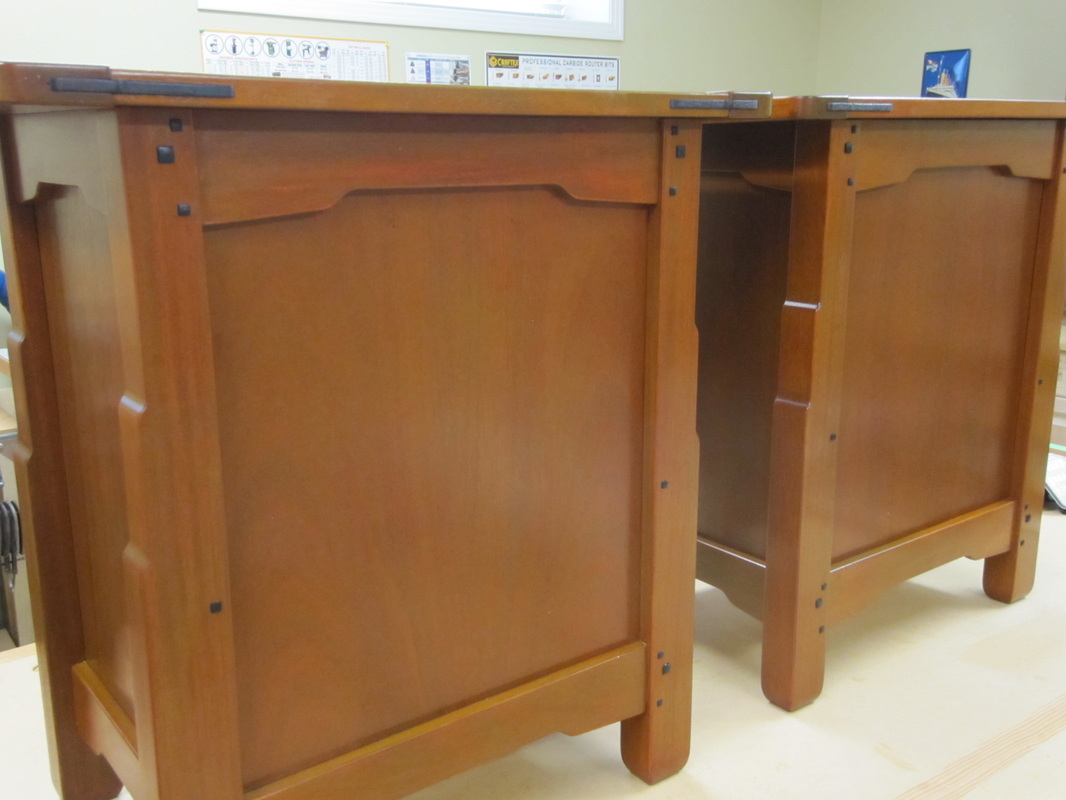
Once the glue had set up and the clamps were removed, I finally had the opportunity to see the original sketch concept translated in three dimensions.
|
|
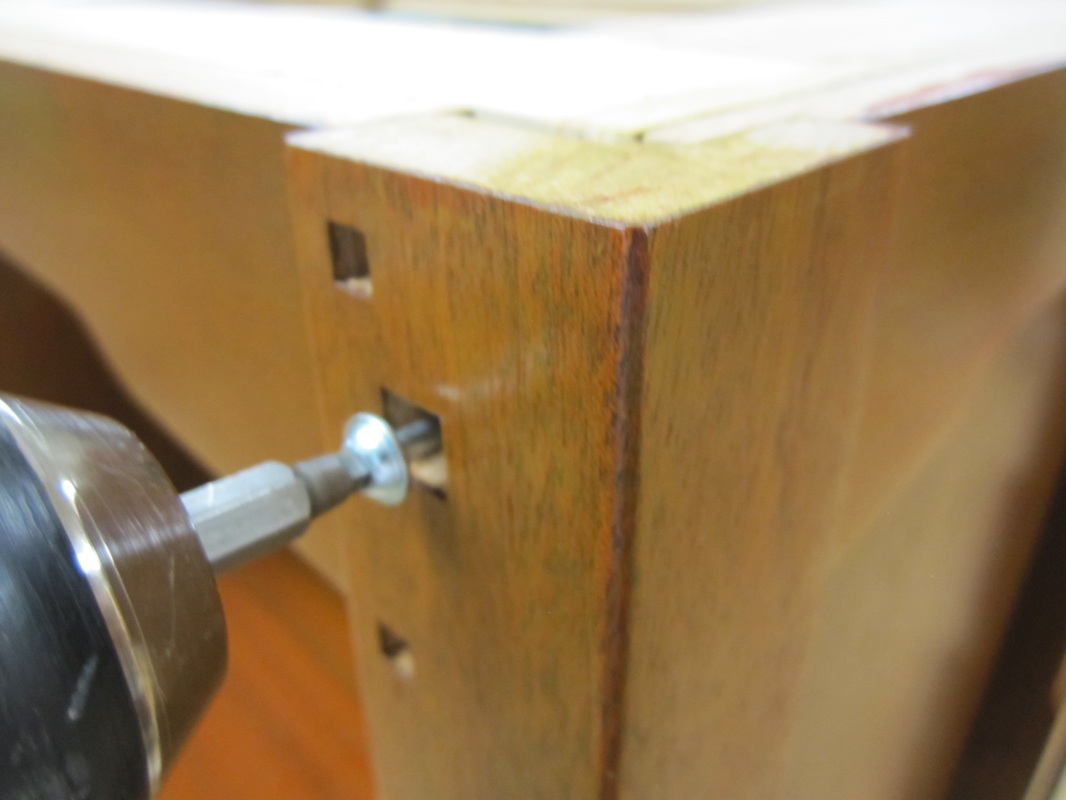
Screws are added for extra strength to secure the legs to the carcass and to secure the bread-board ends to the tops. These get covered by the decorative pegs later. Apparently x-ray images of original Greene & Greene pieces also show the use of screws where it made sense. I used the flat washer type screws intended for pocket-screw joinery to avoid splitting the wood if I tightened too much.
|
|
Now, they are really coming together, but wait…. I have to make and add all those pegs and splines yet.

|

|
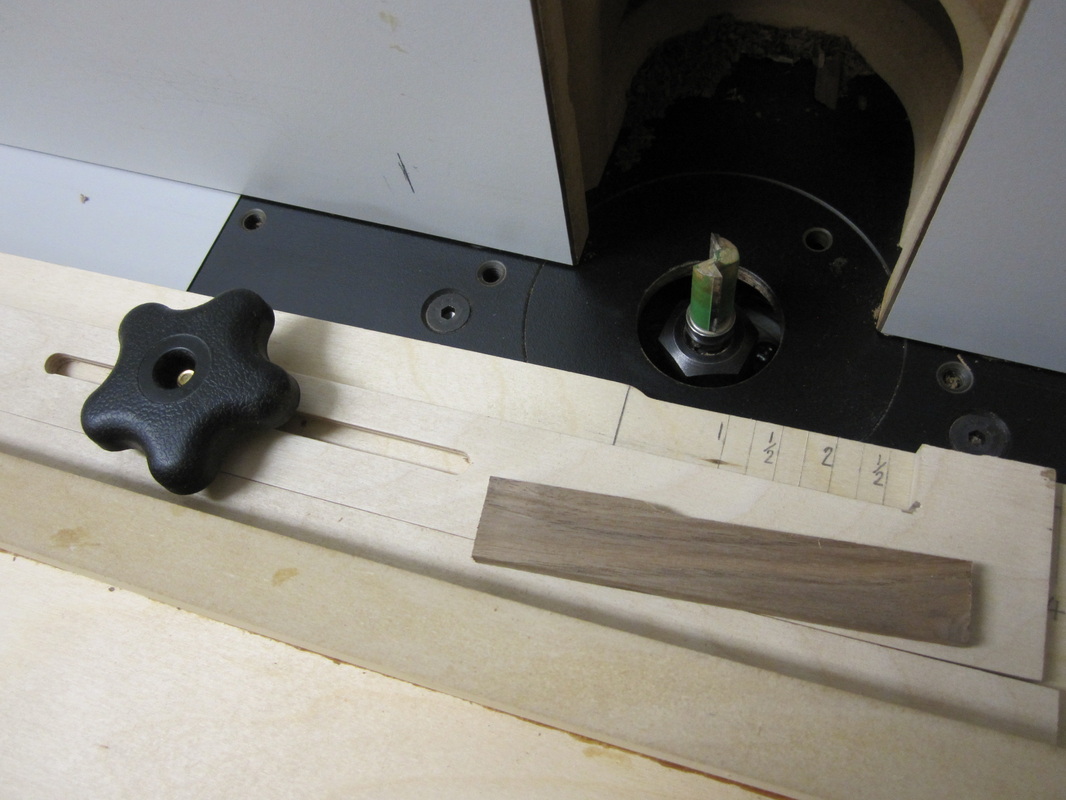
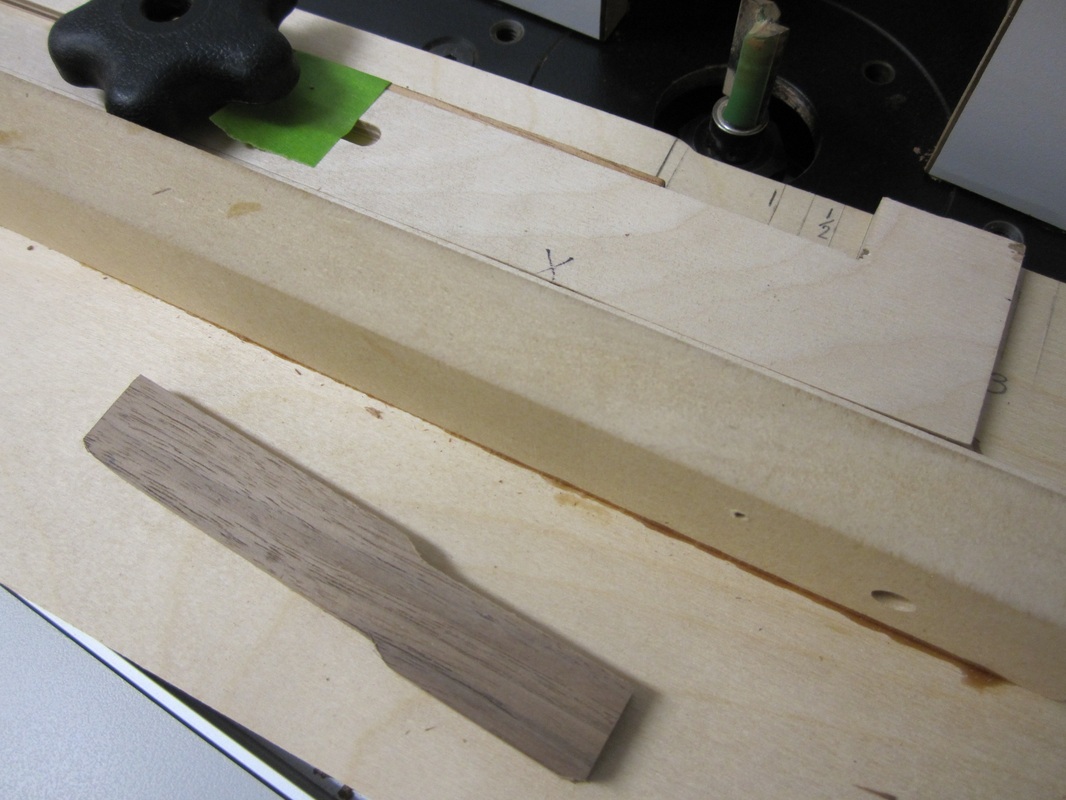
The splines are made from black walnut, planed down to ¼” thick and shaped using a pattern jig at the router table. I used a cork-backed block to hold the spline down to the jig during the cuts and to keep my fingers away from the bit. The splines are ebonized (blackened) using the vinegar and steel wool solution that I described while making the bed. These splines are glued into the tops only and left free to move within the grooves in the bread-board ends as the tops go through dimensional changes primarily in width due to humidity changes.
|
|
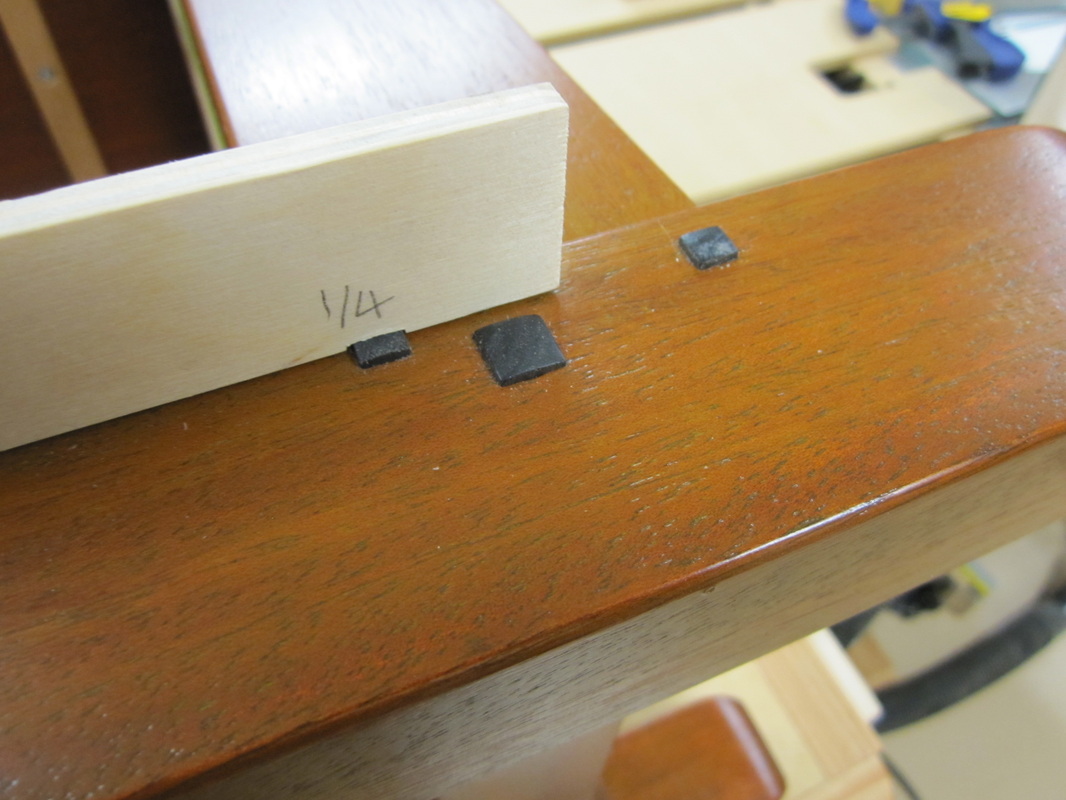
All the pegs are made from black walnut and ebonized using the same process described for the bed. They are then glued in position using gauge blocks to ensure reasonably uniform protrusion.

|
|
|

|
The pegs and splines are then given two coats of satin polyurethane to boost up their gloss and provide protection. Tops are screwed in place and the pieces are finished, ready for use. Overall, I am pleased with how these turned out and I think that they complement the bed very nicely.

|
|
|
|