Bed detailing...
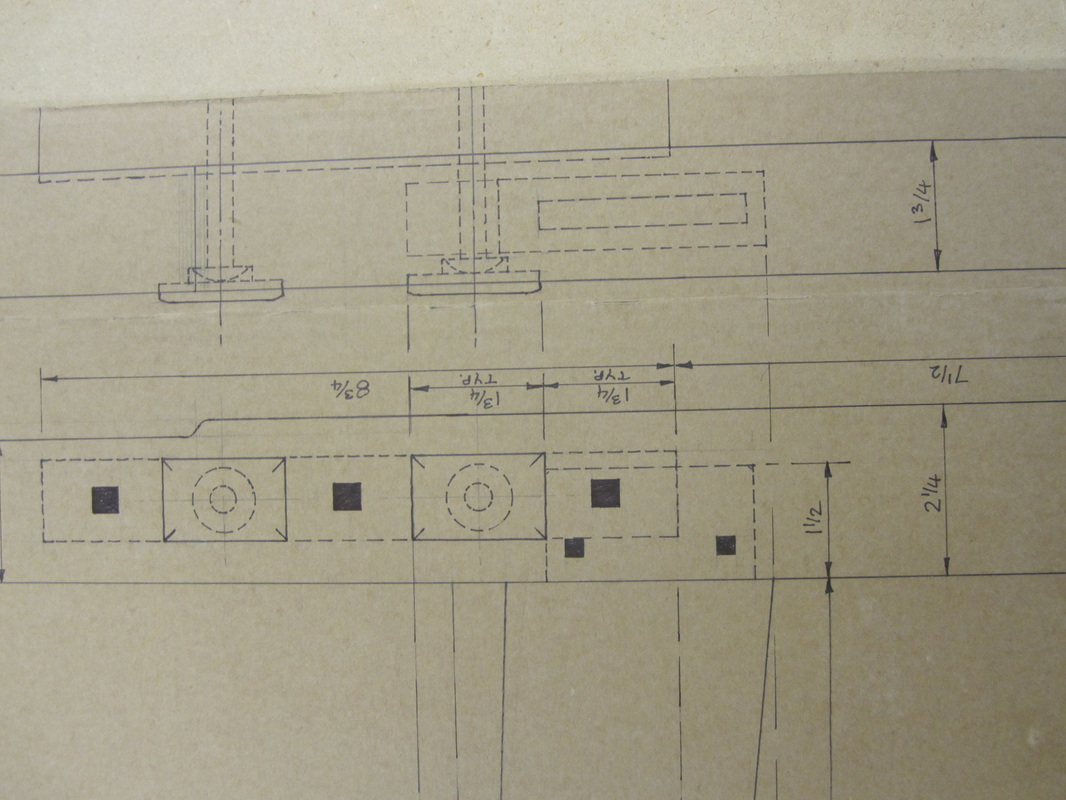
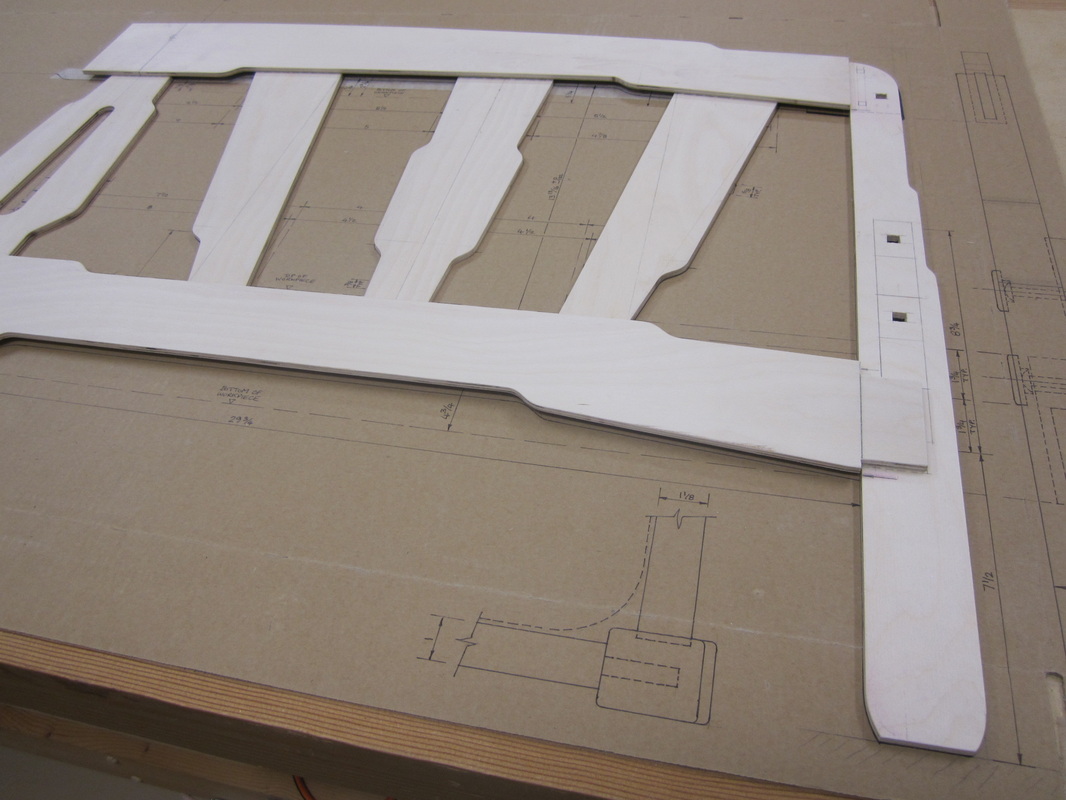
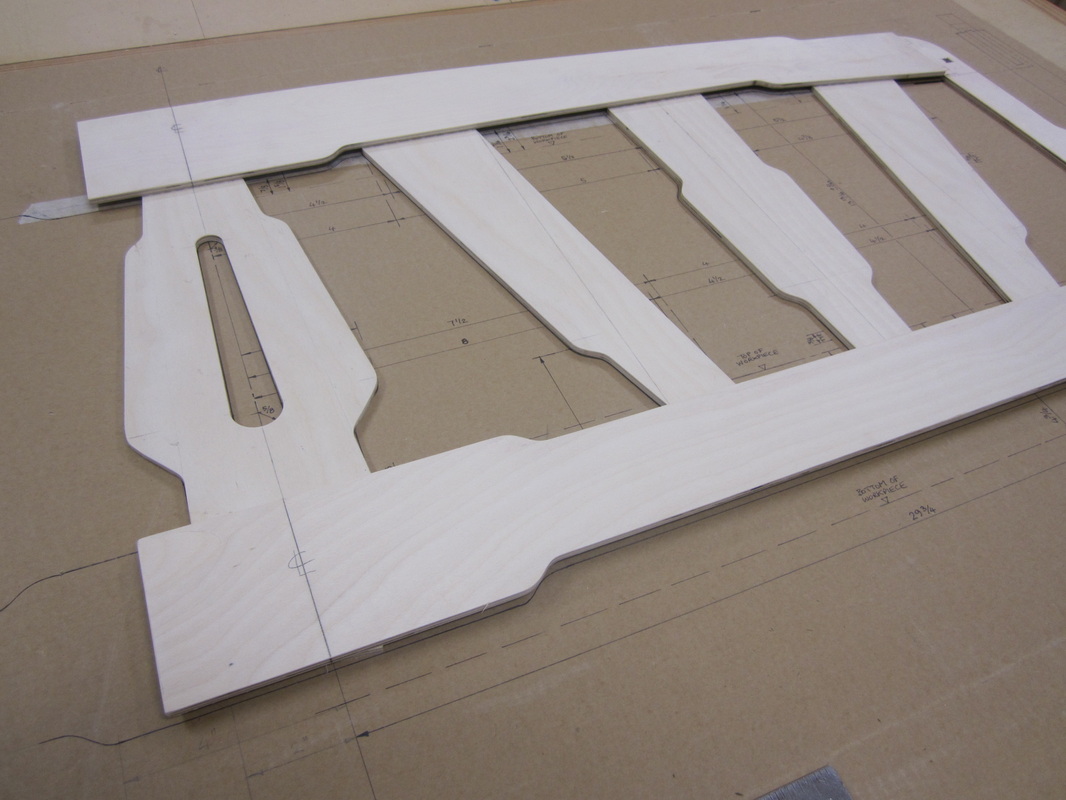
Calling on my drafting skills learned in high-school (and not forgotten) I detailed the bed design, full size, on cardboard so that I could figure out all the dimensions for cutting, joinery and assembly. This was also very helpful as it facilitated building full-size templates for all the curved and irregular shaped pieces and checking them against the full size drawing.

|
|

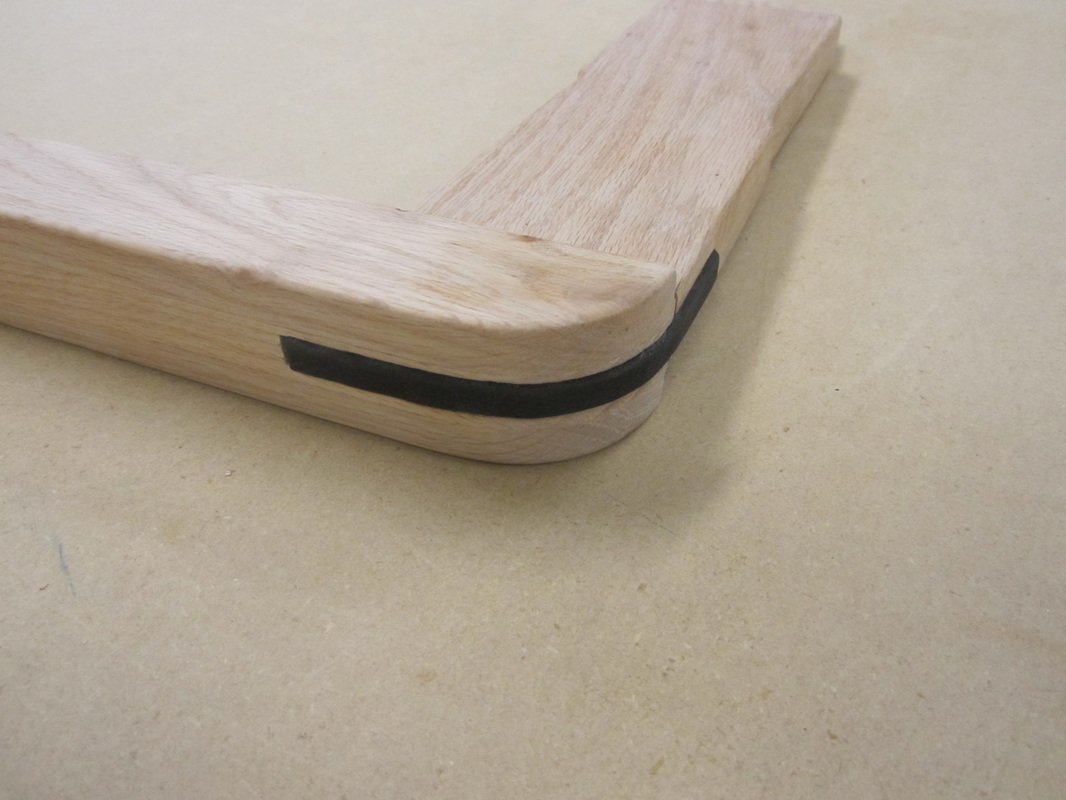
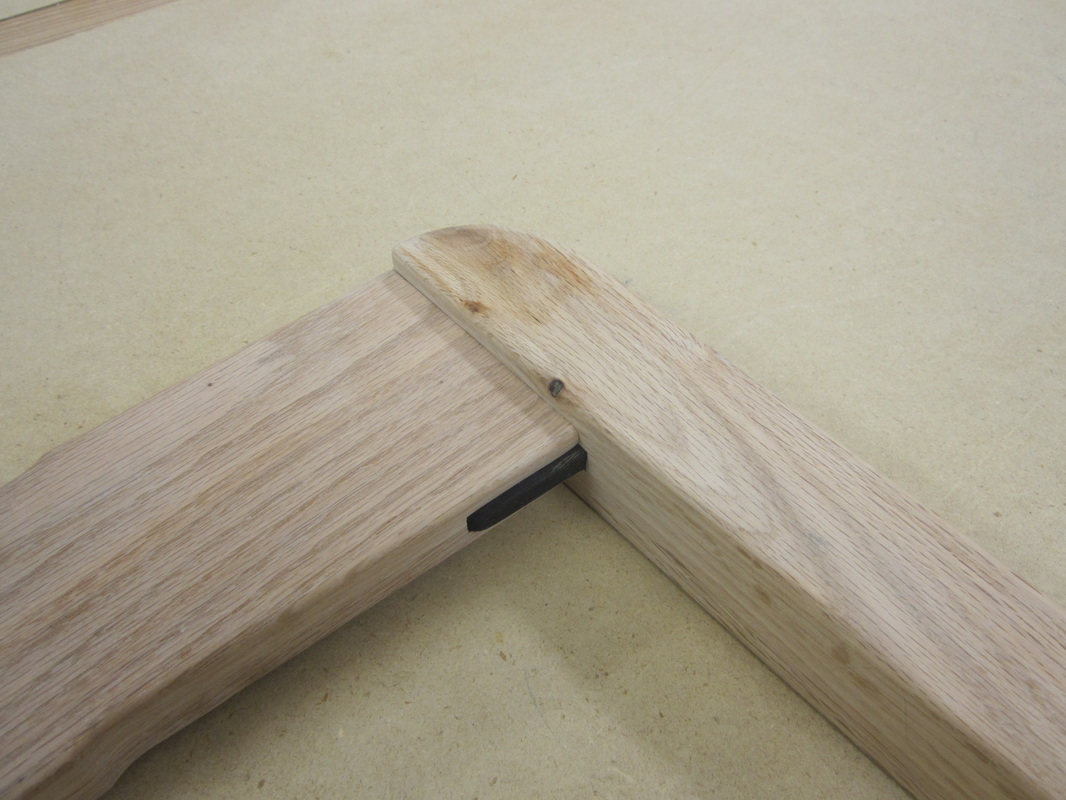
The intersection of the crown-rail and leg, where the black spline is shown in the drawing above, looks fine in front elevation but looked a bit bizarre in the end elevation. To satisfy myself (and the design approval chief) I made a mock-up of the intersection and another design option in case it wouldn’t fly.
|
|
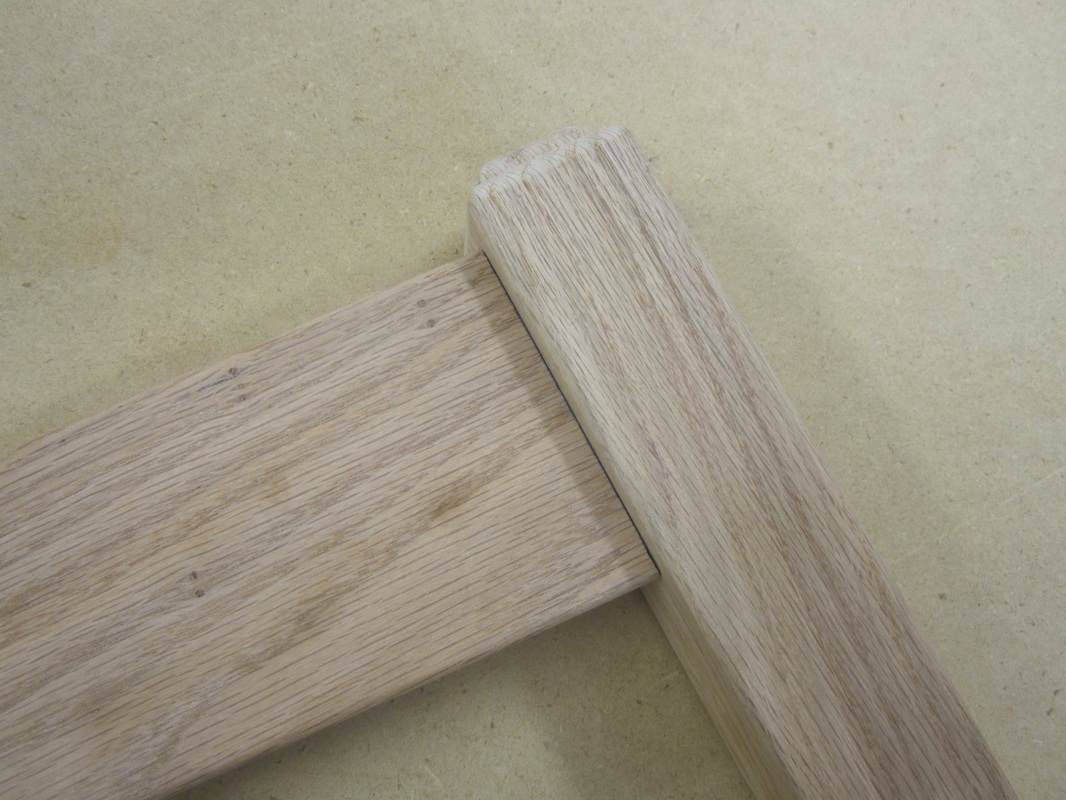
The original design looked good in 3D and was unanimously adopted by the designer and the approval chief. From there, it was on to the making and the “fun” could really begin.
Making the bed, cutting, jointing, dry assembly, finishing, gluing.
I started out by cutting templates from ¼” Baltic birch plywood and carefully shaping them sanding the edges very smoothly to match the full-size drawing. I found that I only had to sand one cloud-lift of each size and then, using the magic of double-sided adhesive tape, I could shape other similar cloud-lifts using the first one. This significantly sped up the process of making the templates.
|
|
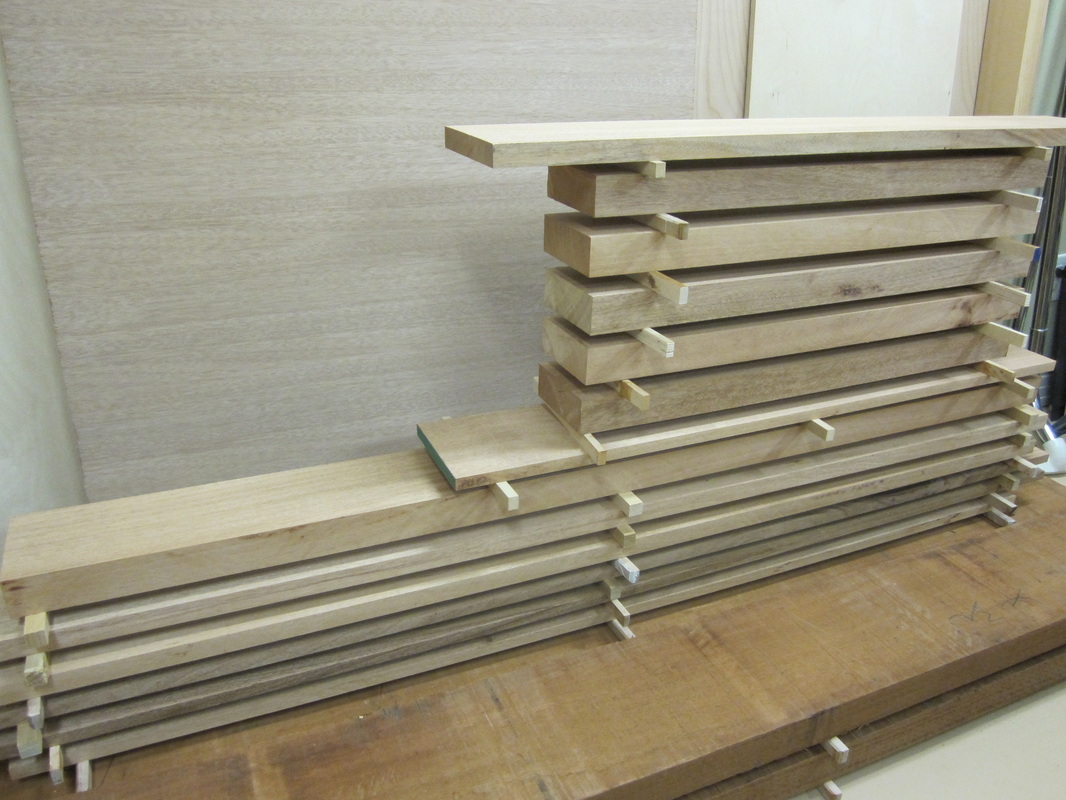
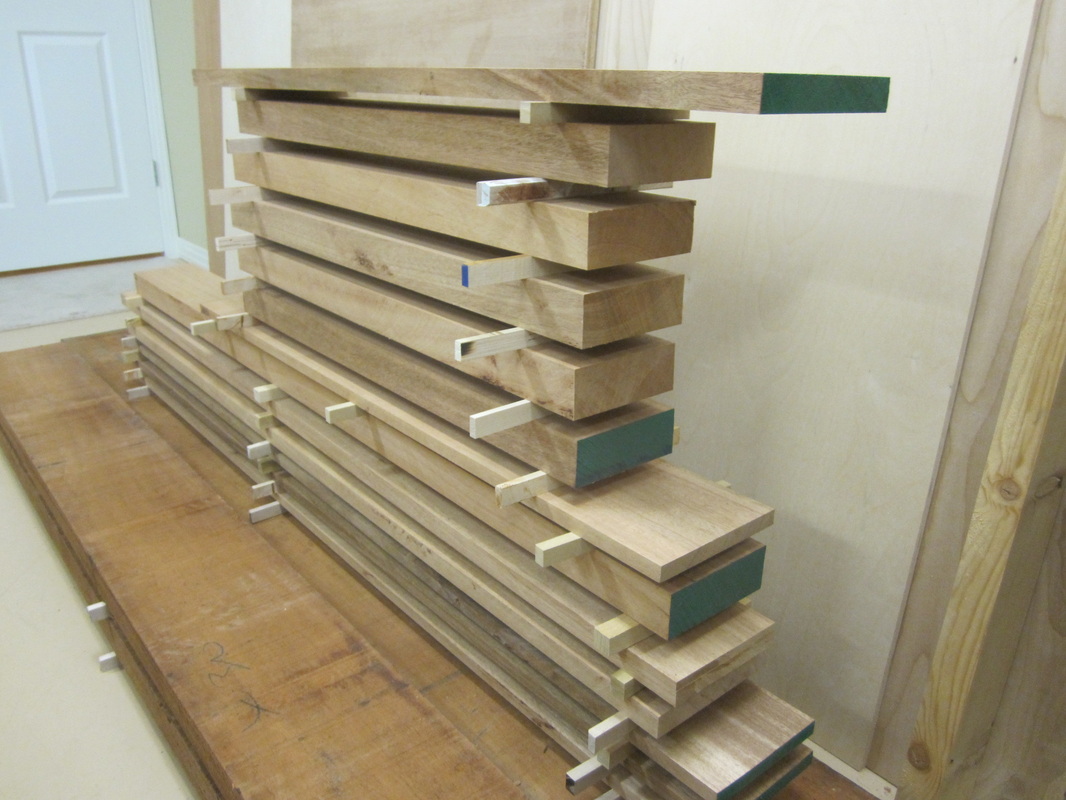
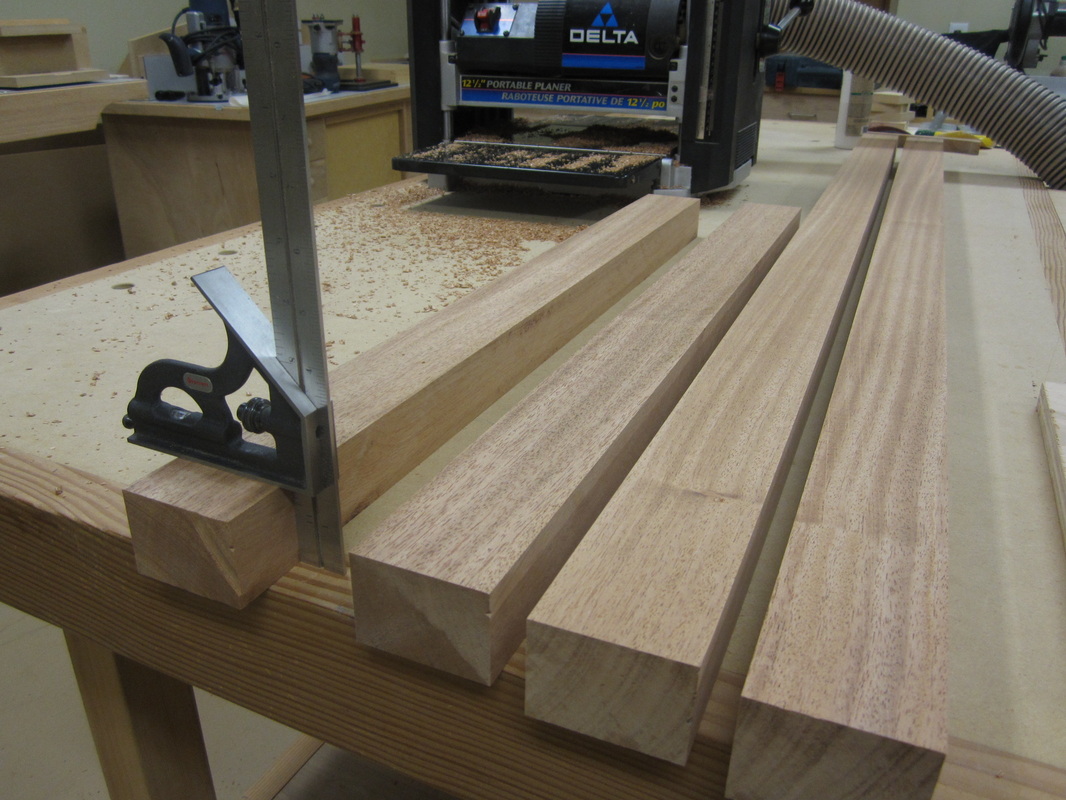
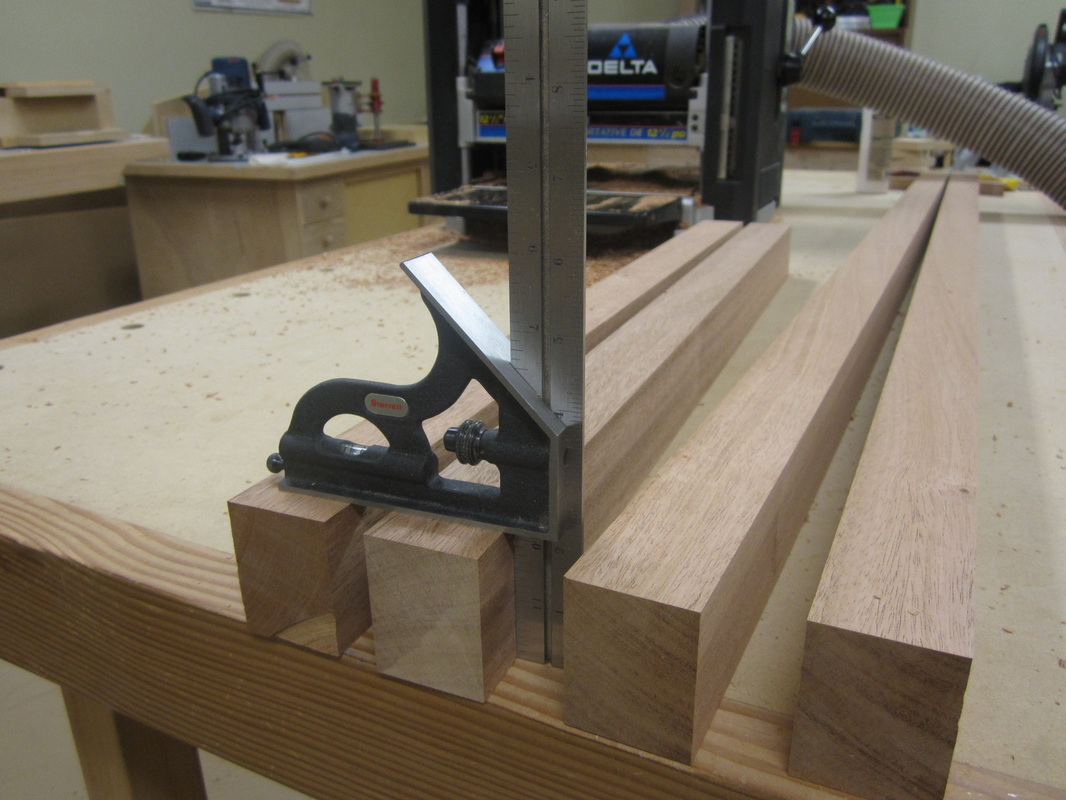
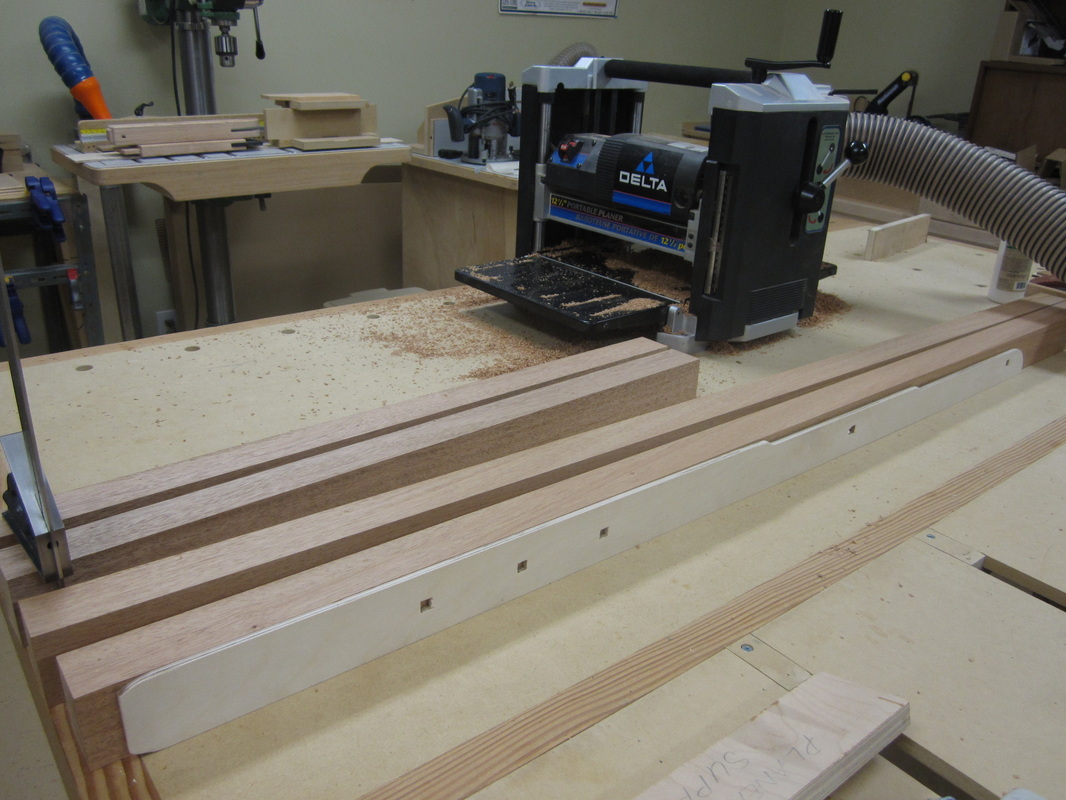
The rough 8/4 and 4/4 mahogany was cut, jointed and planed close to finish dimensions, then stickered to allow drying of fresh-cut faces. This hopefully minimizes further twisting after planing to finished dimensions.
|
|
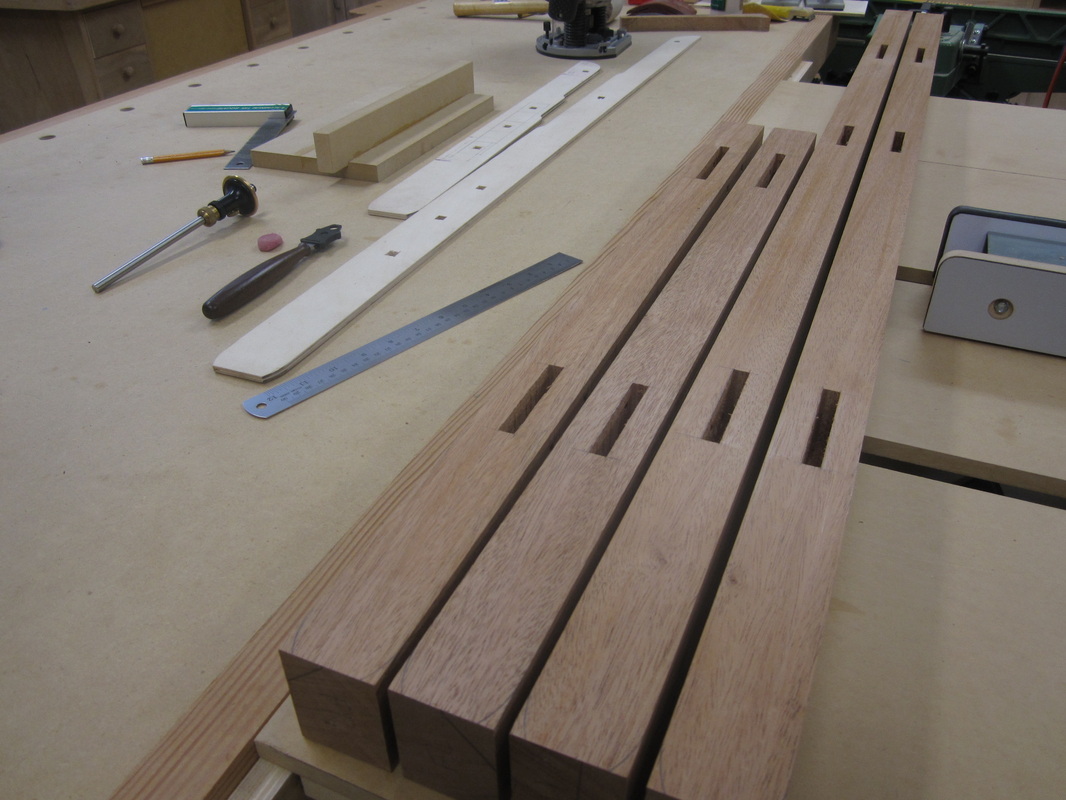
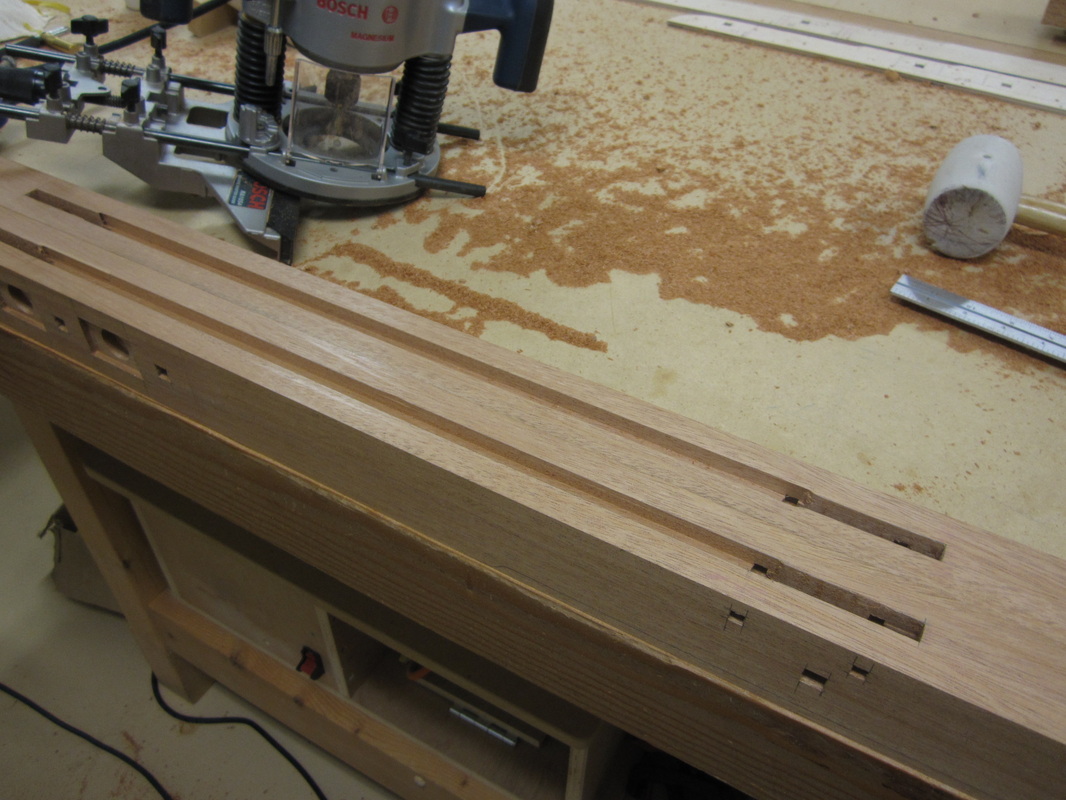
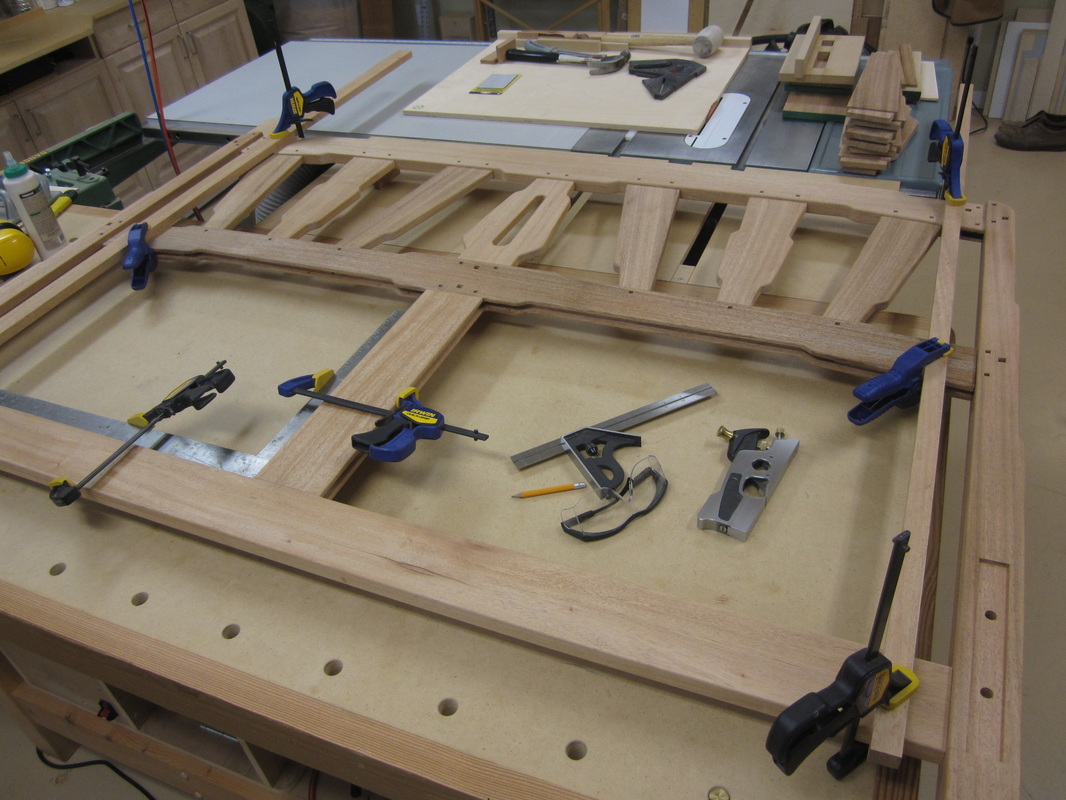
While the stock still had parallel edges I began the process of cutting the mortises in the crown and bottom rails for the slats that connects them. This was a two-step process, as you will see in later photos, since the slats have “housed” tenons. This was a feature of many original Greene & Greene designs and provided added strength to the joinery. In my case it allowed me to hide my less-than-perfect joinery! Having the shop-vac helped to keep the area clean for most of the cuts.
|
|
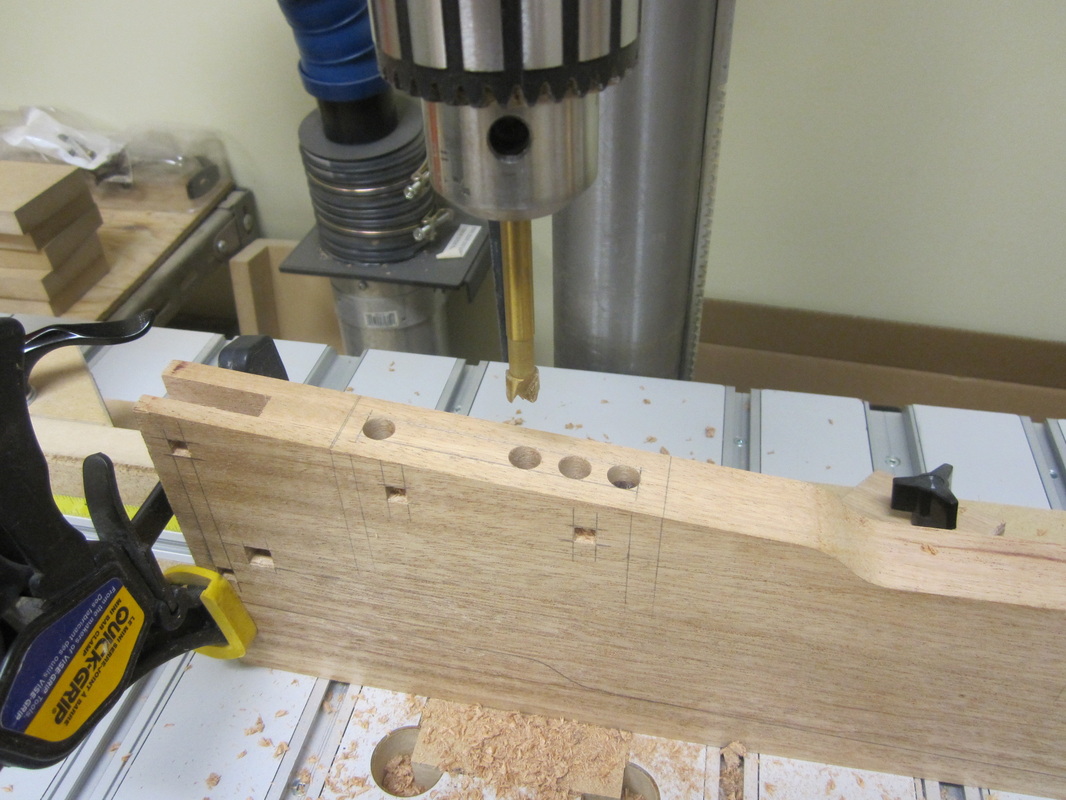
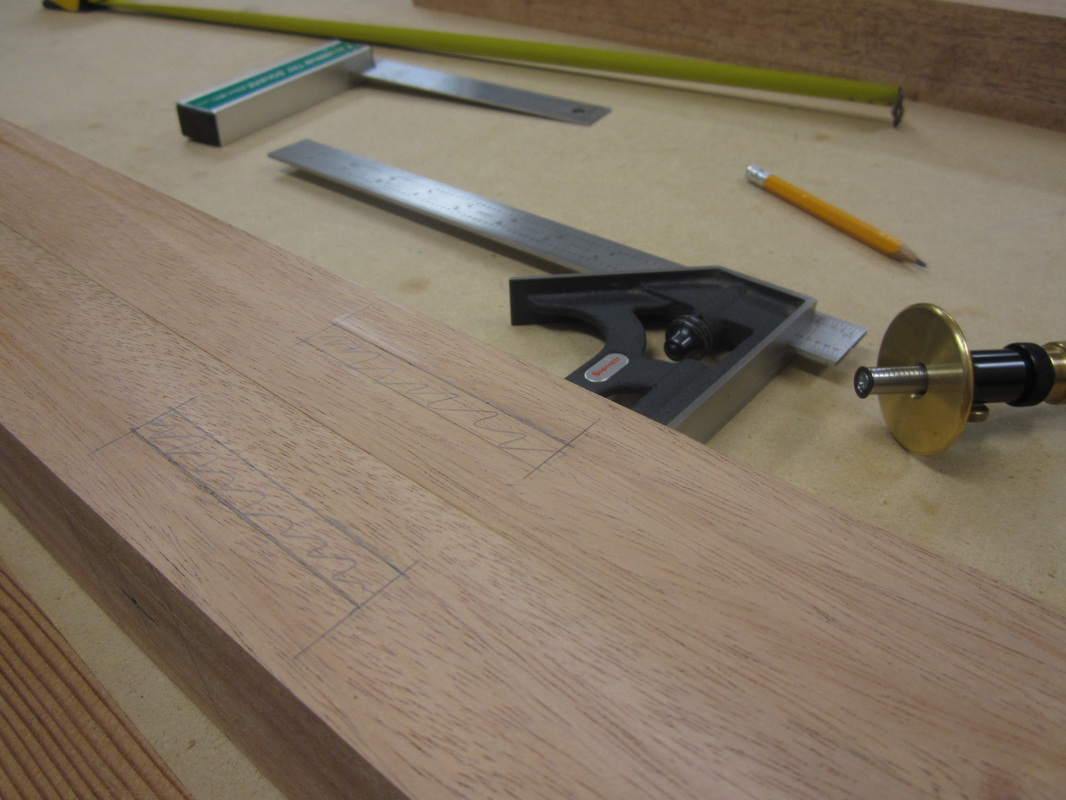
The parallel edges of the stock also allowed me to position and cut many of the holes for the square pegs that are fitted near the end of assembly, some functional but most decorative only.

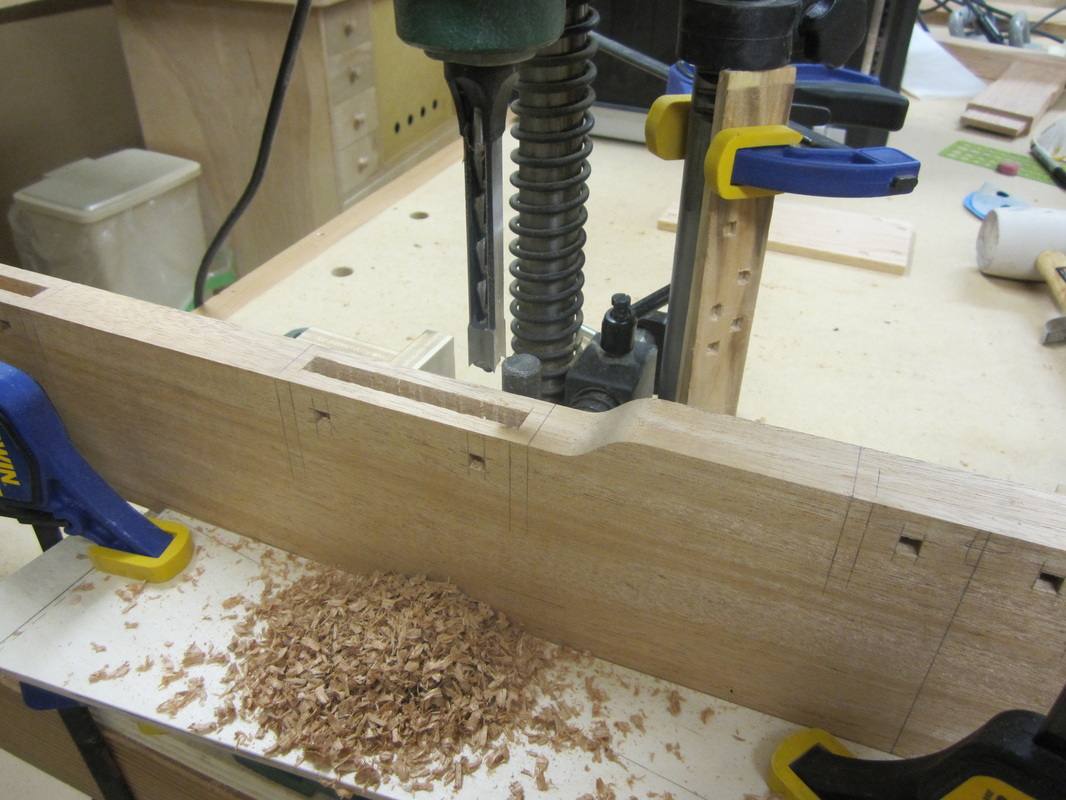
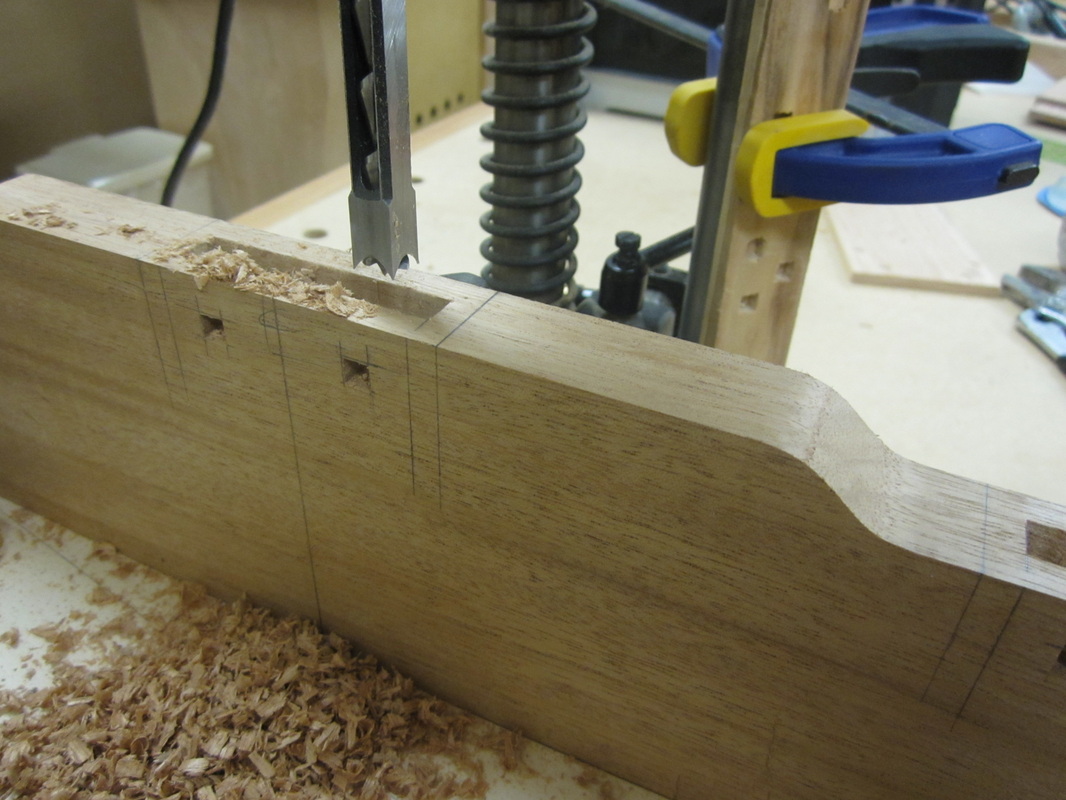
Some mortises had to be marked out and cut after profiling the cloud-lift shapes on one edge, while the other edge remained straight.
|
|
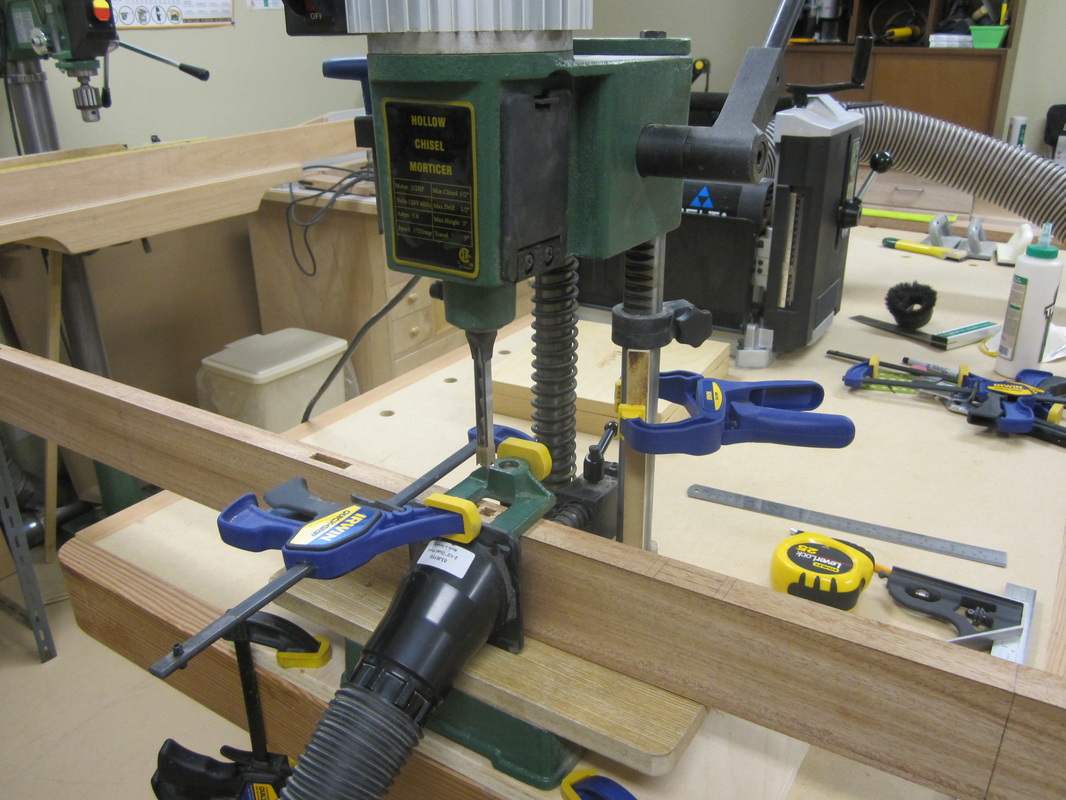
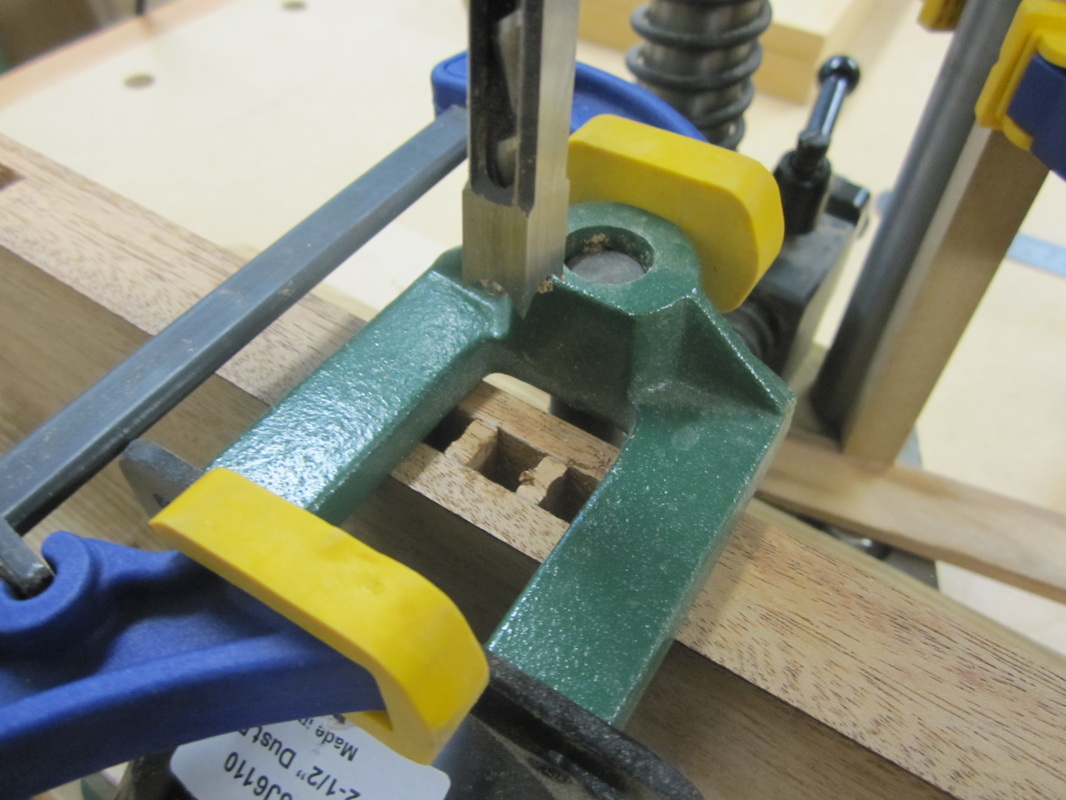
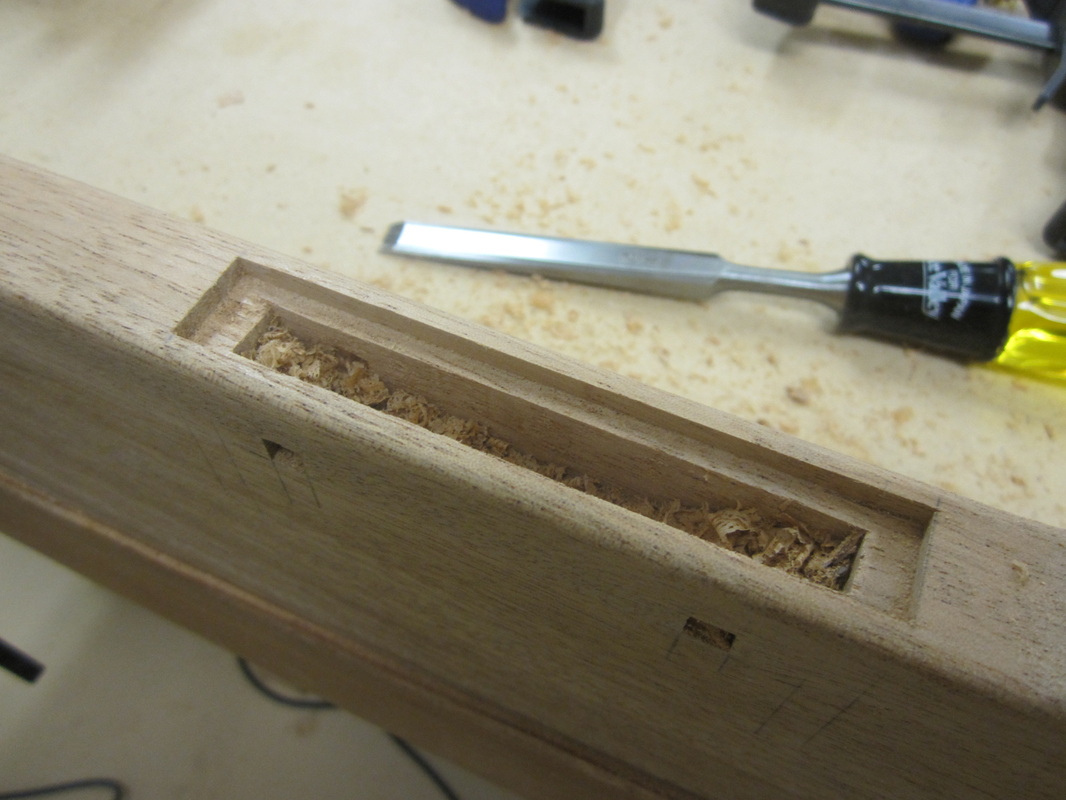
Some mortises could not be cut with my machine so I used a 3/8” Forstner bit in the drill press and chisels to hog them out.
|
|
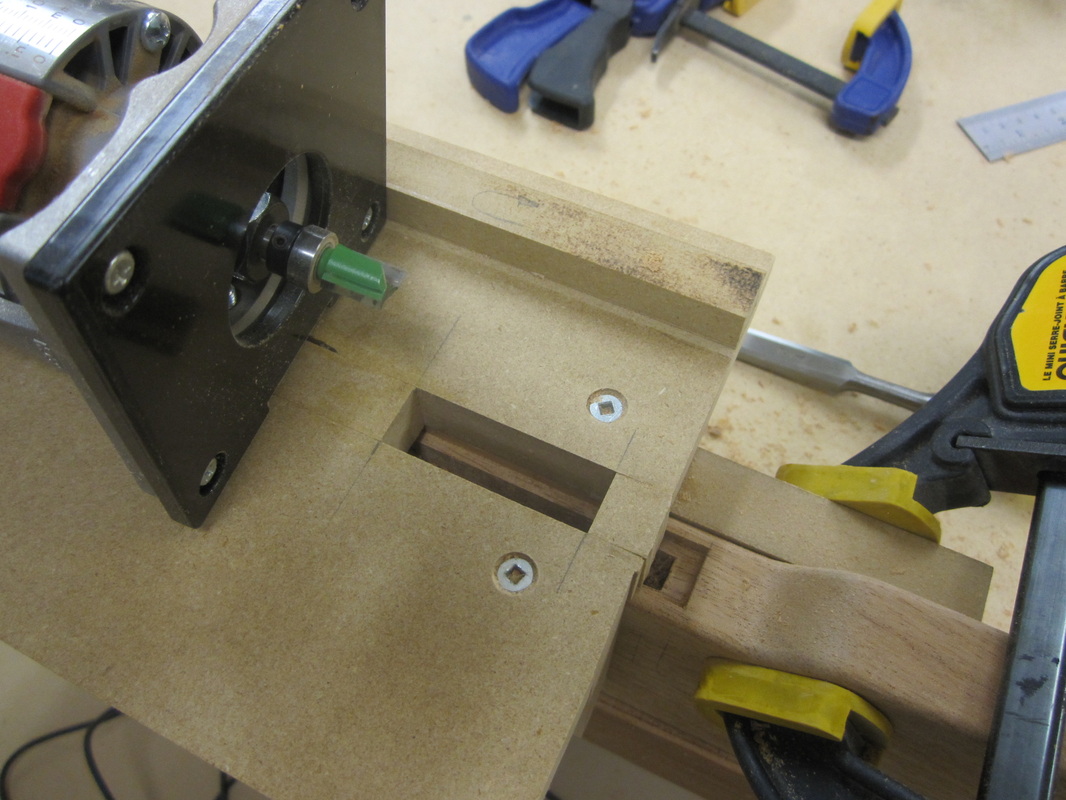
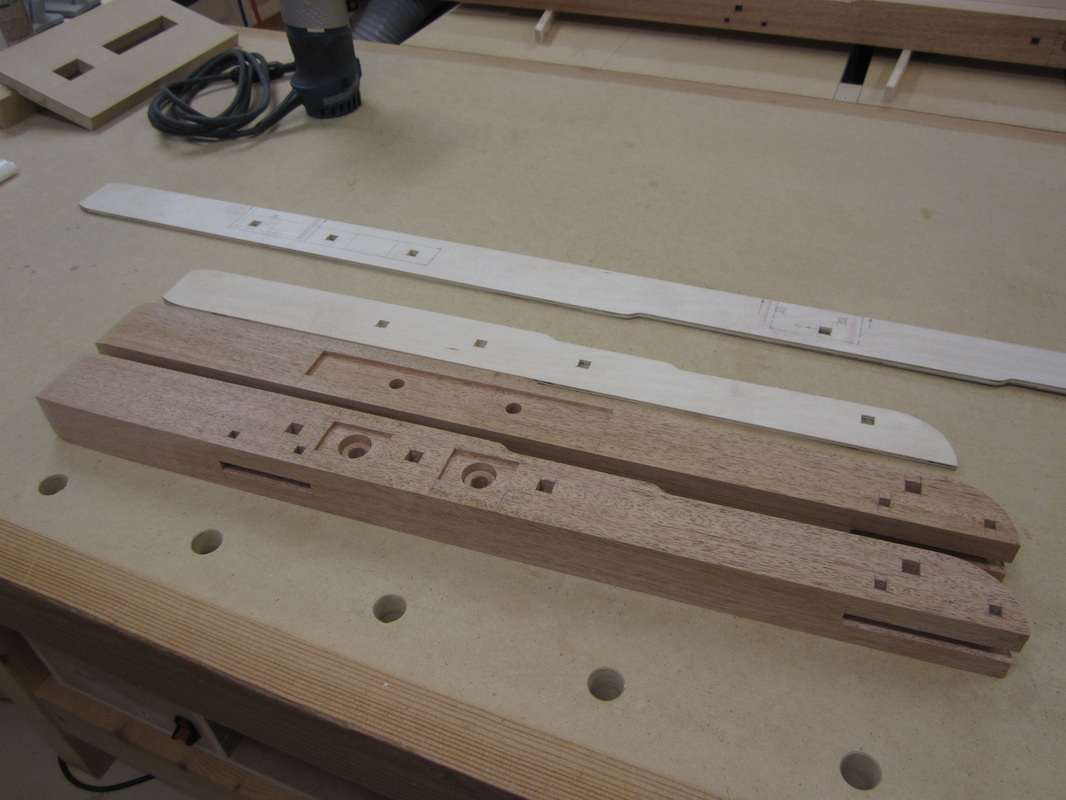
The side rails of the bed have “fake” scarf joints. These were a feature of many beams used in Greene & Greene homes such as the Gamble house. A matching “Z” shape was cut into the two boards interlocked together and pinned with a peg of cross-grained material. This allowed very long beams to be built from two or more pieces and resulted in a very strong joint with load-bearing capability. I think it was also used in early ship-building. My fake version is made from one piece of wood with the “Z” shape cut using a pointed router bit and a chisel. I machined a recess in the centre with a router and template to receive a short piece of end-grain wood to give the appearance of a peg.
|

|
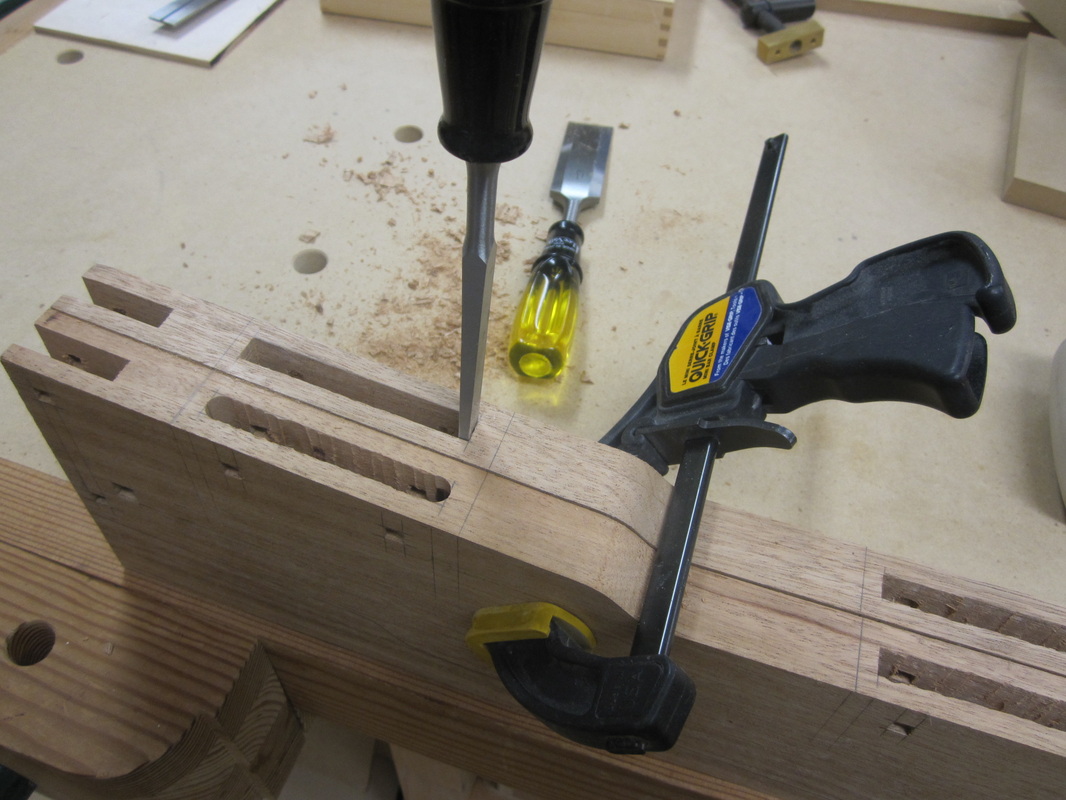
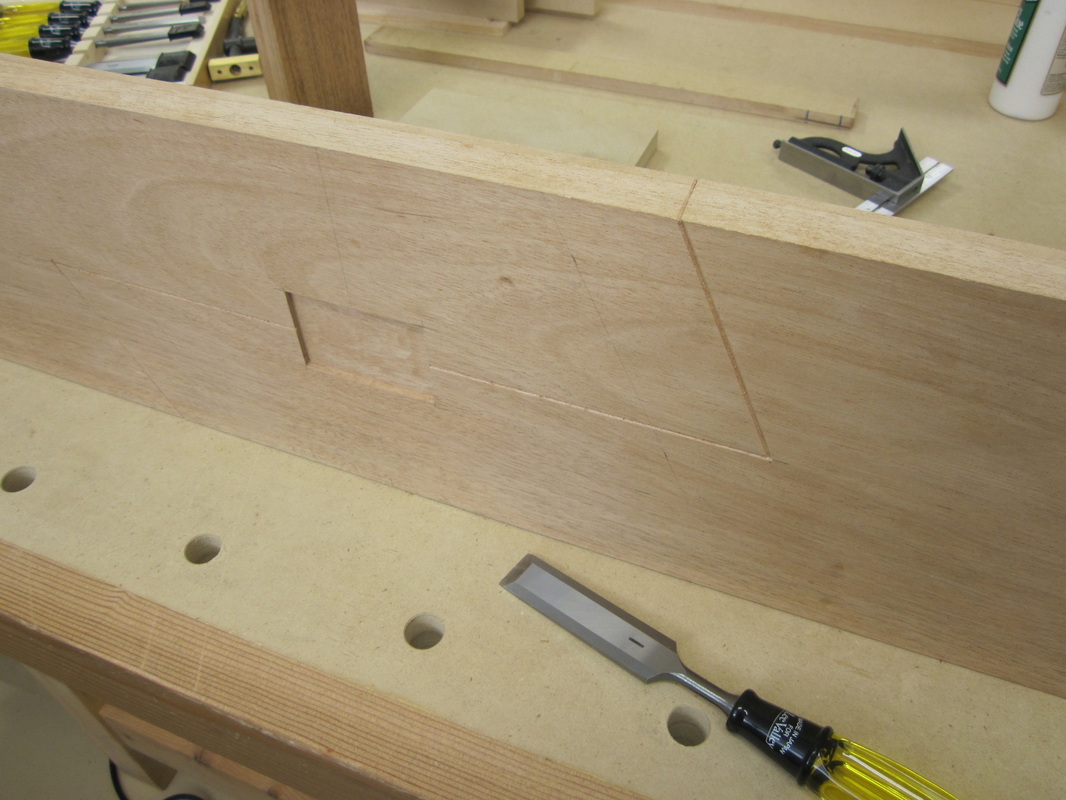
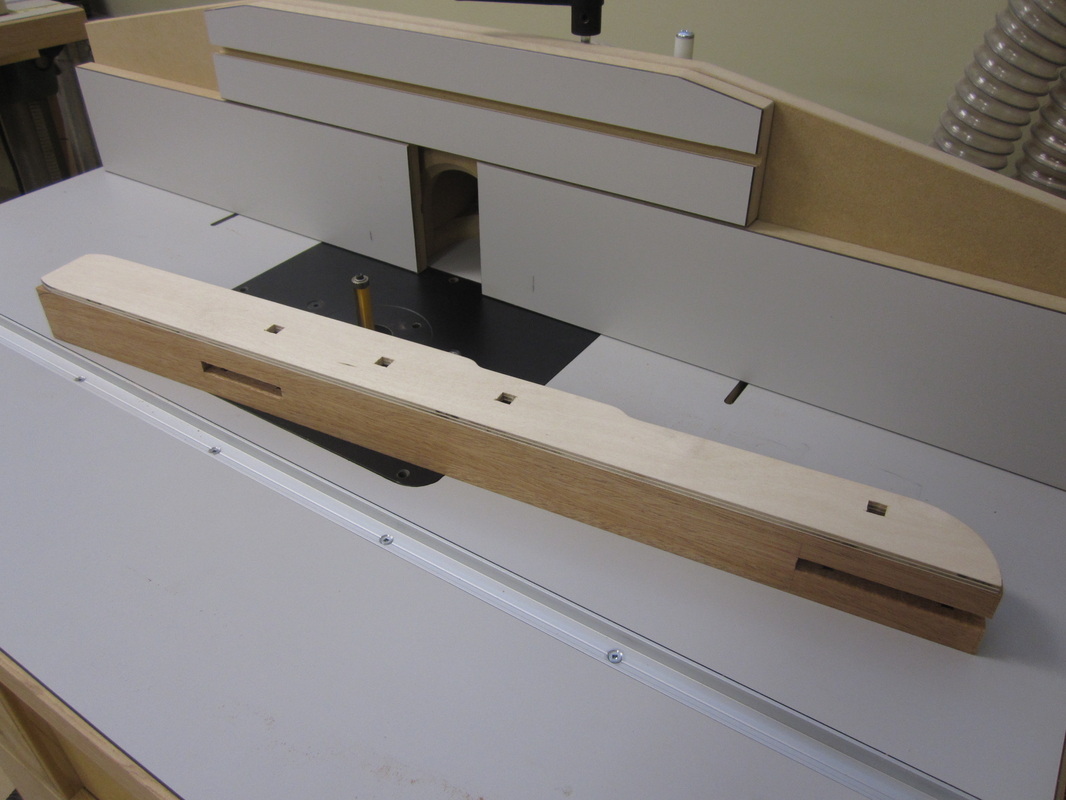
The router is used with another template to cut the 1/8” deep recess for the housed tenons of the slats, as mentioned earlier. The bit hogs out most of the material and the corners are squared off with a chisel.
|
|
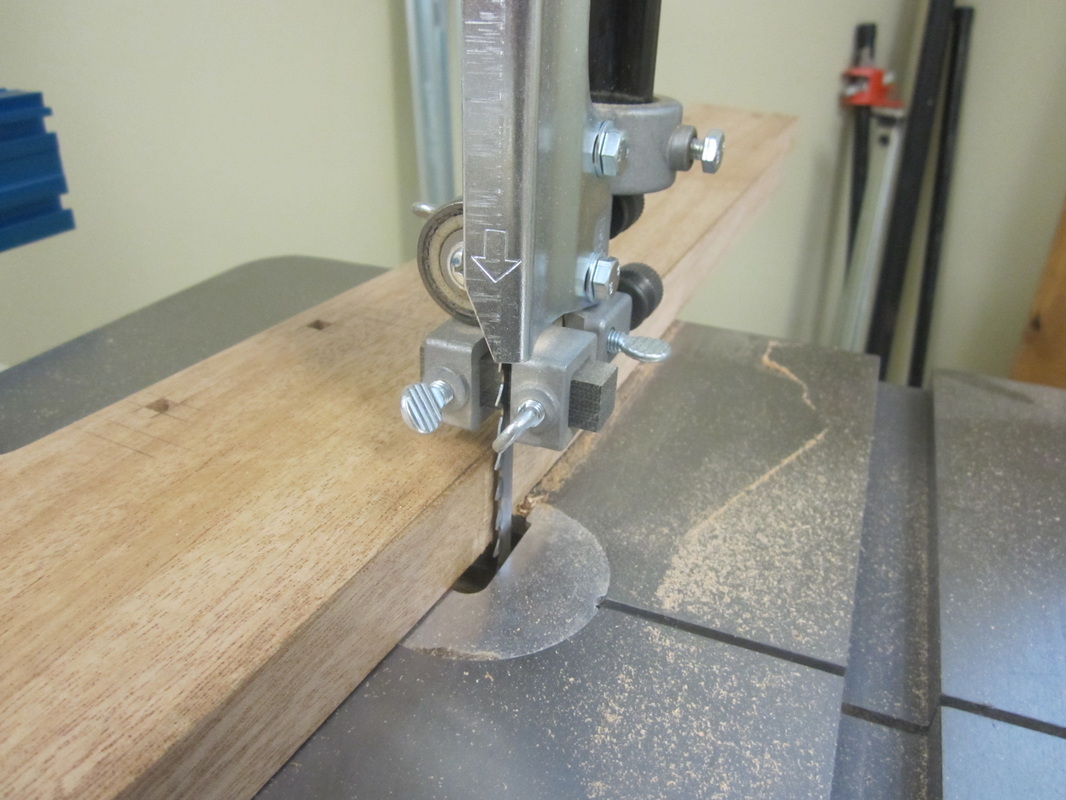
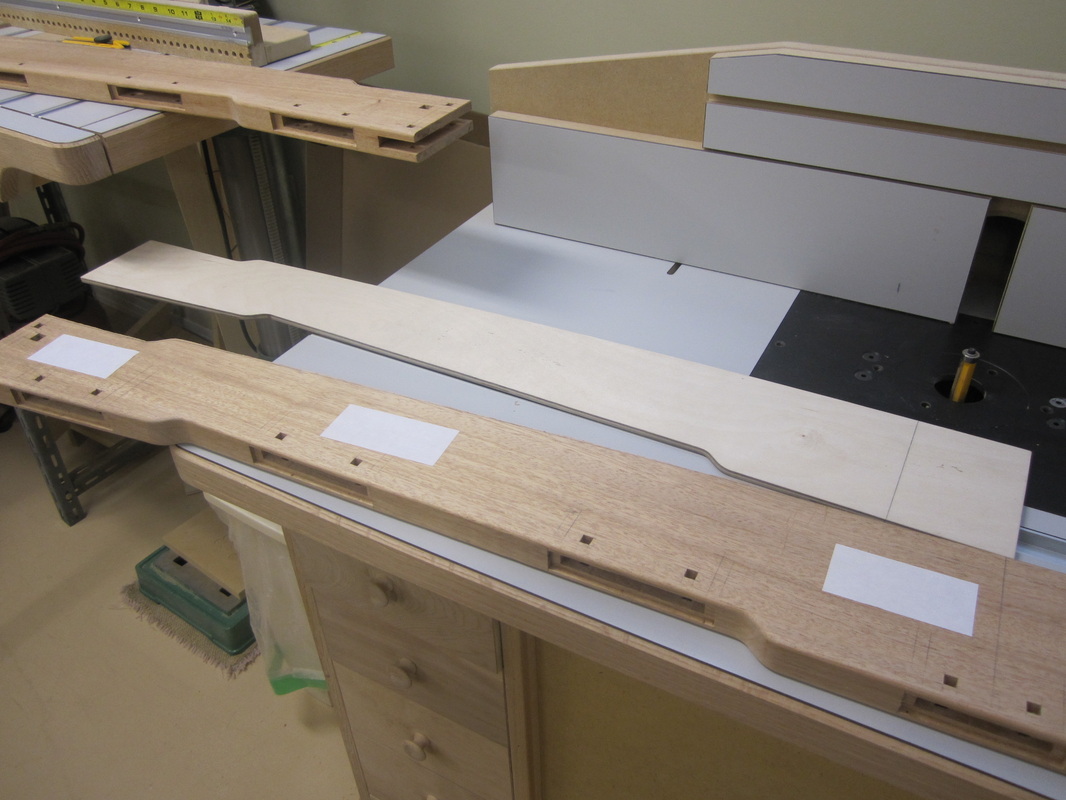
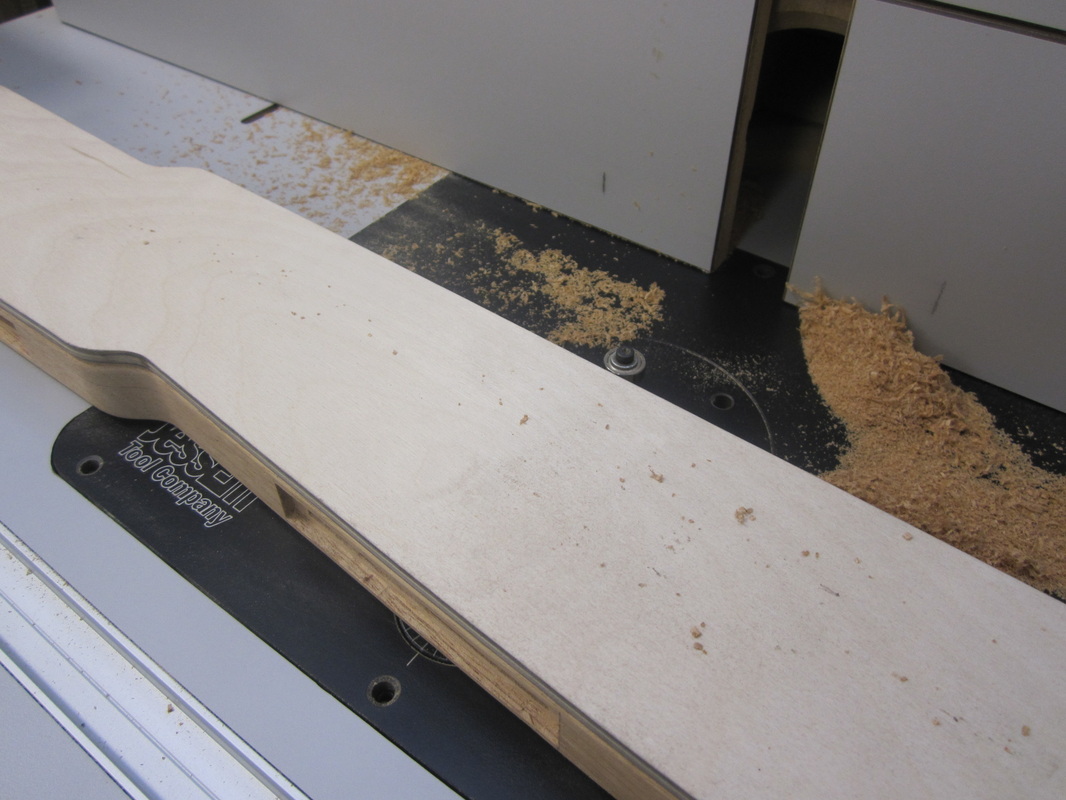
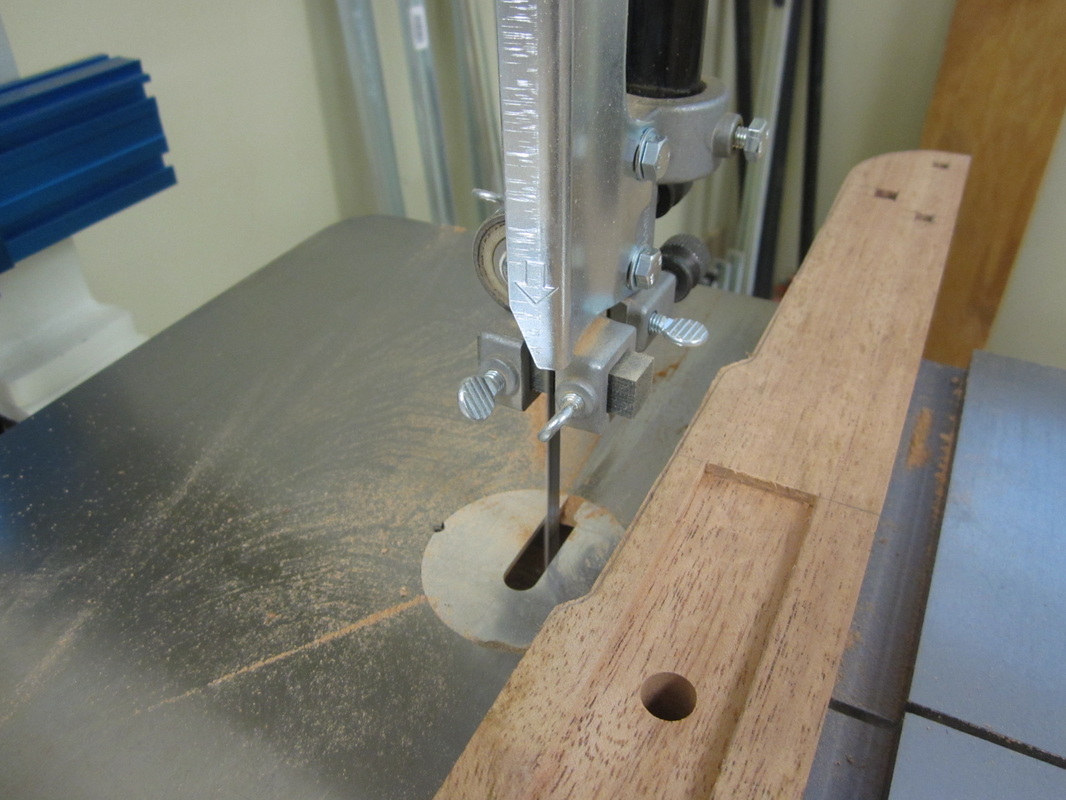
After all these mortises and recesses are cut, the straight side of the rails can finally be profiled, firstly rough cut on the band-saw and then finished using the template and a pattern bit in the router table. Again the magic of double-sided adhesive tape holds the template in place for the routing operation. I found out the hard way that the router does not like to make tight curves from flat into end grain (e.g. the cloud-lift on the left of the crown rail in the photo below centre) so I ended up flipping the template to the other side of the piece for those curves, which was much better.
|
|
|

|
I used my palm router with a 1/8” round-over bit and bearing to round over and soften the edges of the rails. This was a bit difficult where the recesses were cut for the housed tenons of the slats but there was just enough to run the bearing along without having to fill the recesses temporarily. |
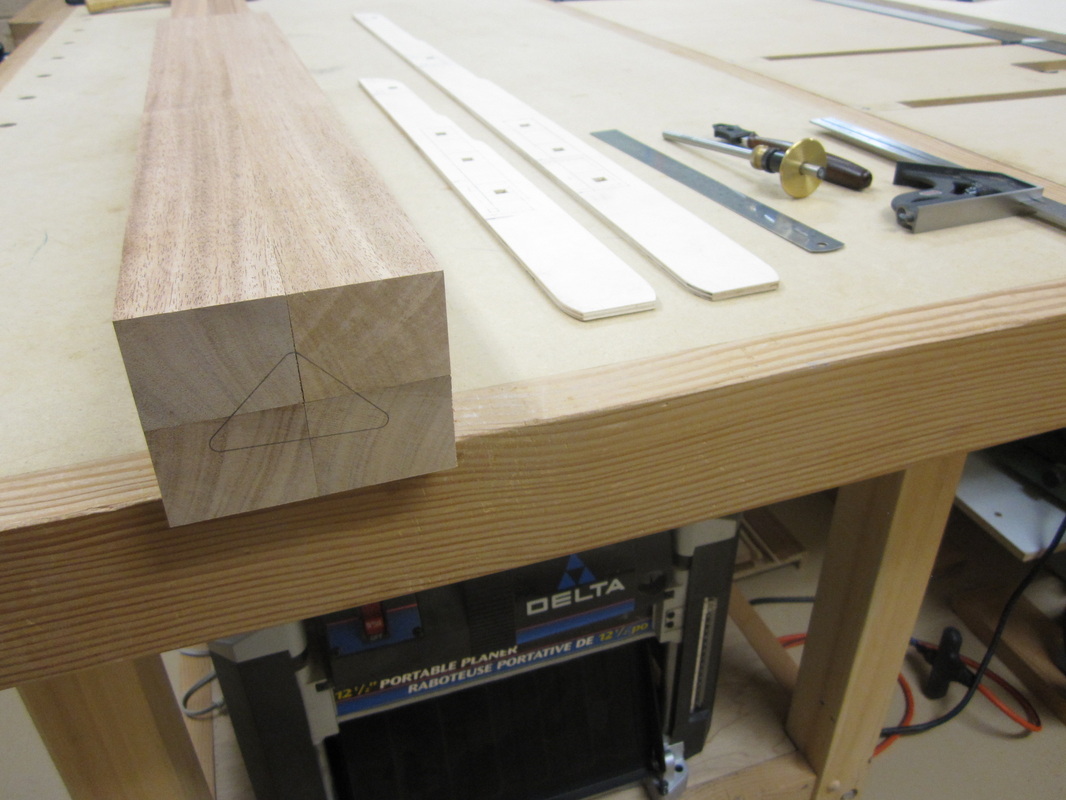
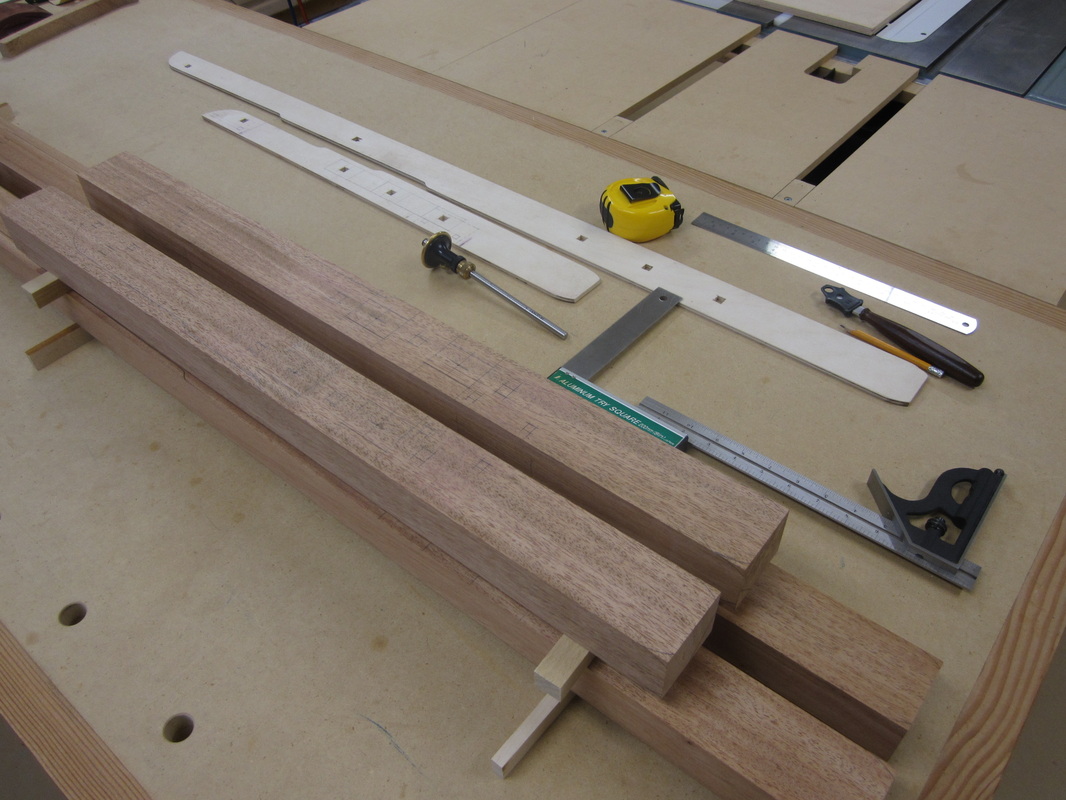
Next, it was time to make the legs. I had earlier cut and planed the blanks roughly to size so I planed them to the maximum finished dimensions, selected the orientation on the final assembly and marked them with a reference triangle. I have found this essential to ensure that the mortises and other features get placed in the correct orientation as work progresses.
|
|
|
|
Then I marked out all the mortises, locations for pegs and holes for hardware. This was trickier than first appearance because, in Greene & Greene furniture pieces, the backs get all the same small details as the exposed fronts. Thankfully the triangle marked on the bottom kept me right, although I checked and double checked before making any cuts.
|
|
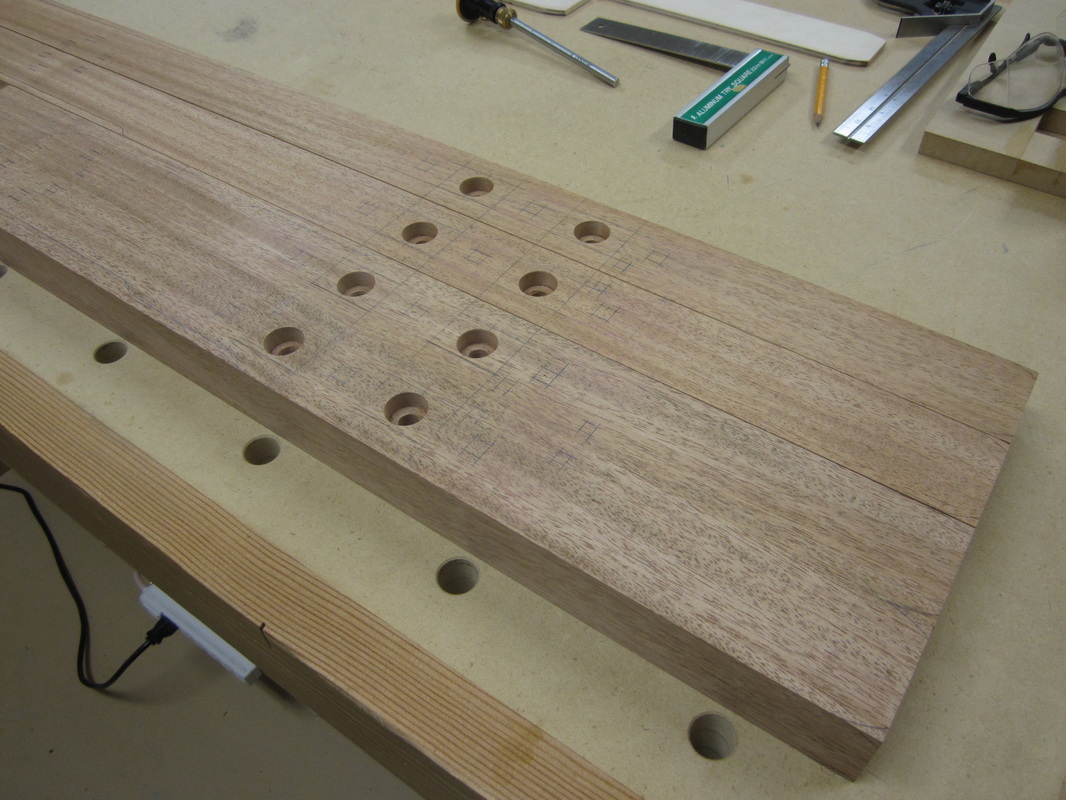
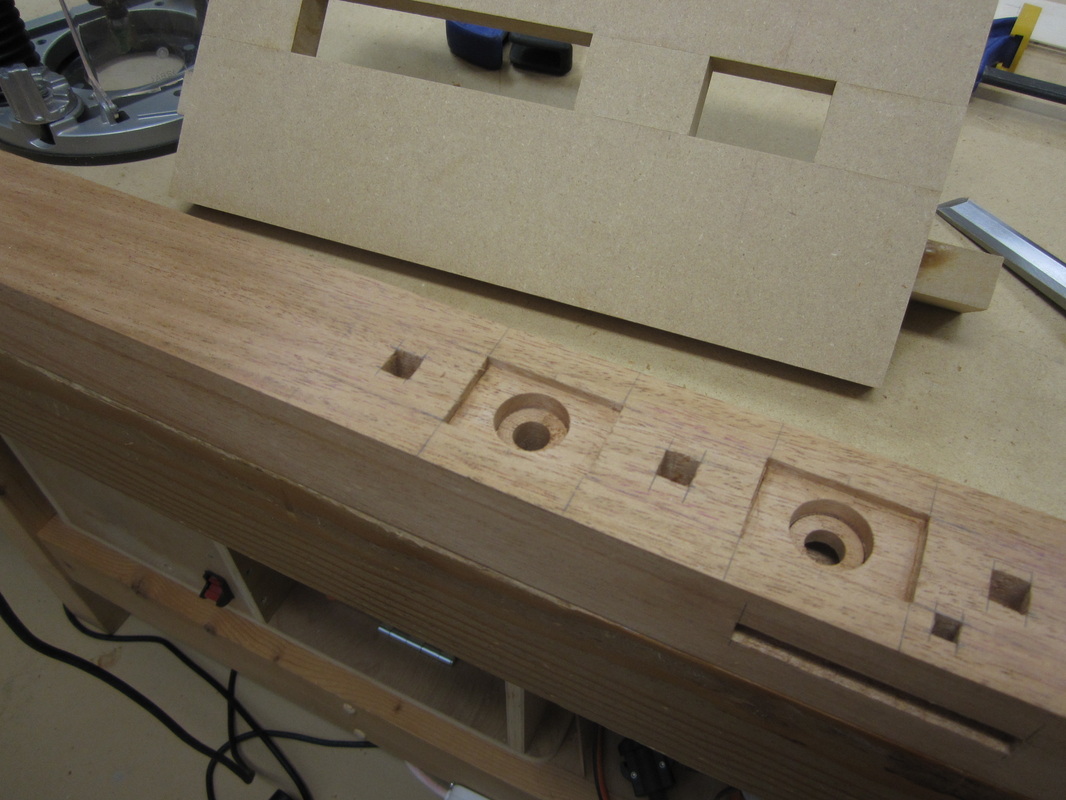
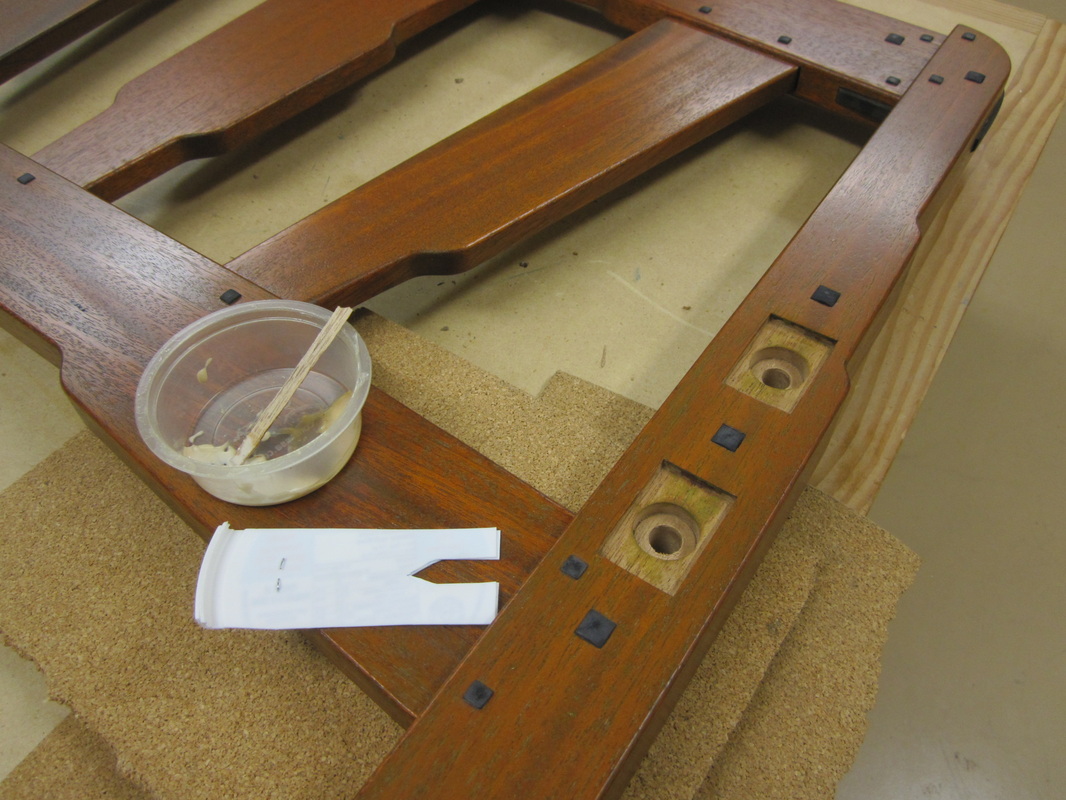
The first cuts were the large holes for the heads and washers of the “bed-bolt” hardware that connects the legs to the side rails, followed by the through holes for the bolt bodies. In true Greene & Greene overkill design; I used two bolts at each joint.

|
|
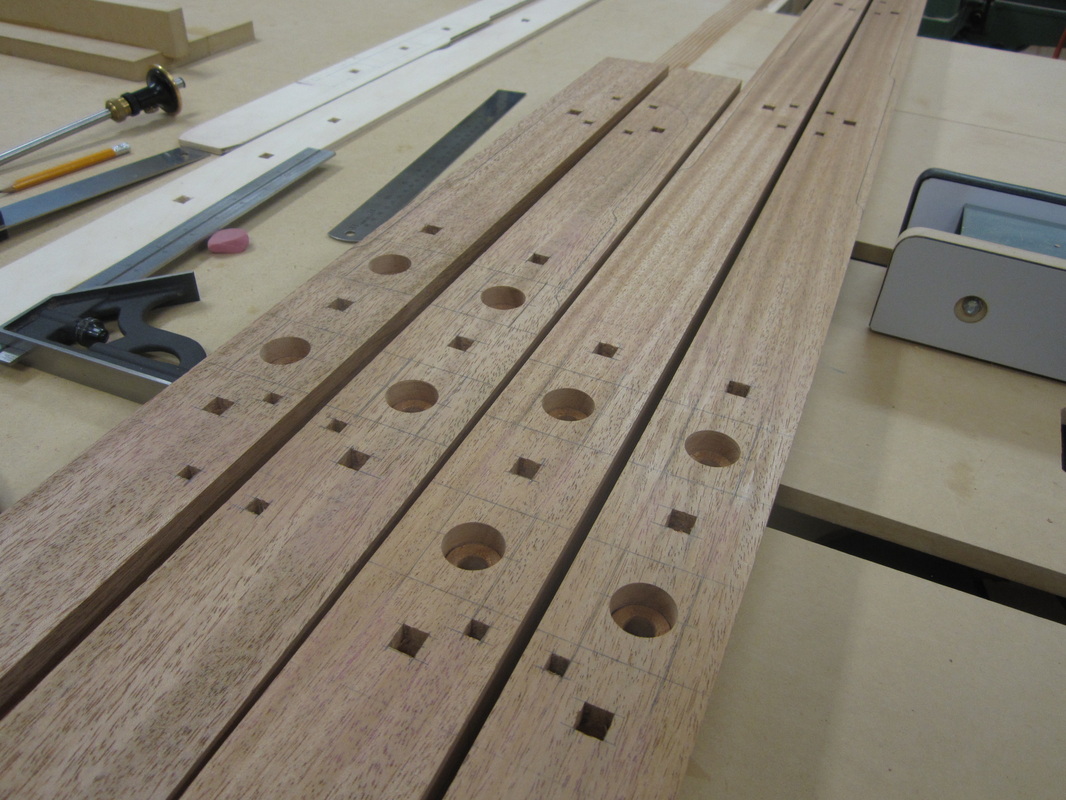
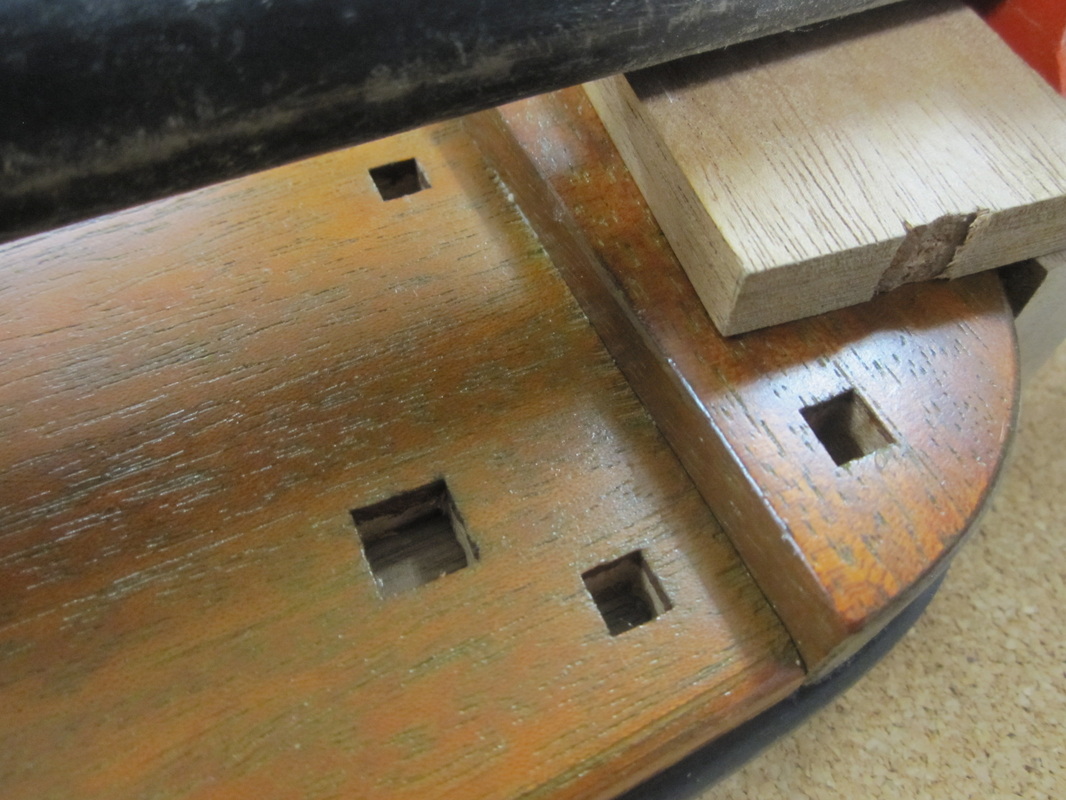
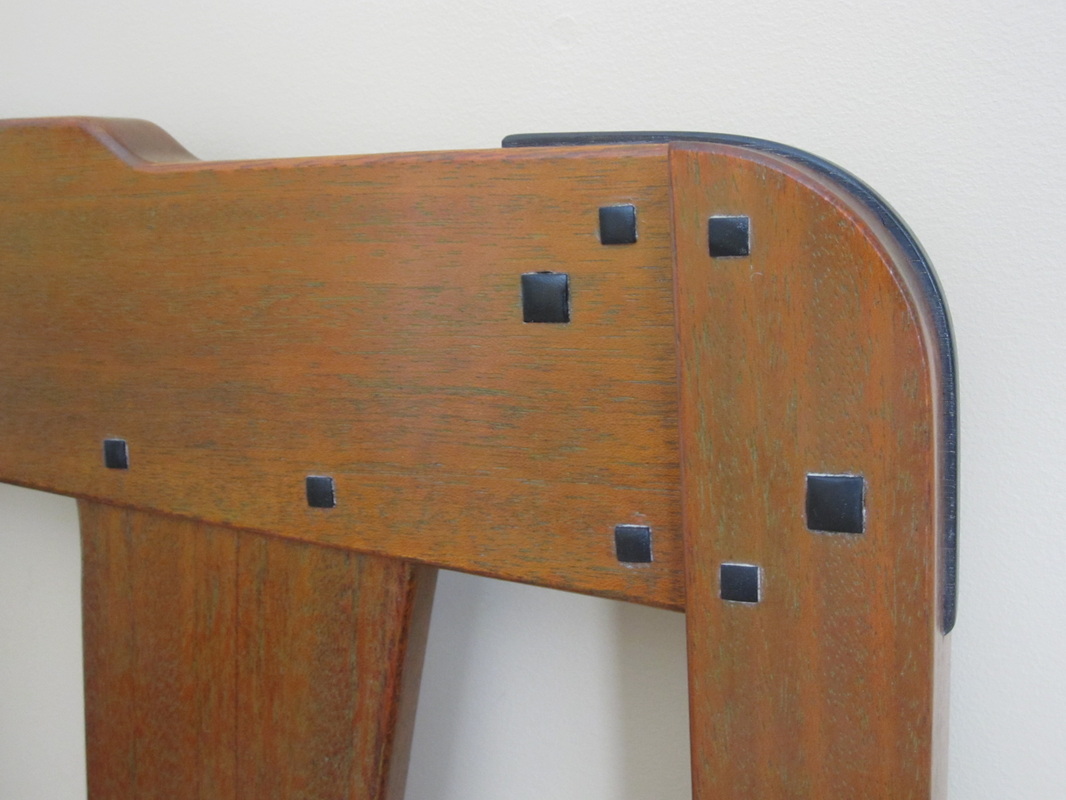
Next, I set up the mortising machine to cut the square holes for the pegs. Two sizes are used, ¼” and 3/8”. When working out the details of the design, I tried to keep the same size pegs in a single line parallel to one edge, to reduce the number of set-up changes.

|
|
Then it was time to cut the mortises for the cross-rails that join the legs. These were cut on the mortising machine. By leaving a space between each square cut, slightly less than the width of the cutter, the hole remains true and I clean out the middle bit in a second pass. The mortises at the top in the picture on the right are used to form one side of the top rail bridle joints, as will be seen in later photos.

|
|
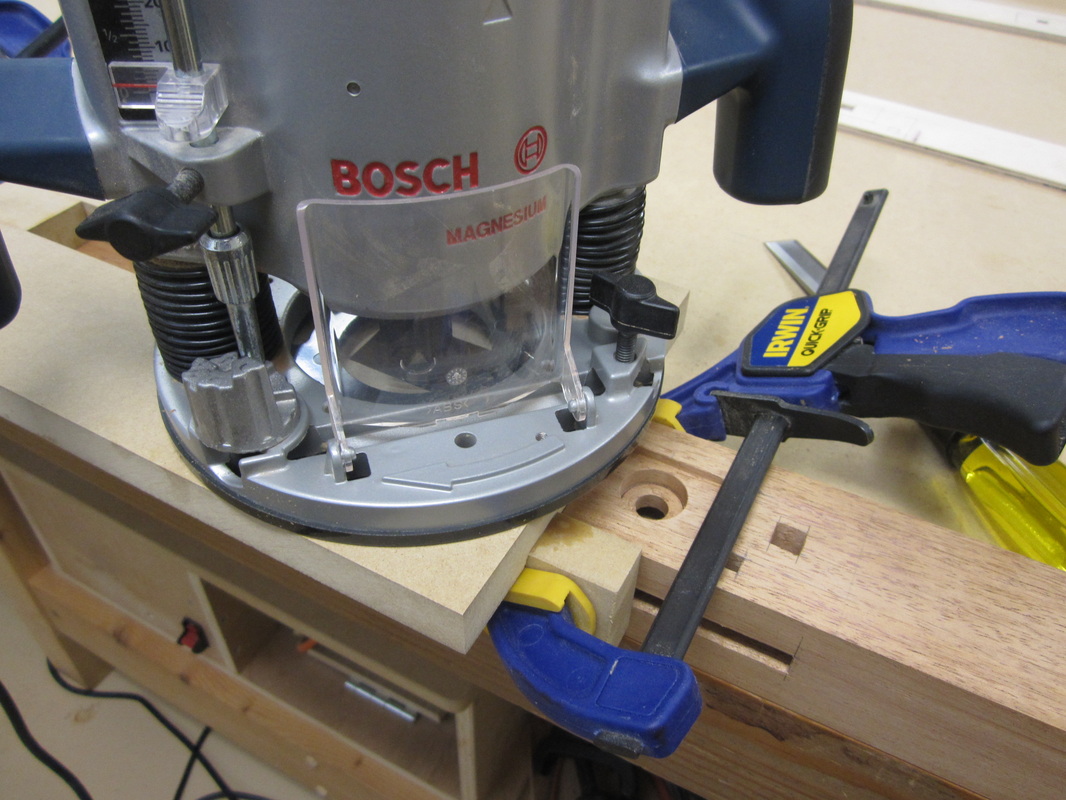
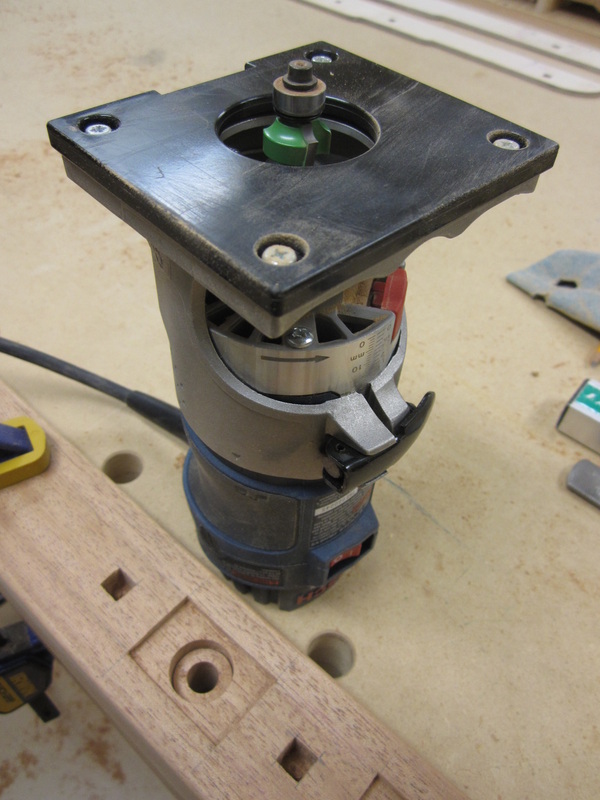
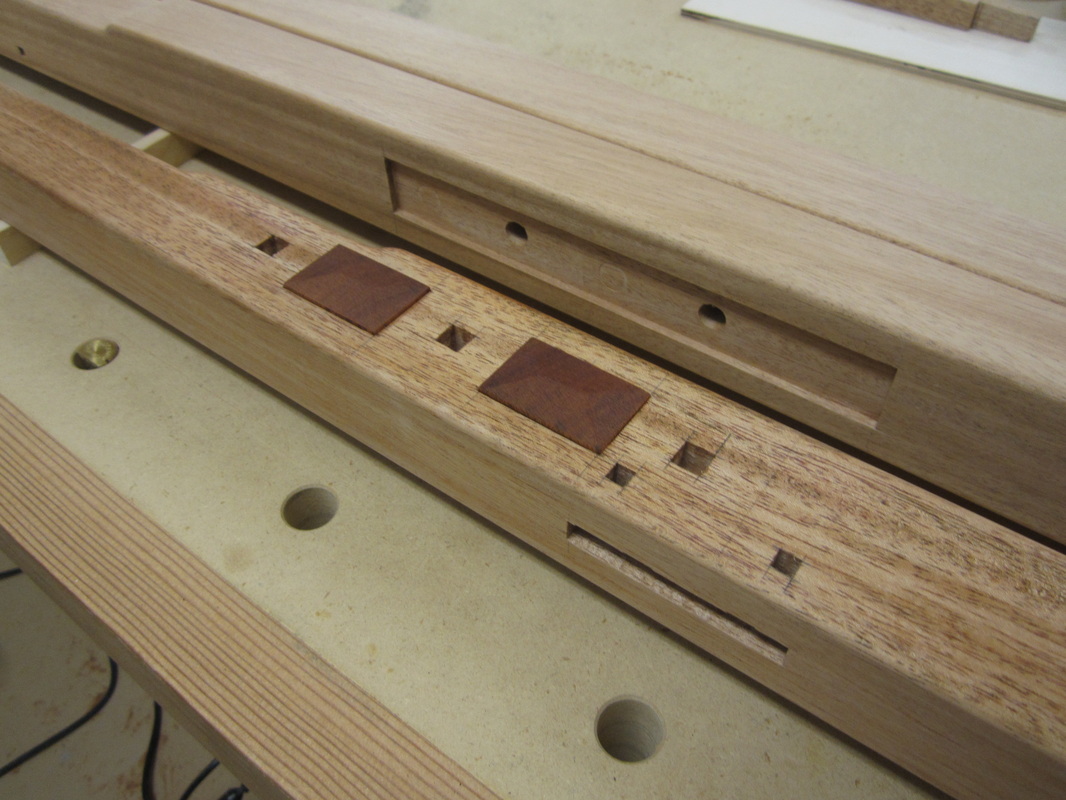
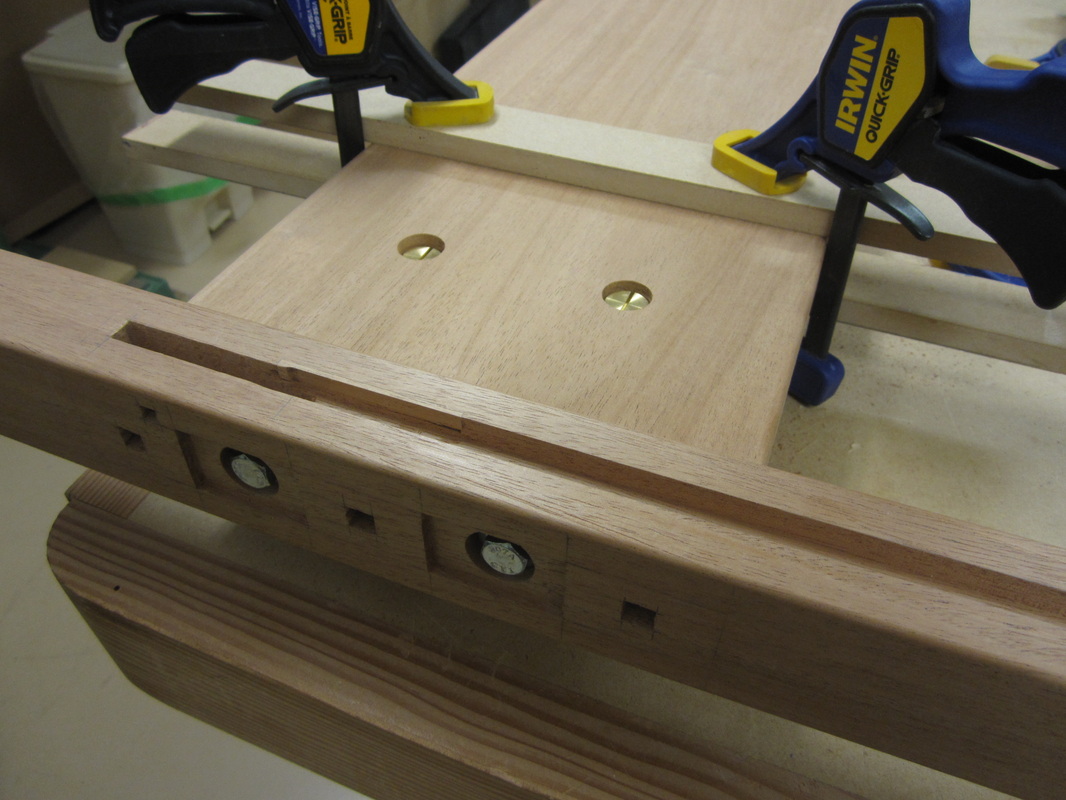
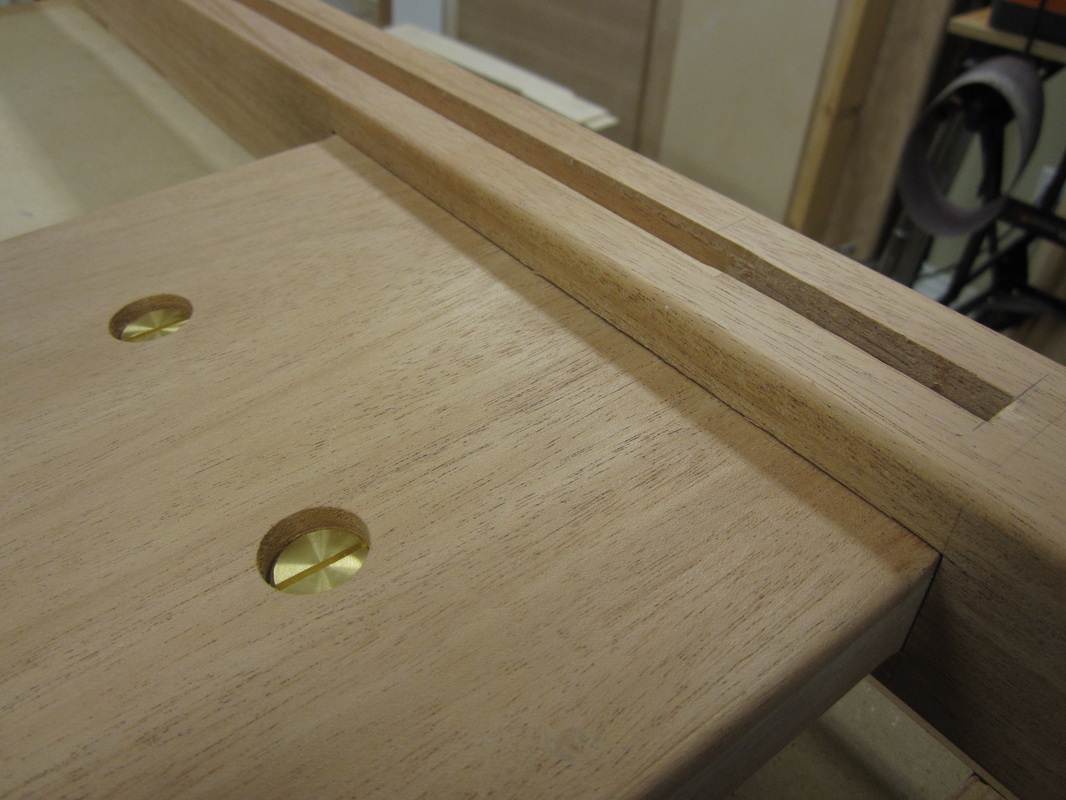
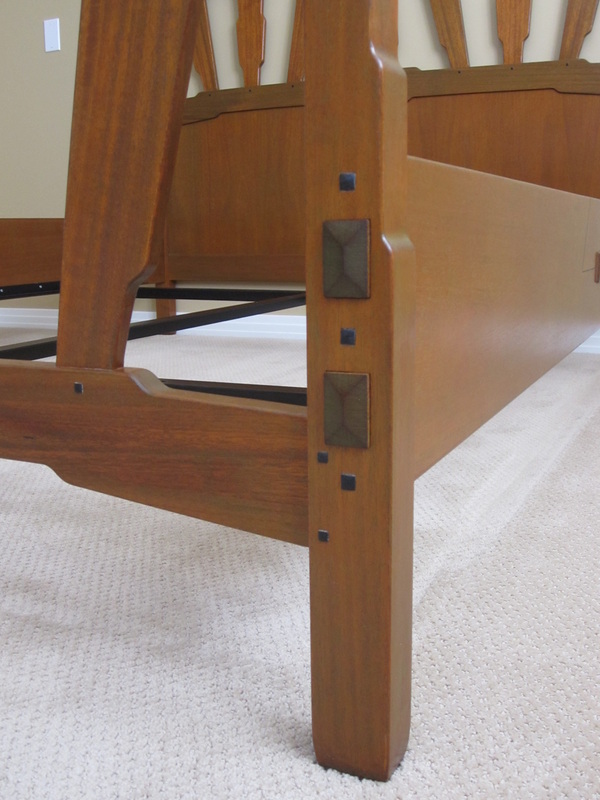
To conceal the bed-bolt hardware, I created a rectangular recess in the leg at each bolt to receive a small piece of shaped end-grain and give the appearance of a through-tenon from the side rails. The small pieces will be held in place using magnets glued to the wood. The recess is cut with a router and a pattern clamped in place.
|
|
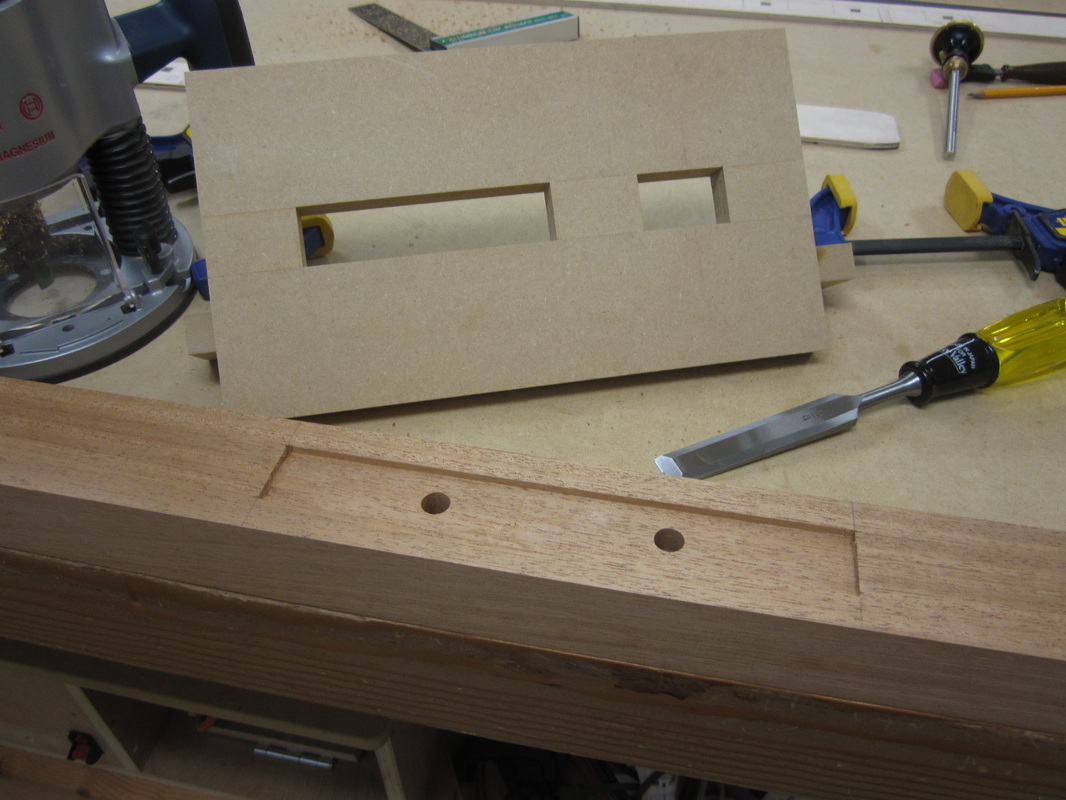
Similar recesses are cut in each leg at the opposite side where the bed-bolts pass through. These recesses receive the side rails, acting as housed tenons to keep the wide side rails from twisting. Slots are also cut in the headboard legs to receive the sides of the panels that sit between the two lower rails.
|
|
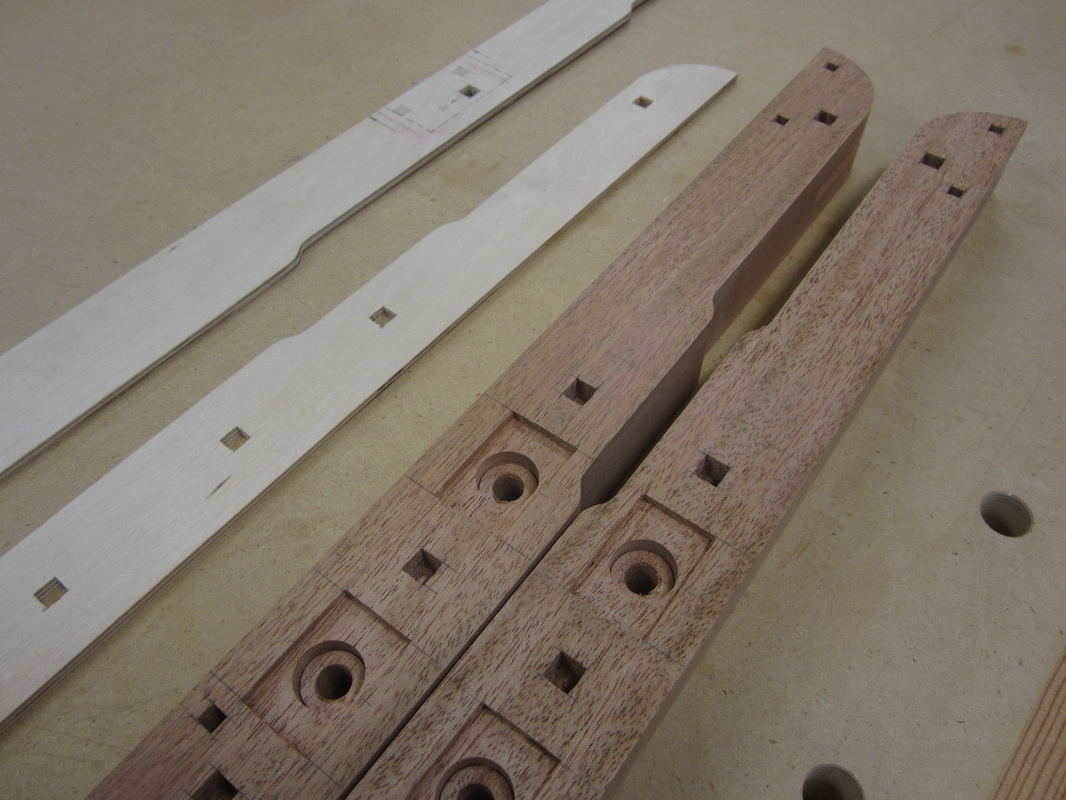
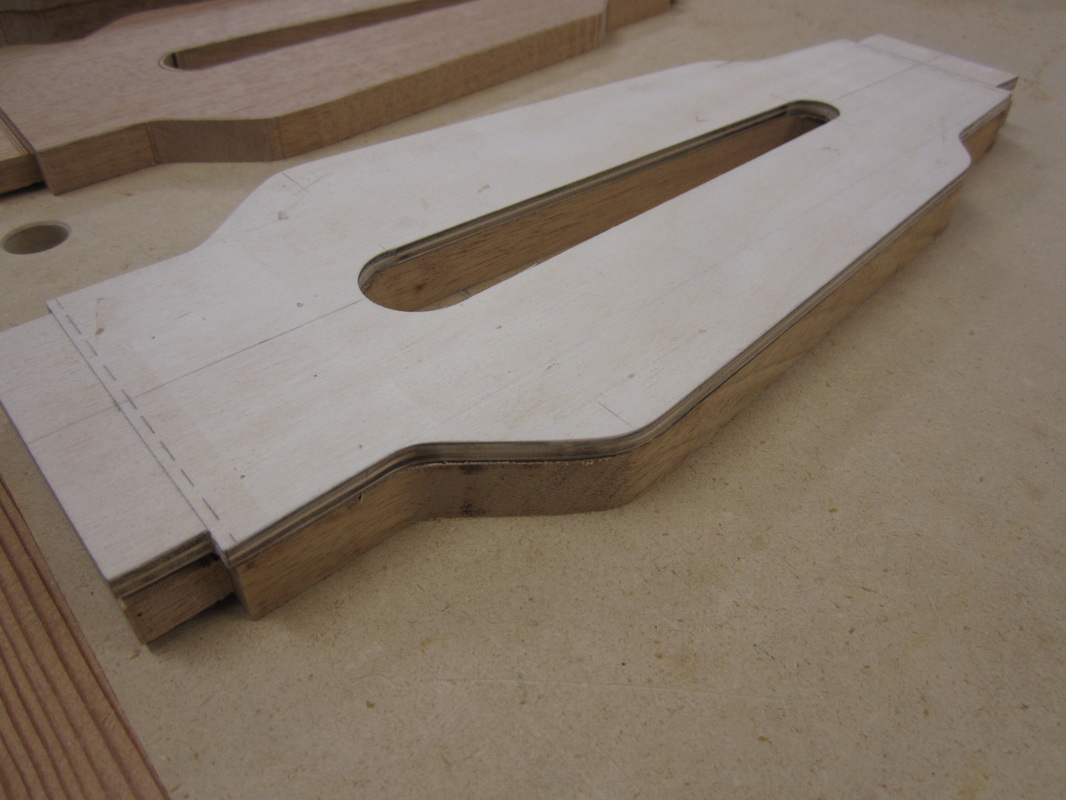
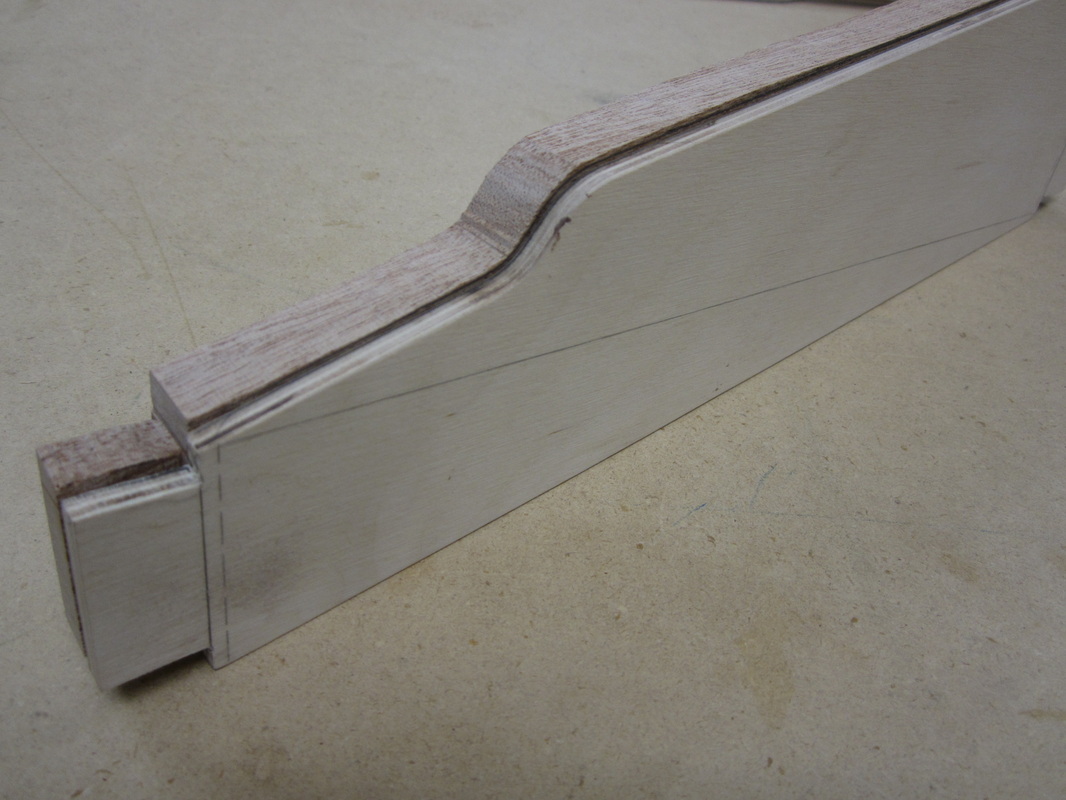
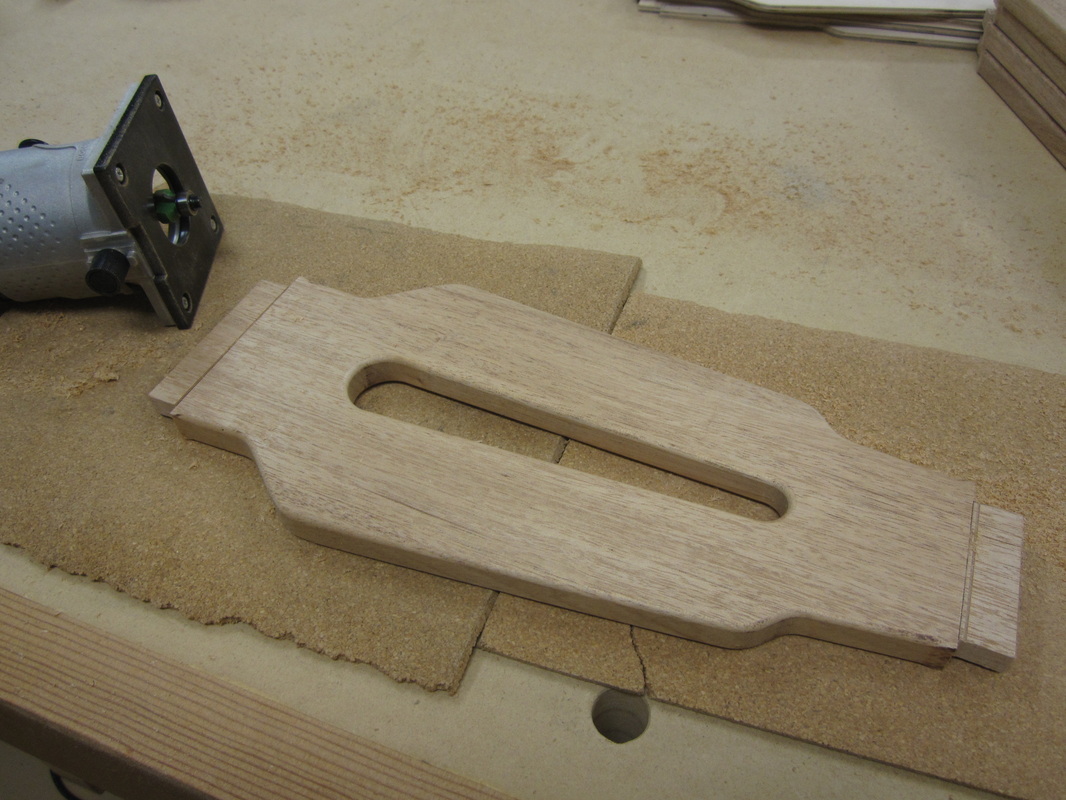
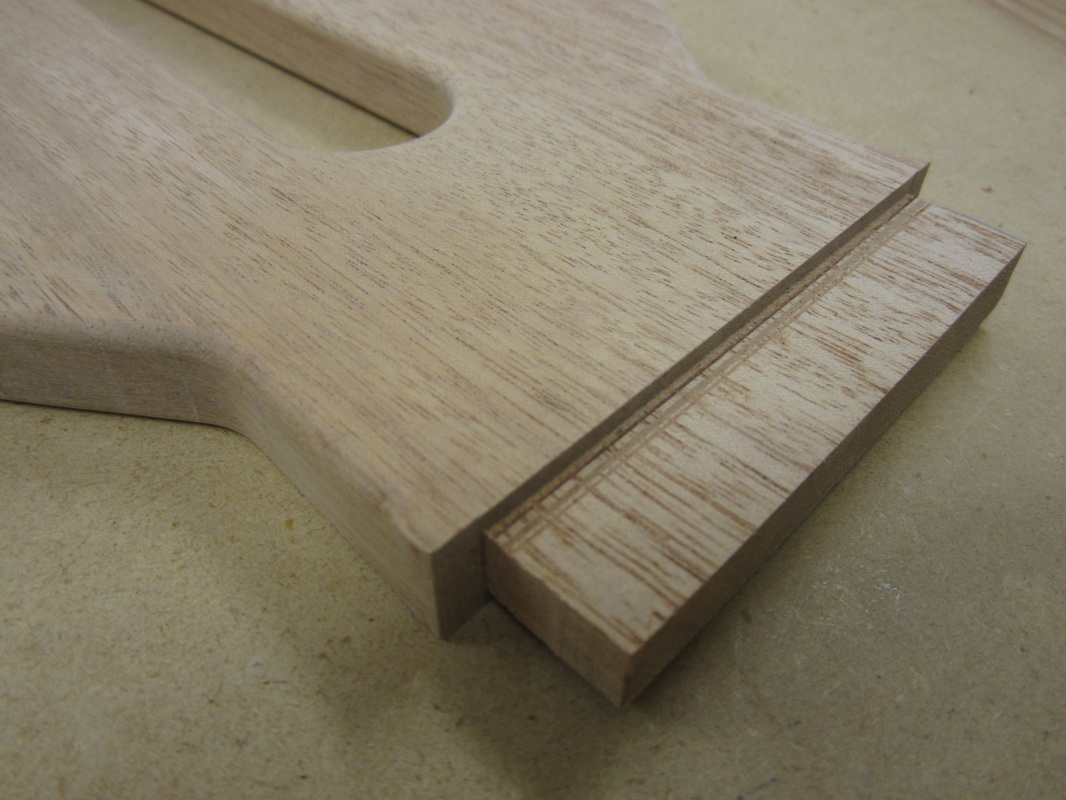
Finally, it is time to cut the cloud lift profile along the outside edge of each leg. The cut is roughed out first on the band-saw and then finished using the router and template, attached with double-sided adhesive tape. At this point, one half of the top bridle joint makes its appearance. It will be joined to the top rail using a functional spline, glued and pegged into both pieces. These are the only functional pegs in the bed, the others are purely decorative.
|
|
As I alluded to earlier, the legs – side to side - are really quite different when you compare them with all the finished cuts made. The triangle marked on the bottom proved essential to avoid mistakes.
|
|
The legs are curved at the bottom. Cutting these curves with a pattern bit in the router table really only works for two of the faces since the depth of the bit I have is not sufficient for the deeper face and the pattern. The other two are curved at the belt sander. Then the 1/8” round-over bit is used in my palm router to ease all the corners. The router works well for the square edges but I used a sanding block to round over the curved bottoms.

|
|

|
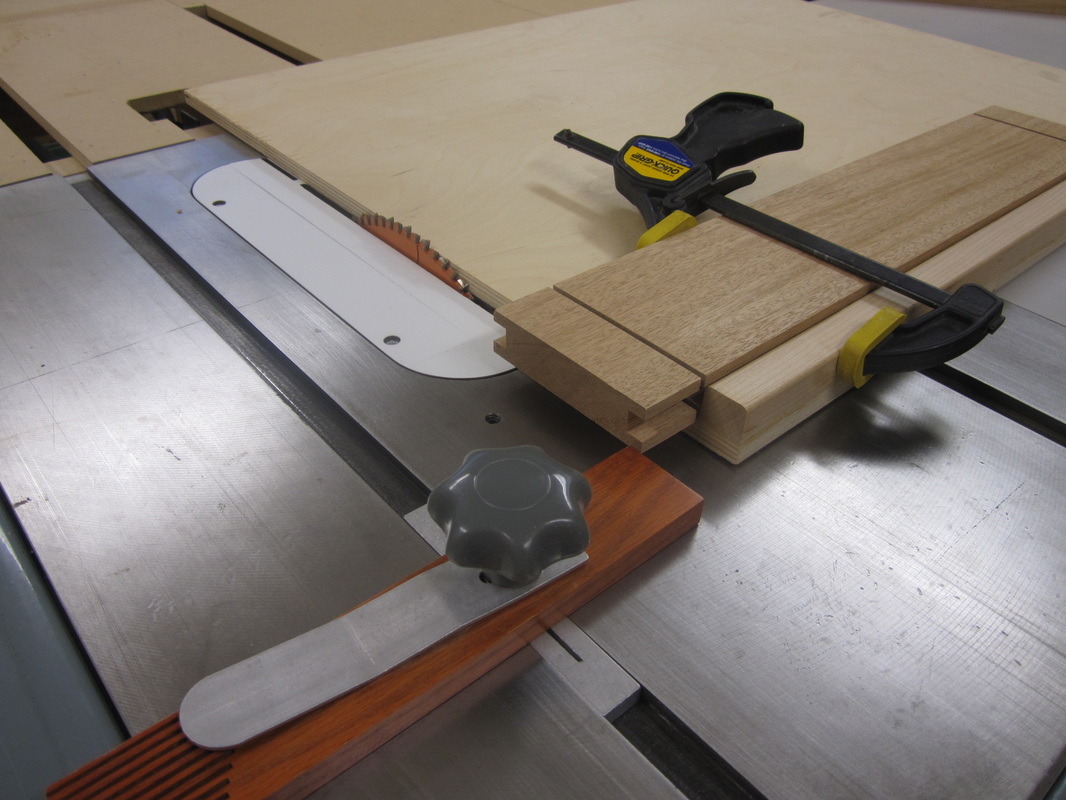
The grooves in the bottom rail of the headboard and the vertical divider that separated the two panels were cut at the table saw, as well as the shoulders of the tenons on the bottom and lower rails of both headboard and footboard. The tenons and the other halves of the bridle joints in the top rails were carefully cut using my tenoning jig.
|

|
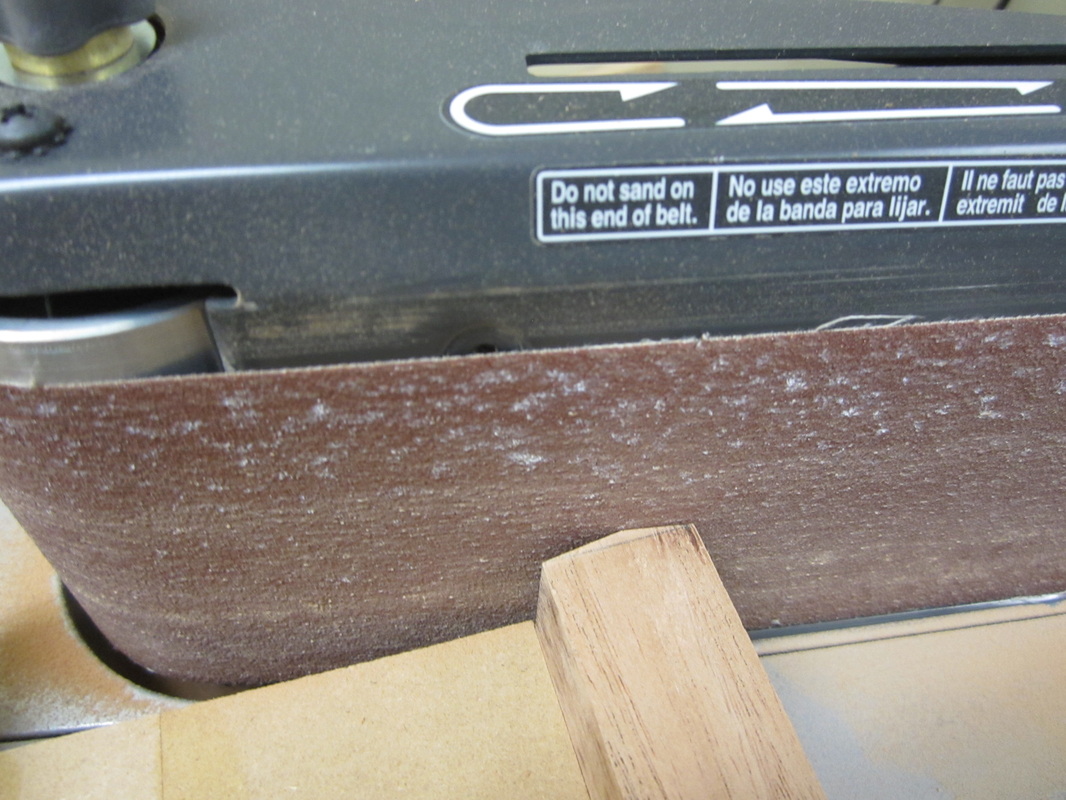
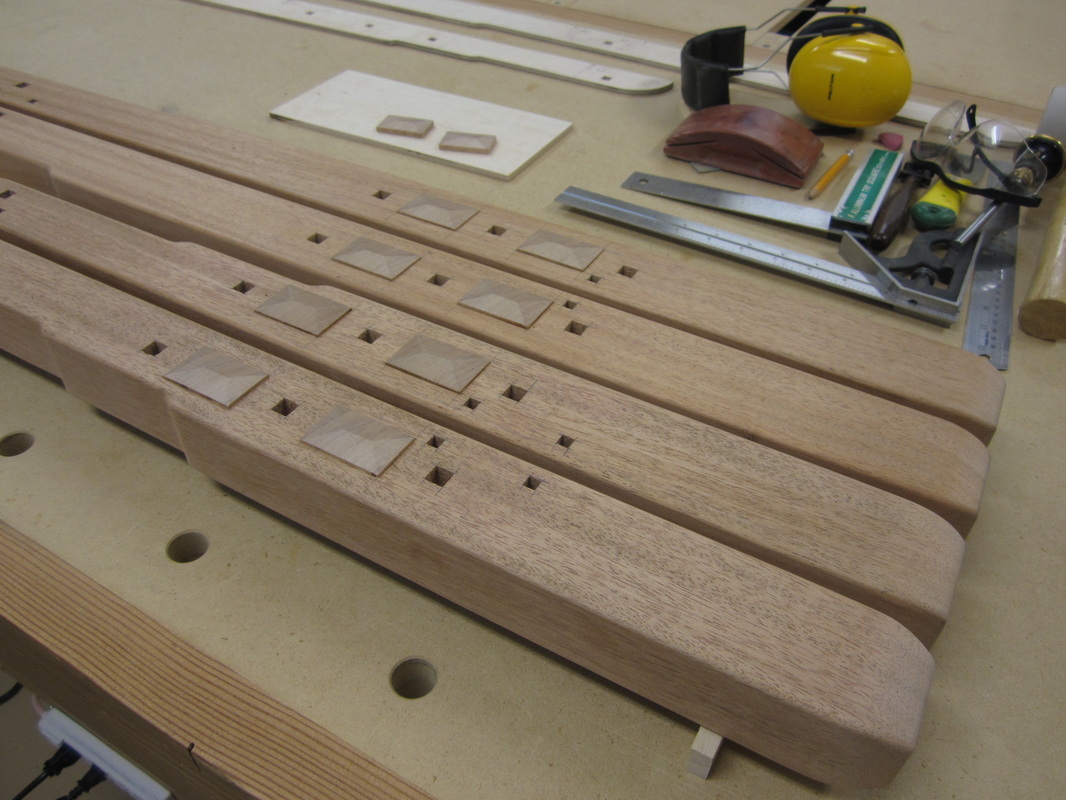
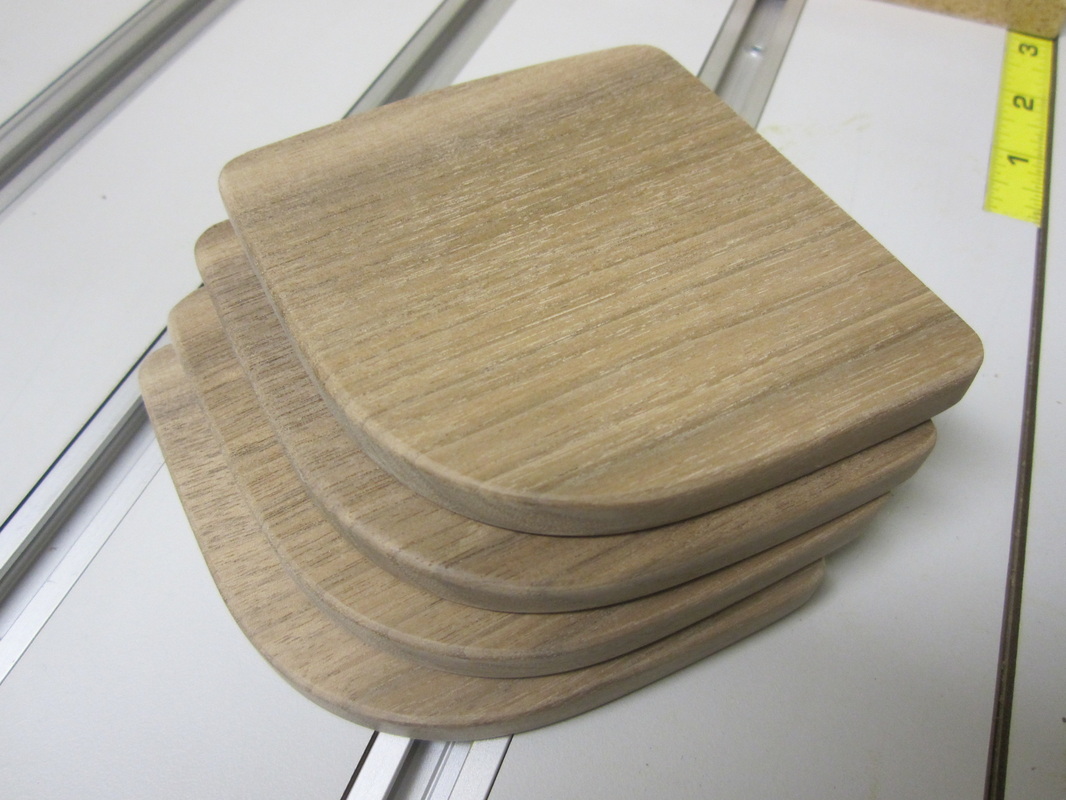
Next I made the decorative covers for the bed-bolts. I set up a guide at an angle to the belt of my sander and guided a piece of material sized to match the recesses I cut in the legs. This allowed me to sand the end-grain down to a line that resulted in a gentle pyramid shape on the top. Then I cut the piece off to required length and repeated the process for the others.
|
|
After finishing all the profiles and cutting to length I set them into the legs and wiped on some mineral spirits to see how the end result might look with stain and finish applied.

|
|
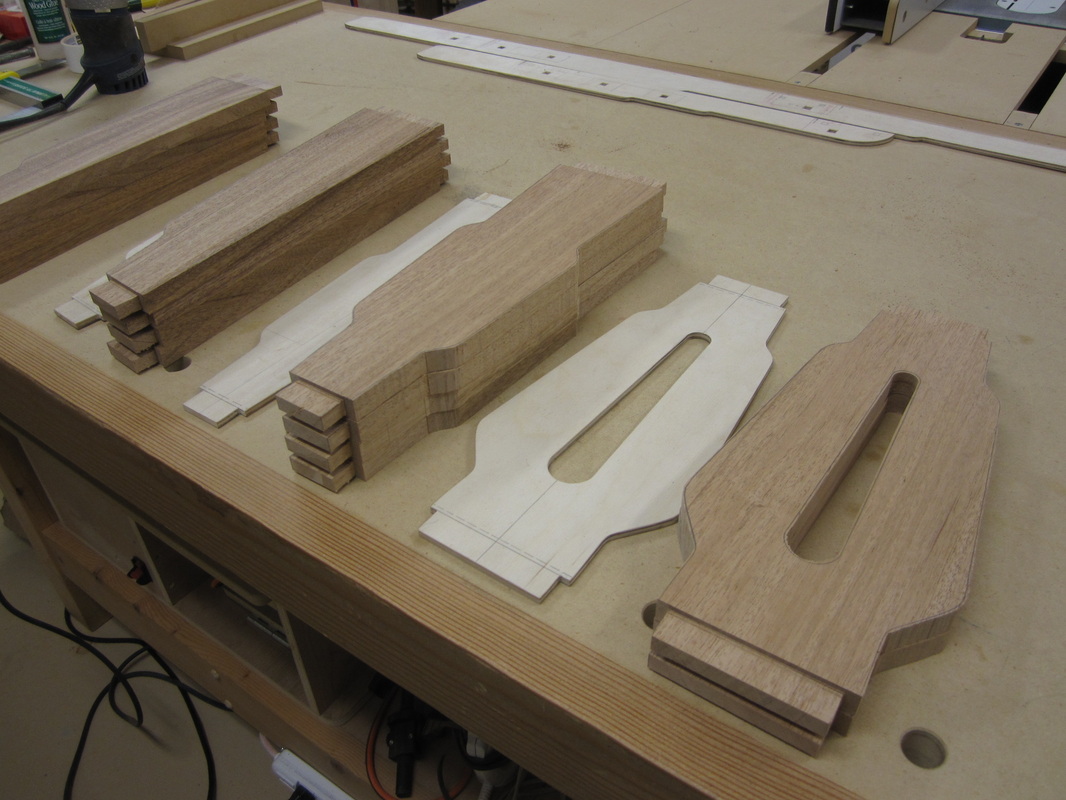
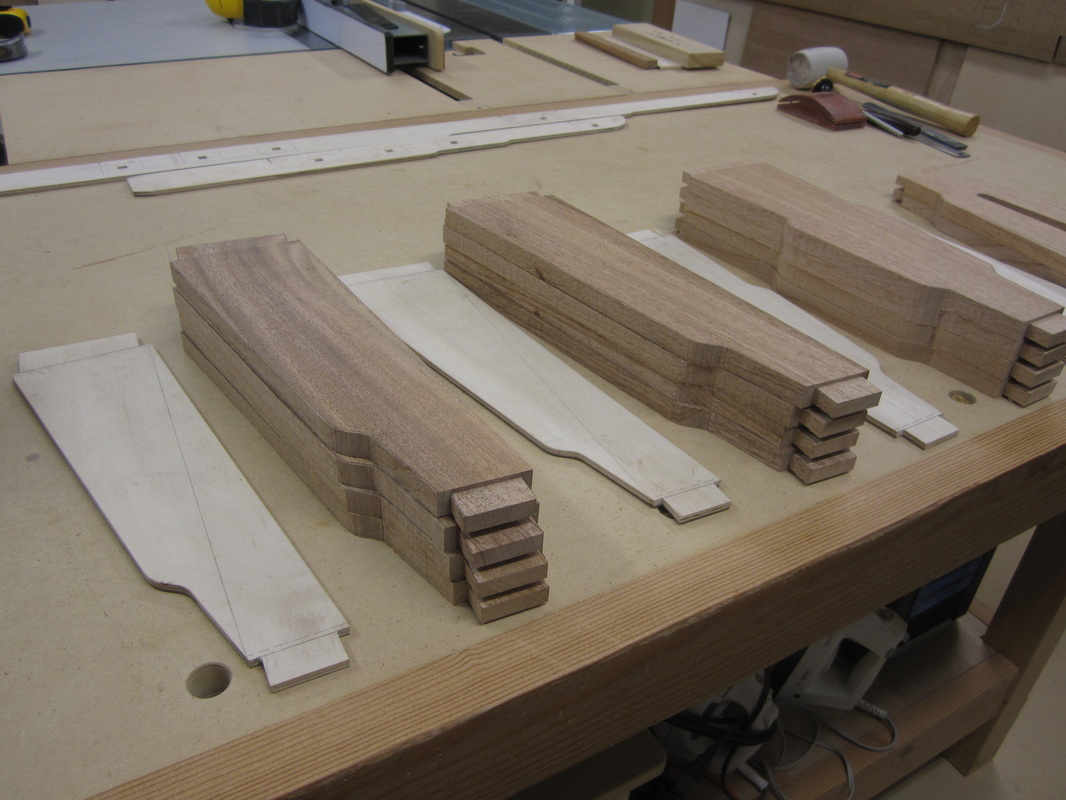
Next was the process of selecting the best grain direction and pleasing appearance for the slats between top and lower rails of the headboard and footboard. I marked around my templates to identify all the pieces and rough cut them using the band-saw.

|

|
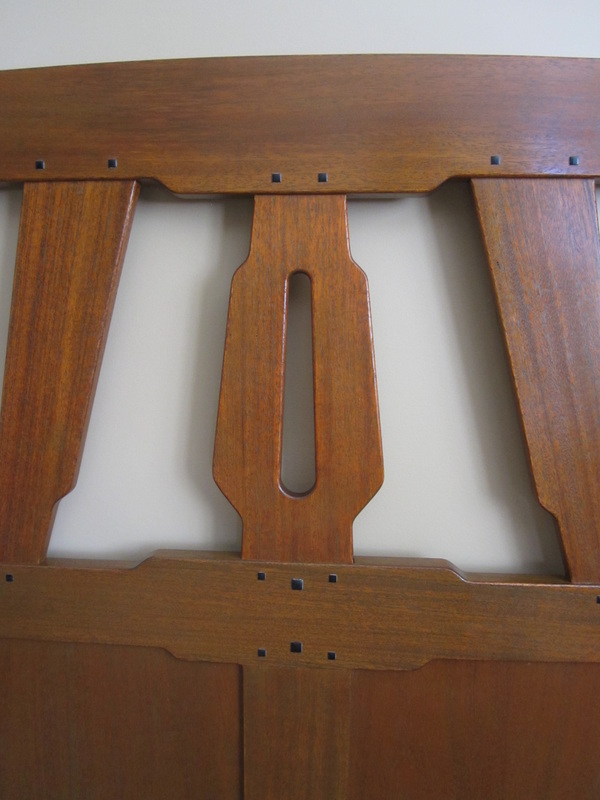
There are four different slat profiles used in the design, each with the Greene & Greene cloud lift incorporated. The centre slat profile is similar to one used in a hall seat designed for the Blacker house. All the slats have parallel ends except the one shown in the left pile, where the top edge meets a part of the top rail that angles down slightly. After the ends are cut to the proper dimension and shape, the tenon shoulders and faces can be cut parallel.
|
|
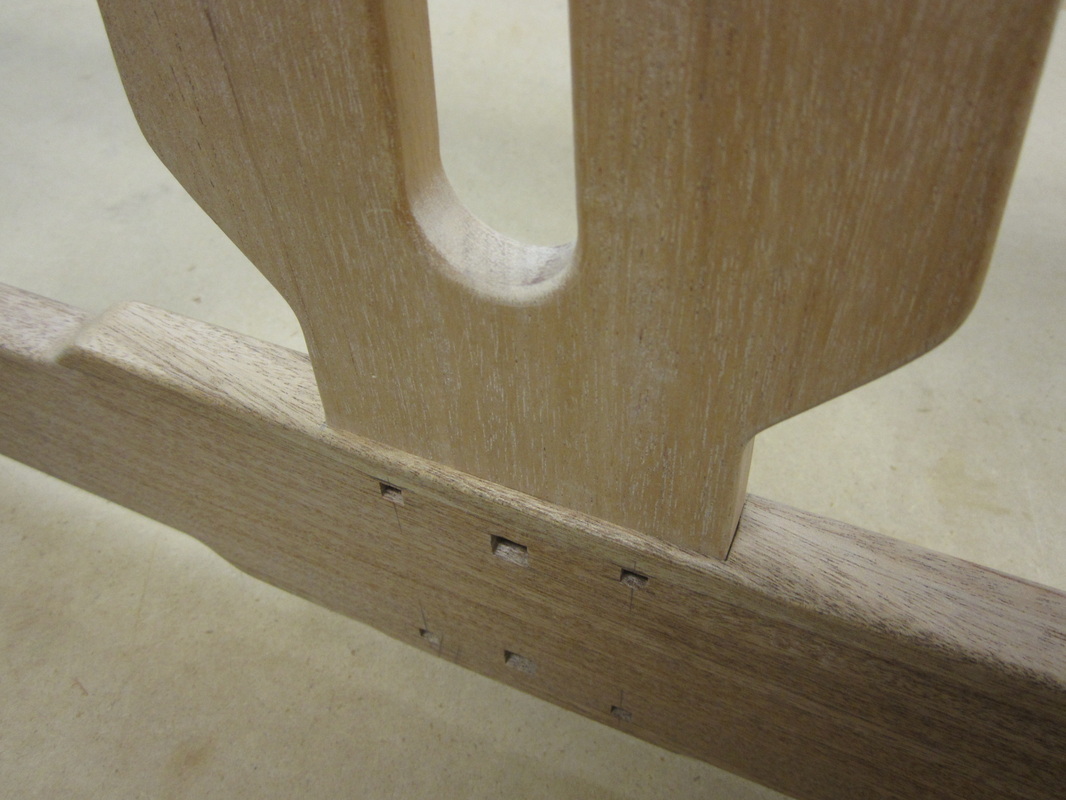
The slats are then cut to match the templates. The dashed line on the templates represents the intersection of the corresponding rail and the extended part forms the “housed” tenon.
|
|
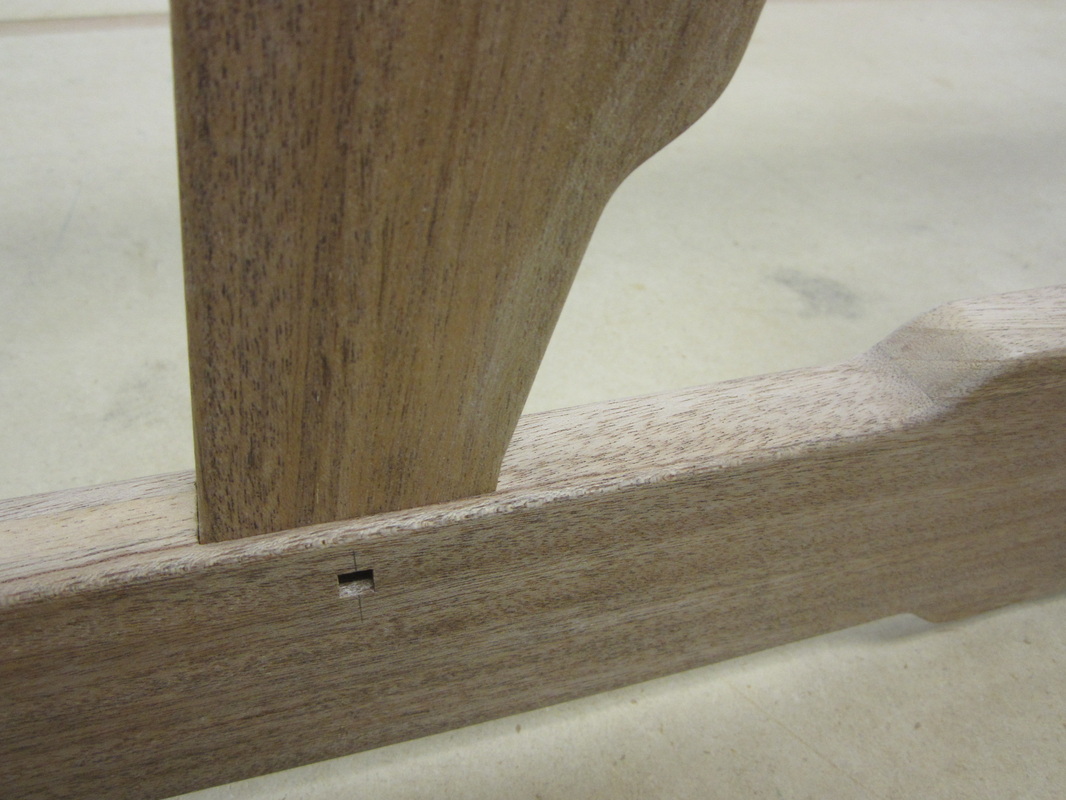
The edges of the slats are then rounded over with the router leaving the ends of each edge square where they enter the corresponding rail recess.
|
|
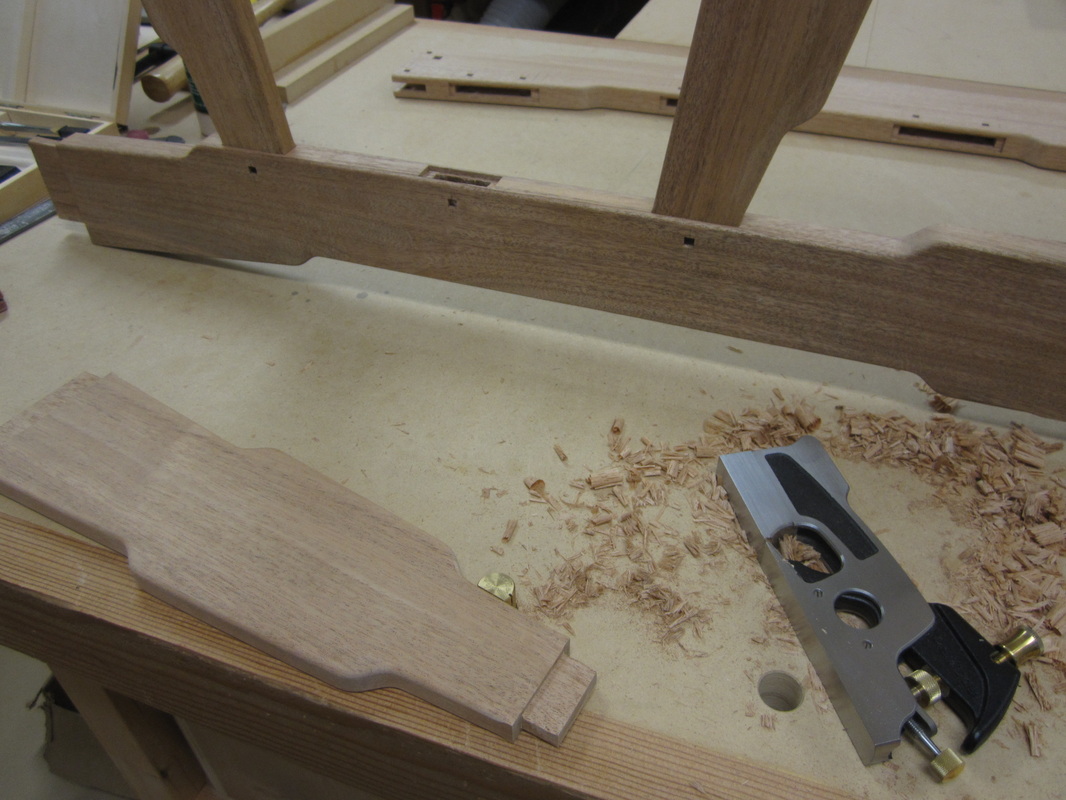
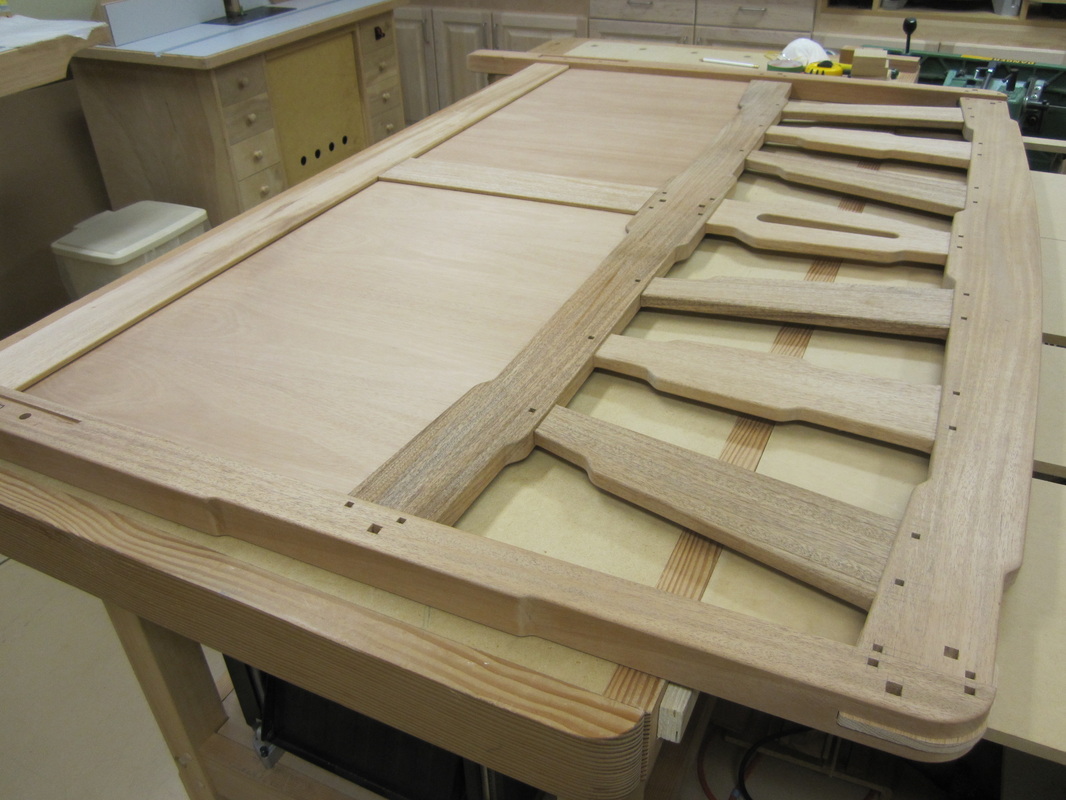
I used my shoulder plane to fine-tune the tenons to fit into the corresponding mortises in the rails. Then it was time to dry-fit the assemblies together and check the overall joinery. So far – so good!
|
|
|
|
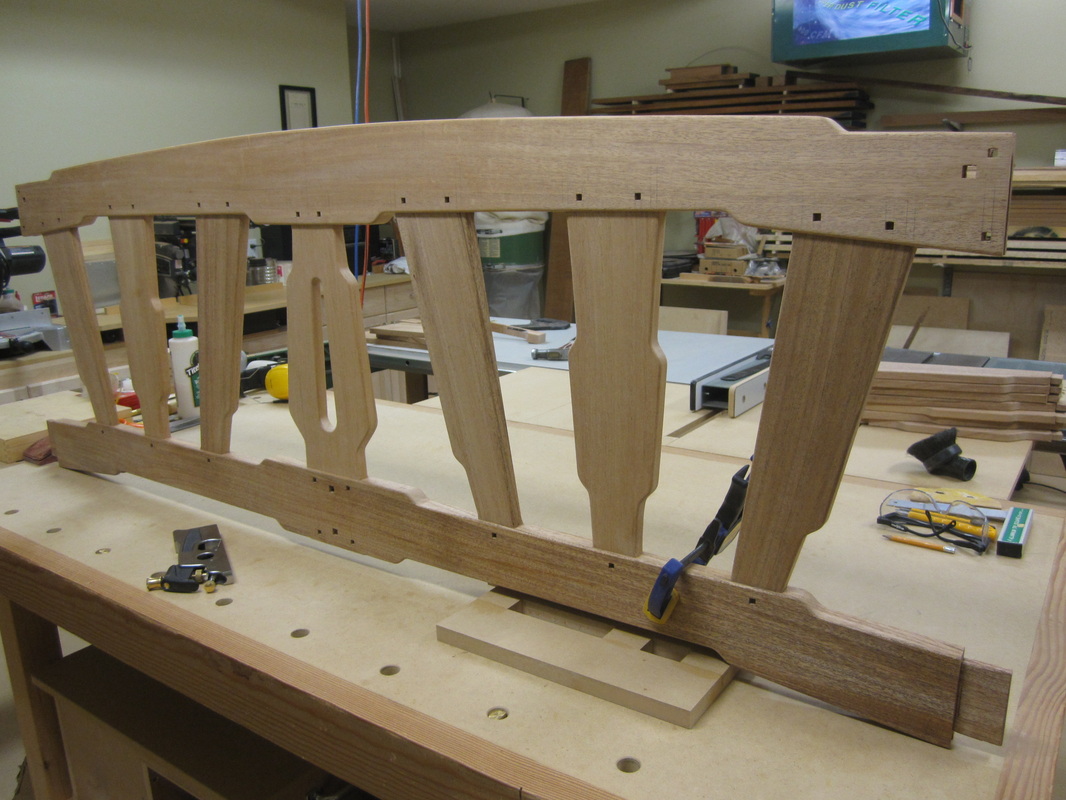
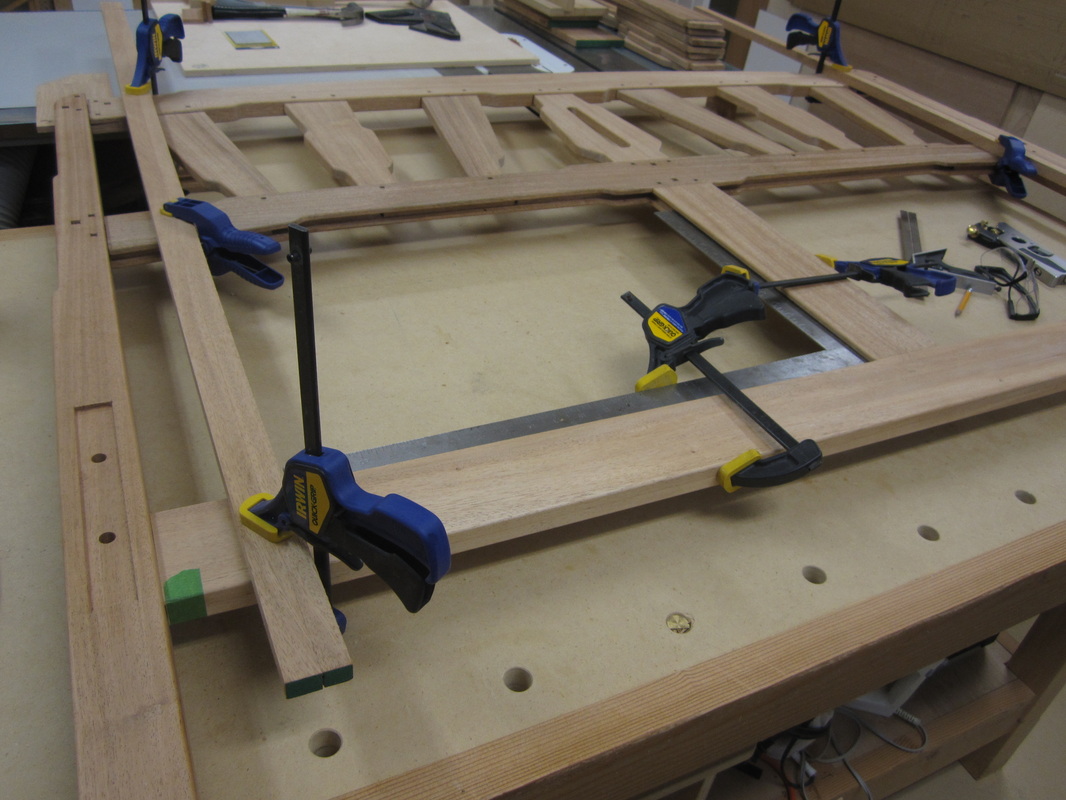
When I was satisfied with the fit of the slats, I dry assembled the legs as well as the bottom rail and vertical divider of the headboard. Temporary splines were used to hold the bridle joint between the top rails and legs.
|
|
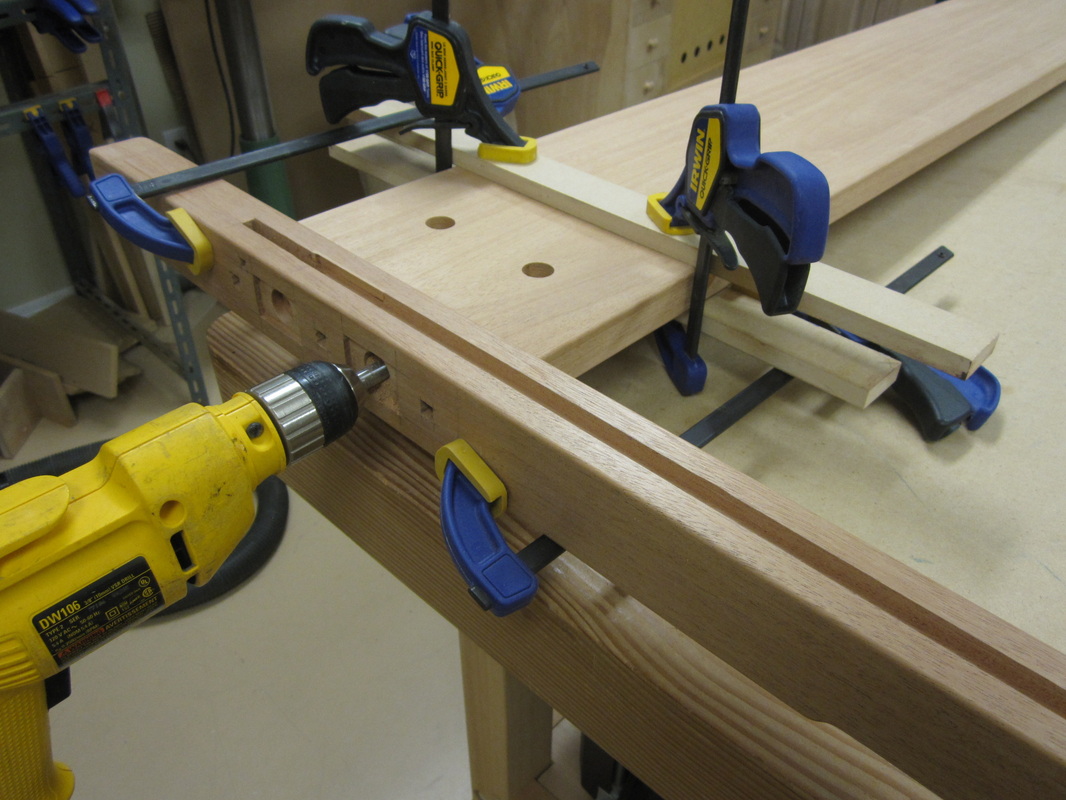
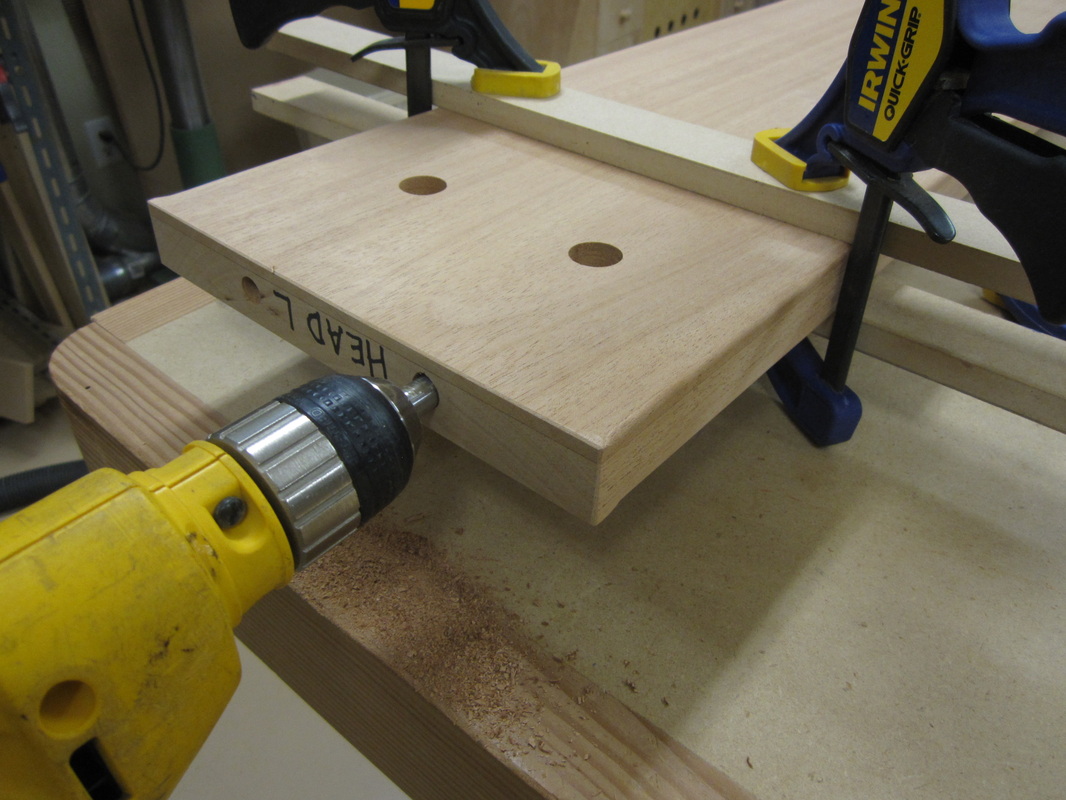
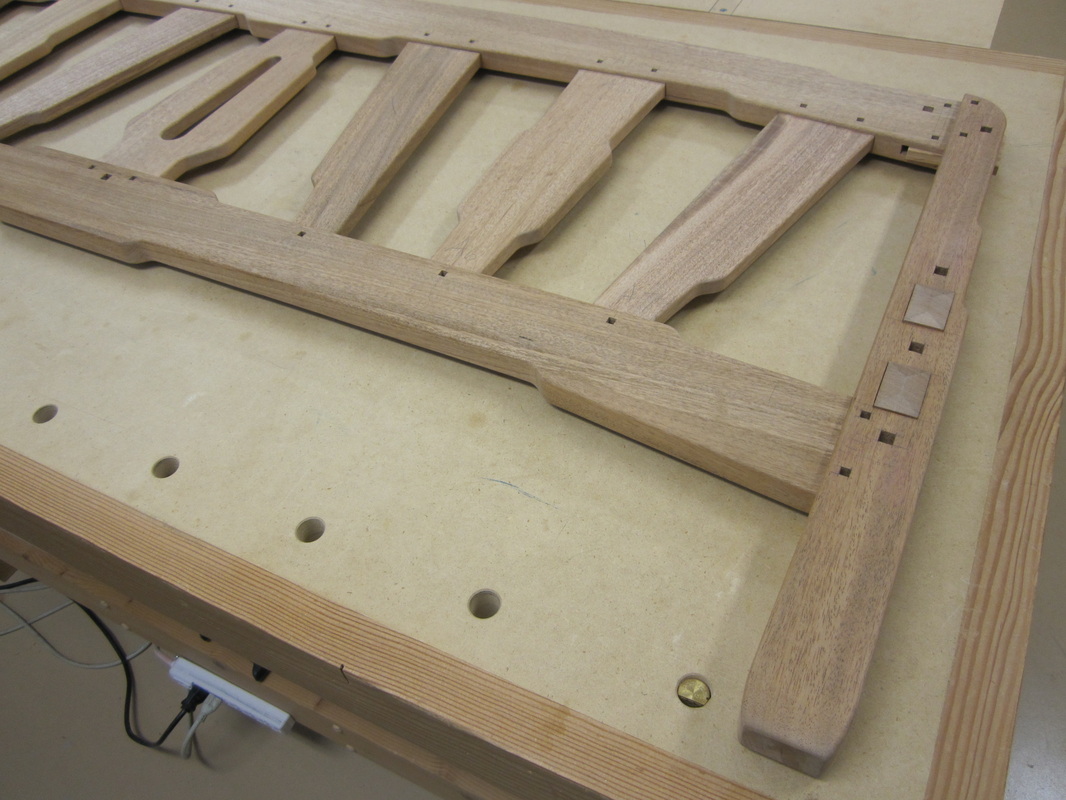
Next, I clamped each leg to its corresponding end of the side rails and drilled part-way through to each of the recesses for the bed-bolt barrel nuts. My drill bit was not long enough to go all the way through so I removed the leg and completed the hole, extending it a little beyond the barrel nut recess to ensure it would not bottom out when tightening later.
|
|
Then I tried the hardware, it fits and works perfectly!
|
|
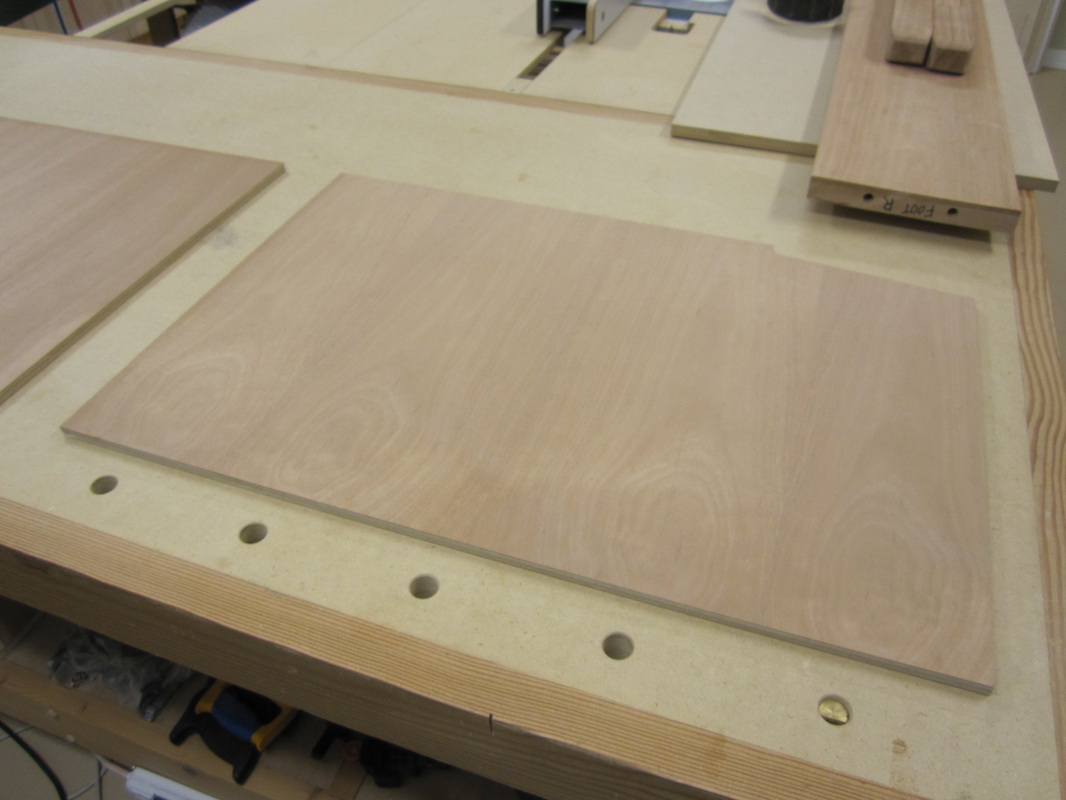
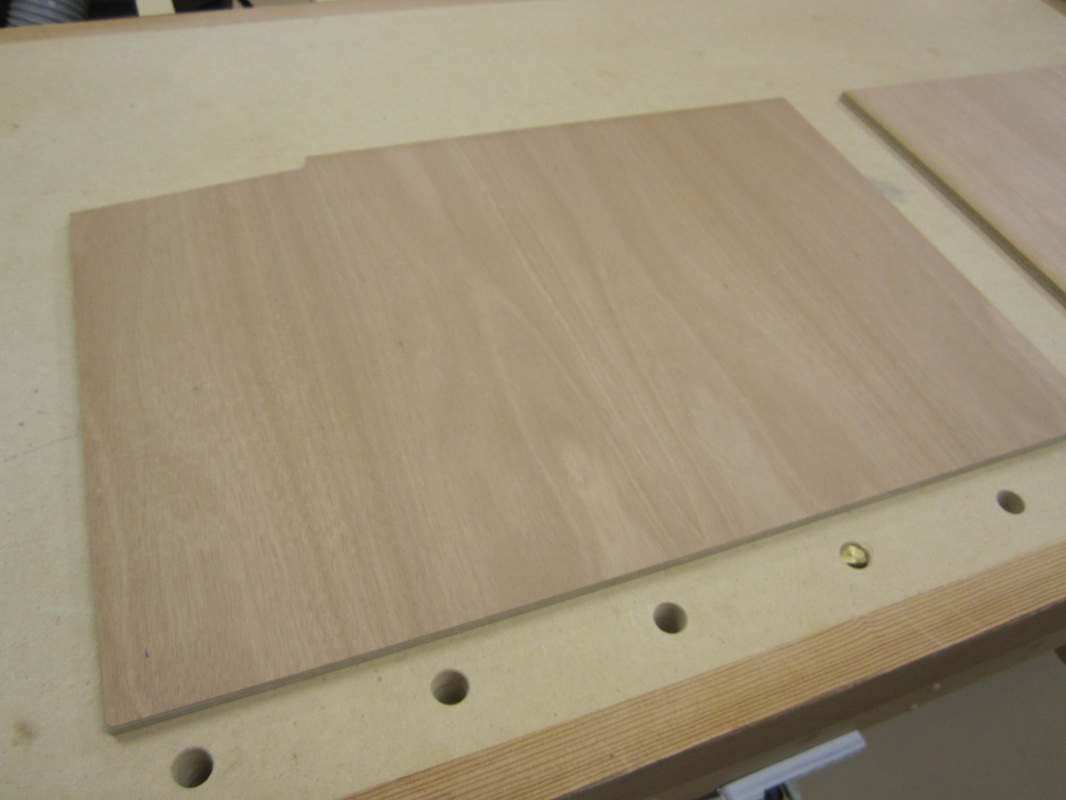
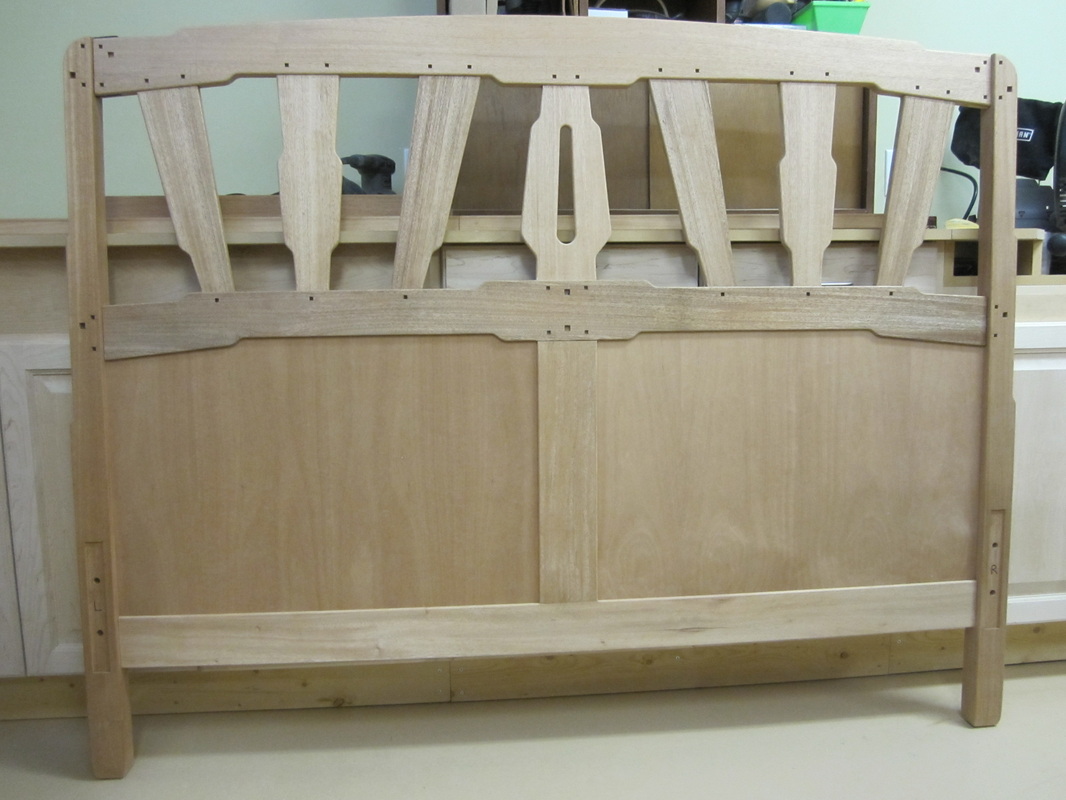
Next, I cut and dry-fitted the panels for the headboard. A little secret not immediately obvious is that each panel is actually two pieces of plywood spot-glued back to back so that there are good finished faces on both sides – just in case anyone wants to tear the bed away from the wall and look behind it, or if it ever ends up in a museum! The panels are spot-glued into in the slots cut in the legs and the adjacent rails and divider.
|
|
|
|
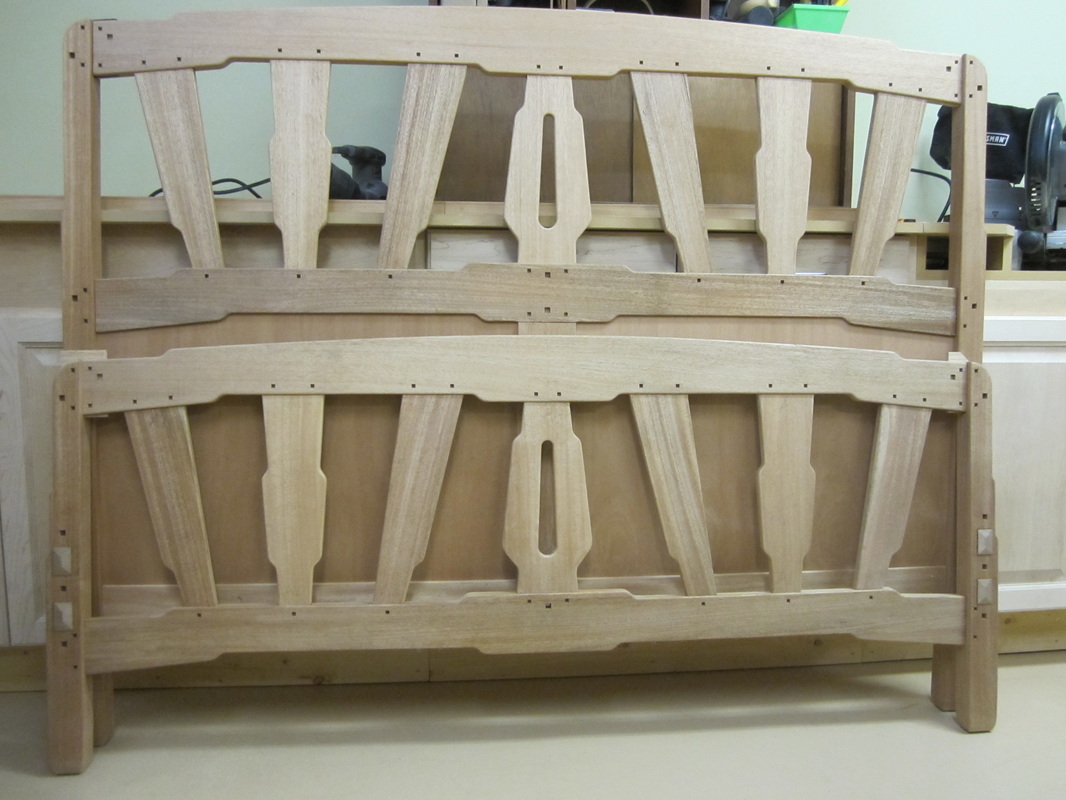
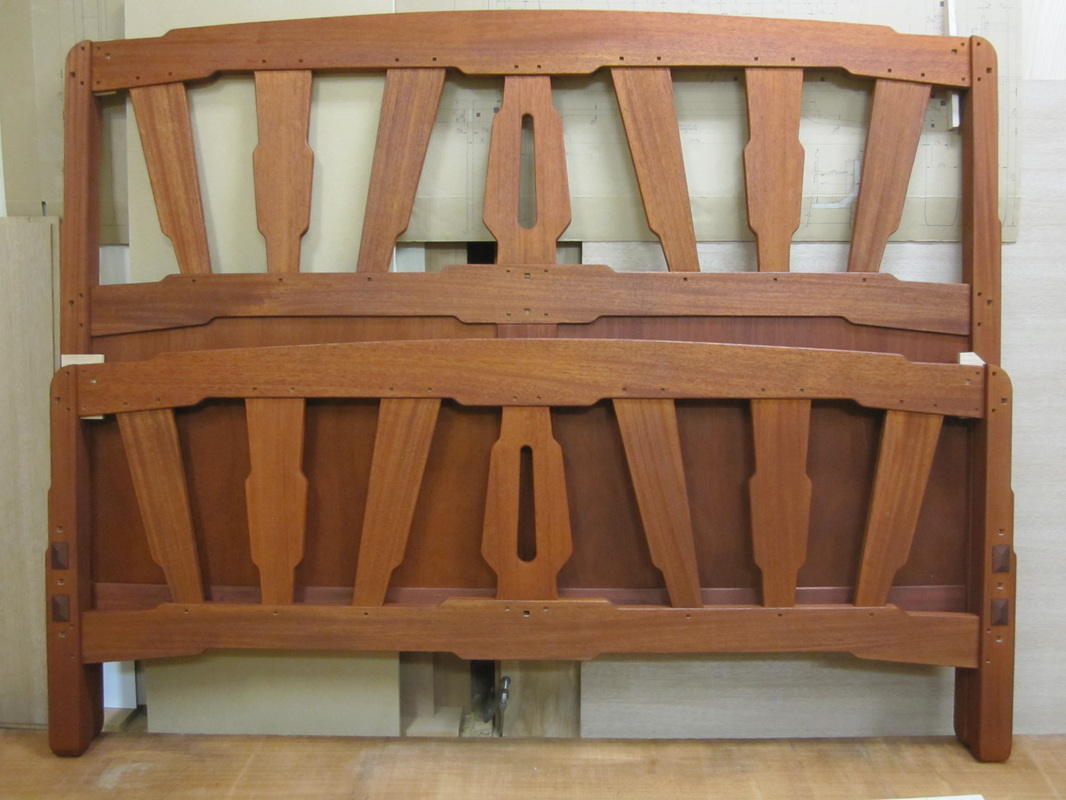
I dry-assembled the foot board and propped them both up against my cabinets. Finally, I can see roughly how the finished bed will look, but there is still a lot more work to be done - this is a Greene & Greene inspired piece after all!
|
|
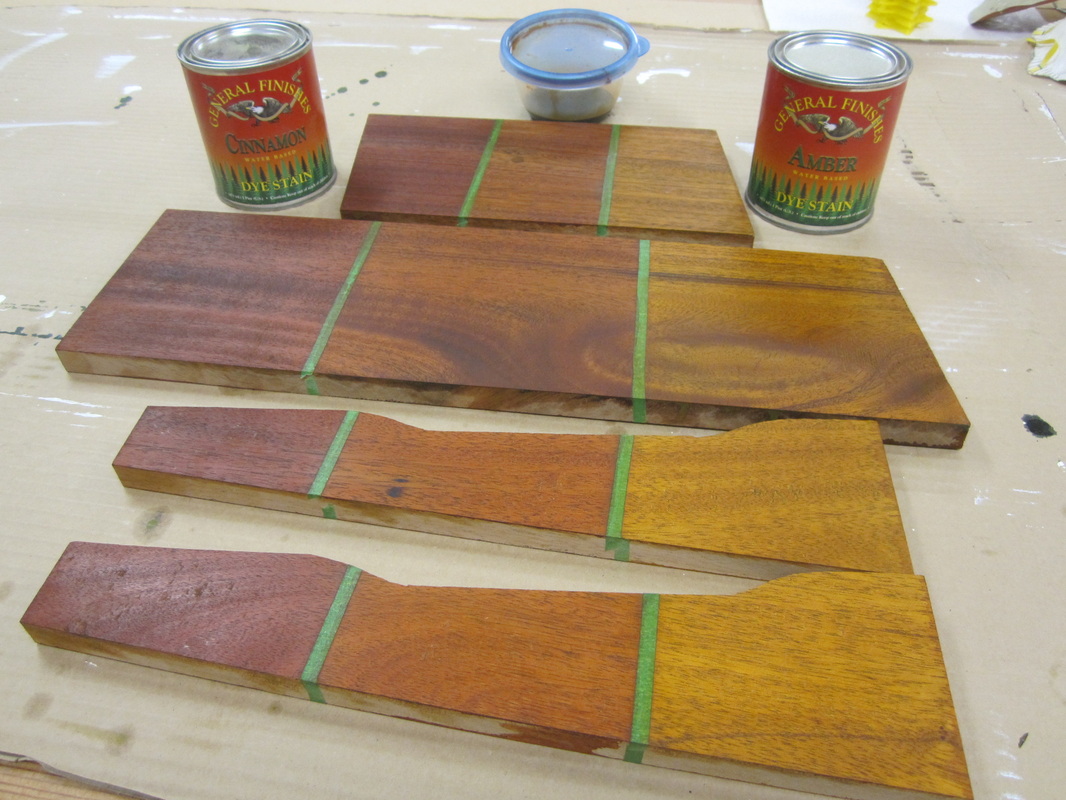
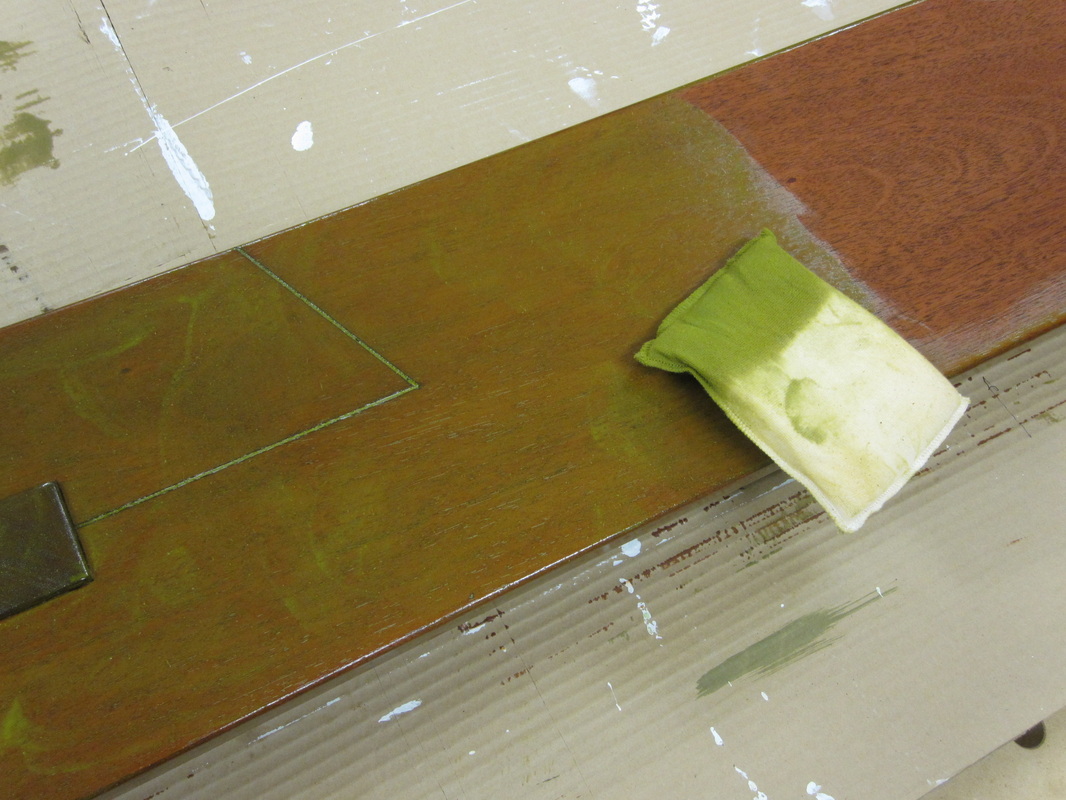
I decided it would be best to pre-finish the pieces before assembly since I didn't want to have glue squeeze-out issues that would spoil the finish. I experimented with a few water based dyes, and finally decided on a 50%/50% mixture of Amber and Cinnamon dyes made by General Finishes. I applied these to sample boards that had gone through the same sanding sequences, 120 to 180 and finally 220 grit. The water based dye raises the grain slightly so on the final pieces I pre-raised the grain with a damp cloth and re-sanded using 220 grit. Final choice was the middle colour on the samples. Then I mixed up the “bilious” green mixture of boiled linseed oil and artists colours using a recipe I found in one of the books I listed earlier. I rubbed this into the grain of the wood after the dye dried and let it sit for a while. Then I wiped off the residual across the grain leaving some traces of green in the pores. Since green is the direct contrast to red on the colour wheel, this dulls down the red. The green remaining in the pores gives a sparkle to the wood, especially after the finish is applied.
|

|
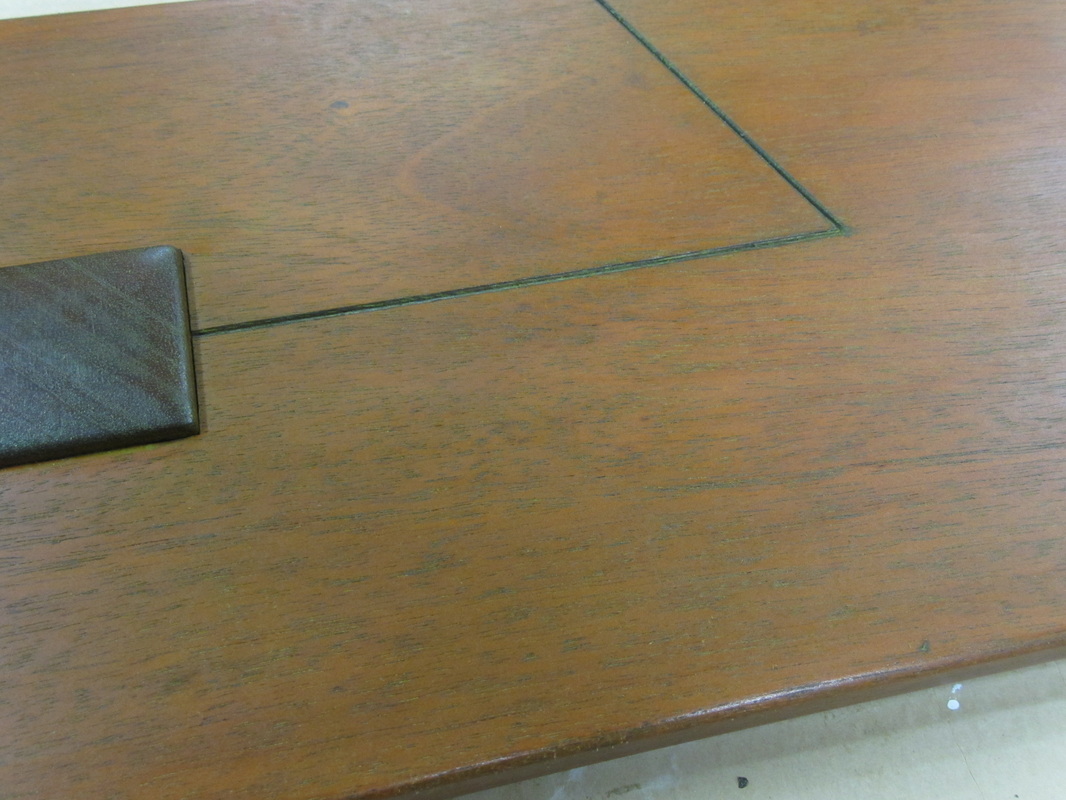
I went ahead and applied this finish process to the side rails figuring that, if I didn't like it, I could remove it easier from them. The result was quite pleasing to me, adding a patina that makes it look quite old, so this set the stage for finishing the entire bedroom suite.
|
|
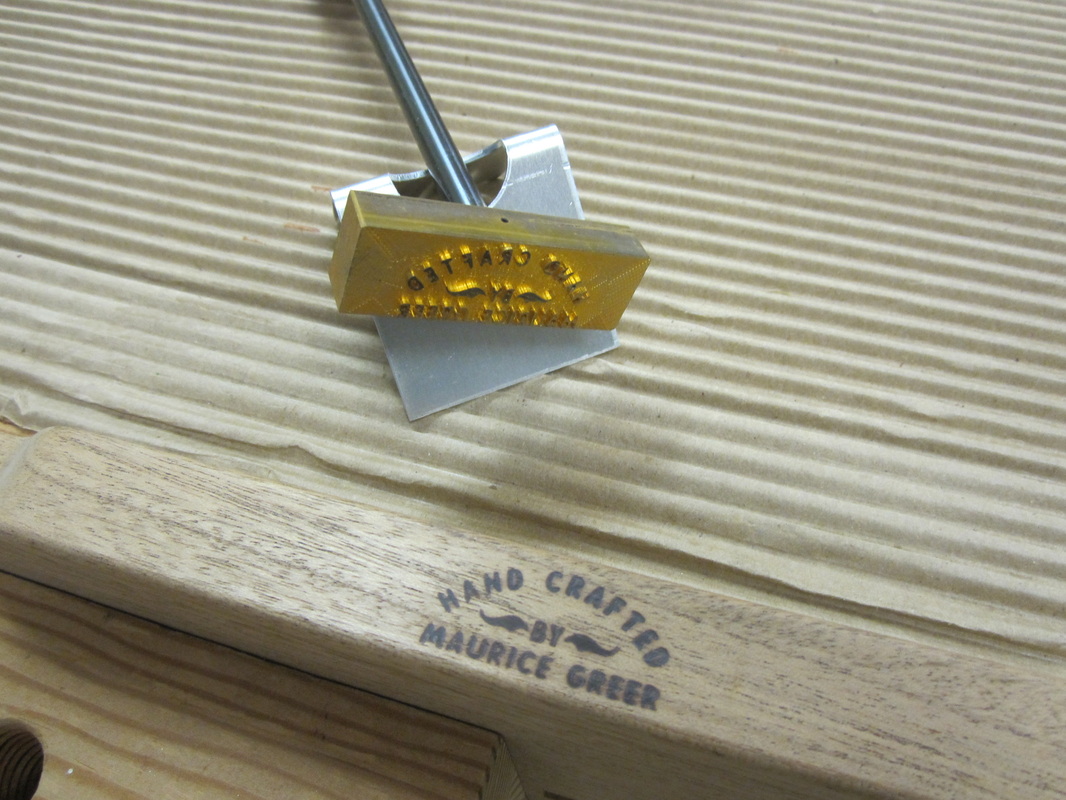
I added my maker’s brand to the lower rails of the headboard and footboard, applied the finish to the other parts and dry-assembled again to see how it looked.
|
|
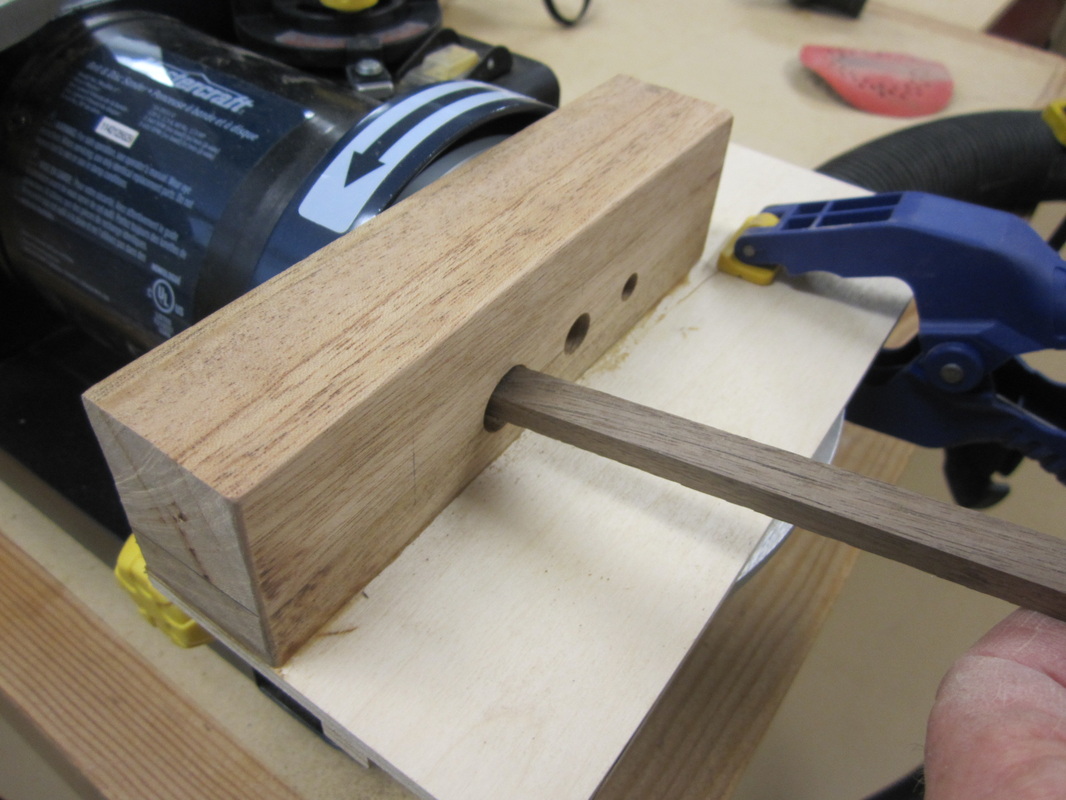
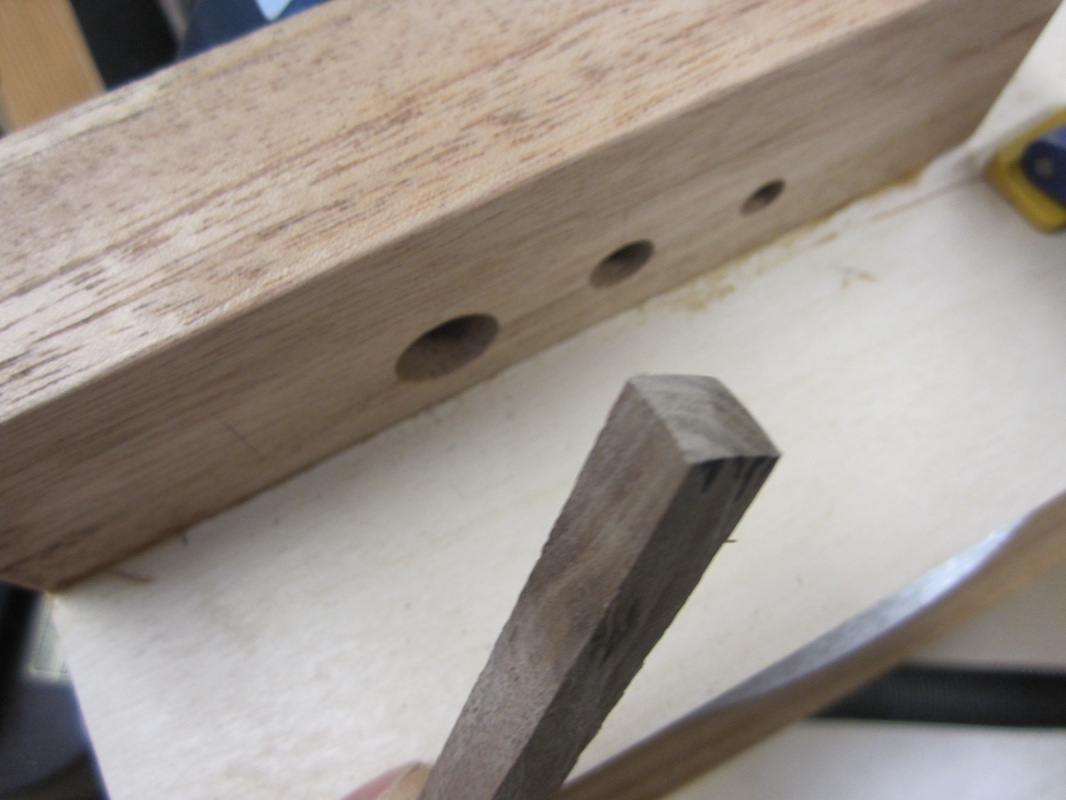
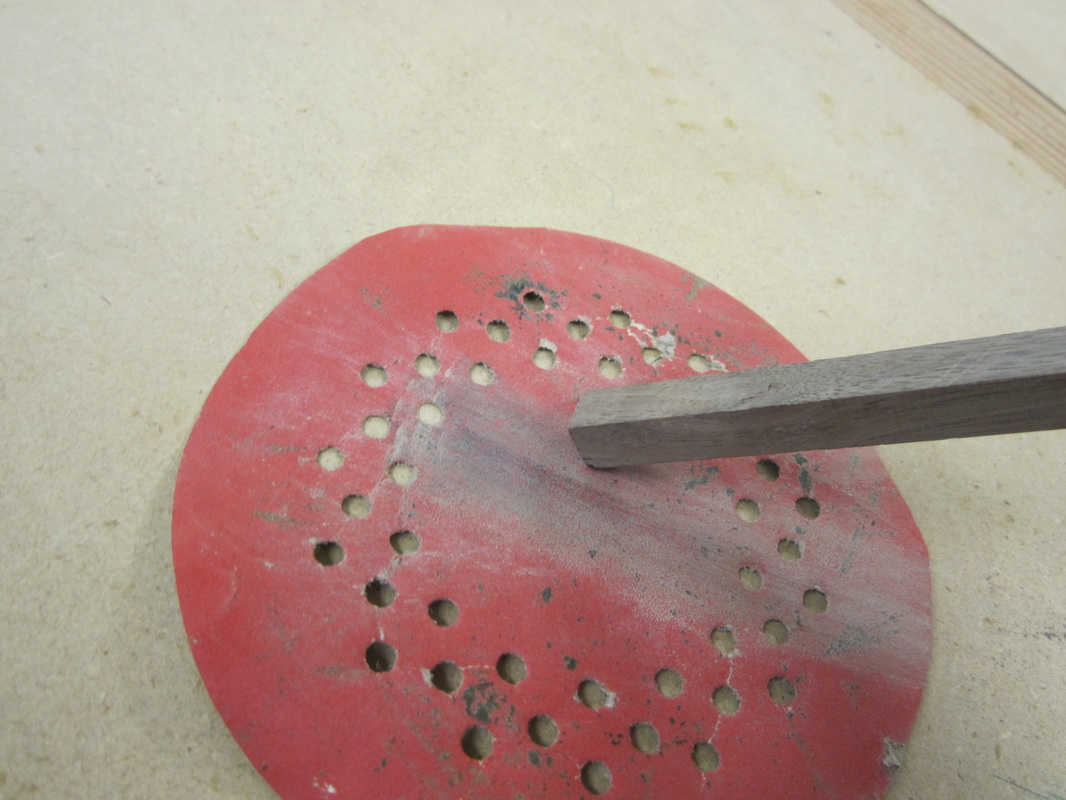
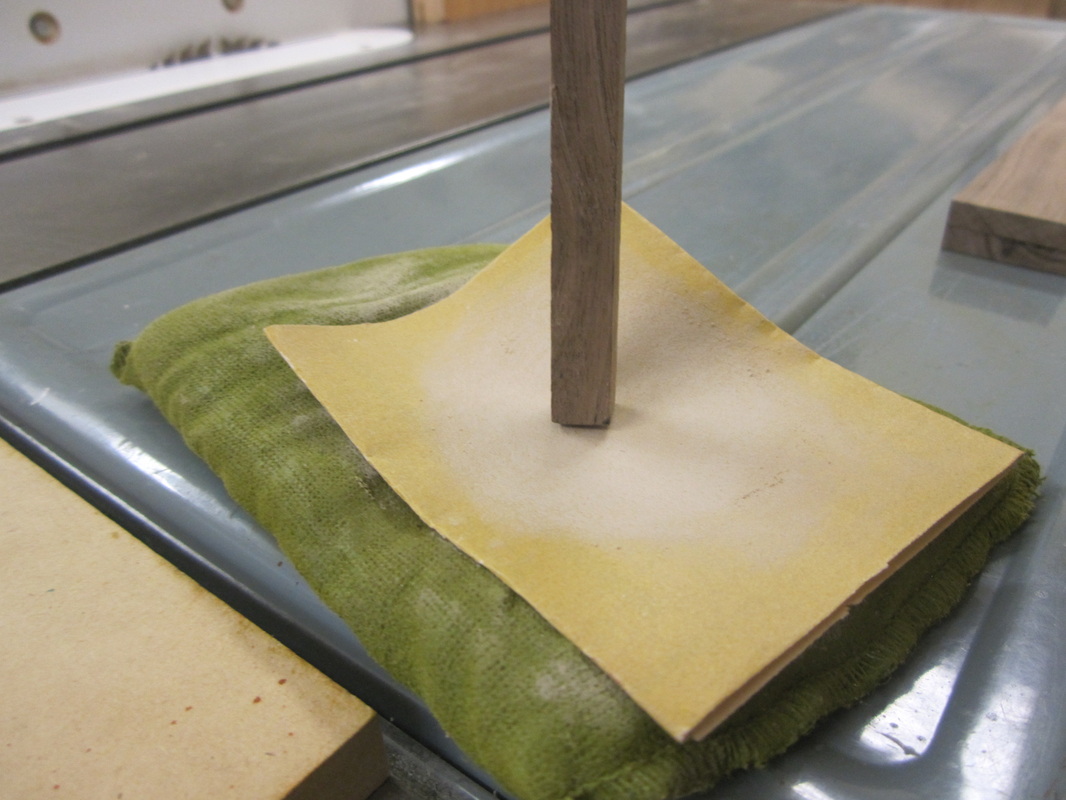
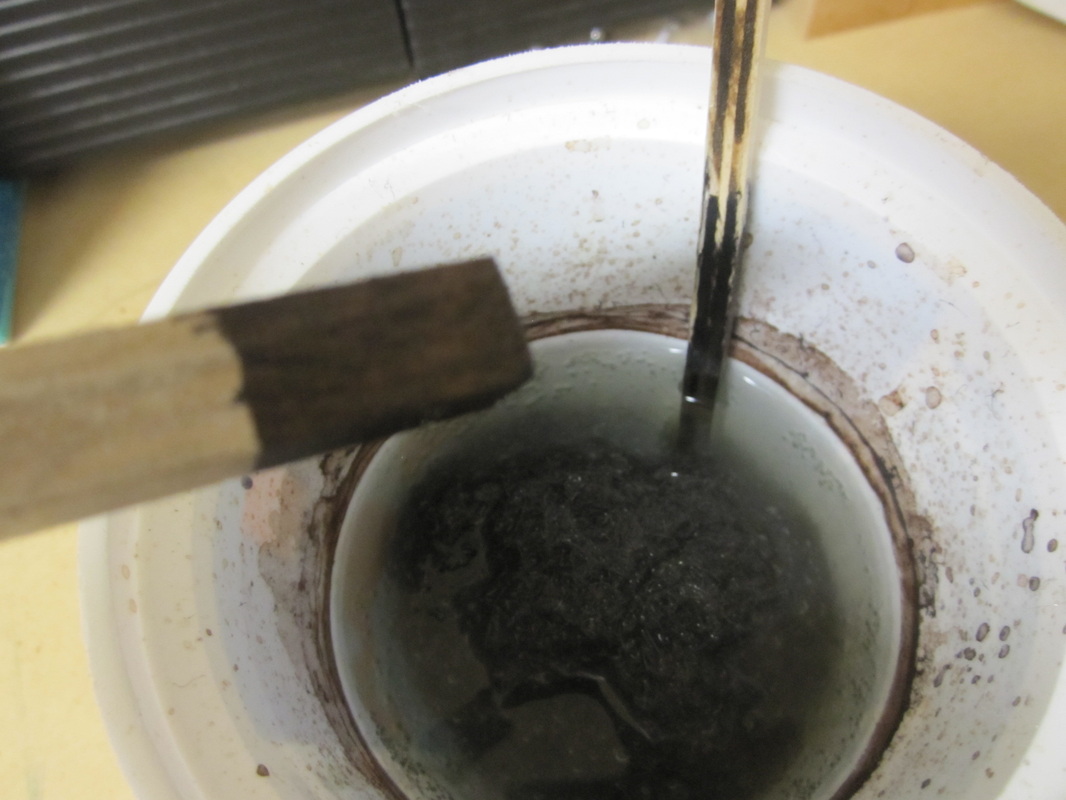
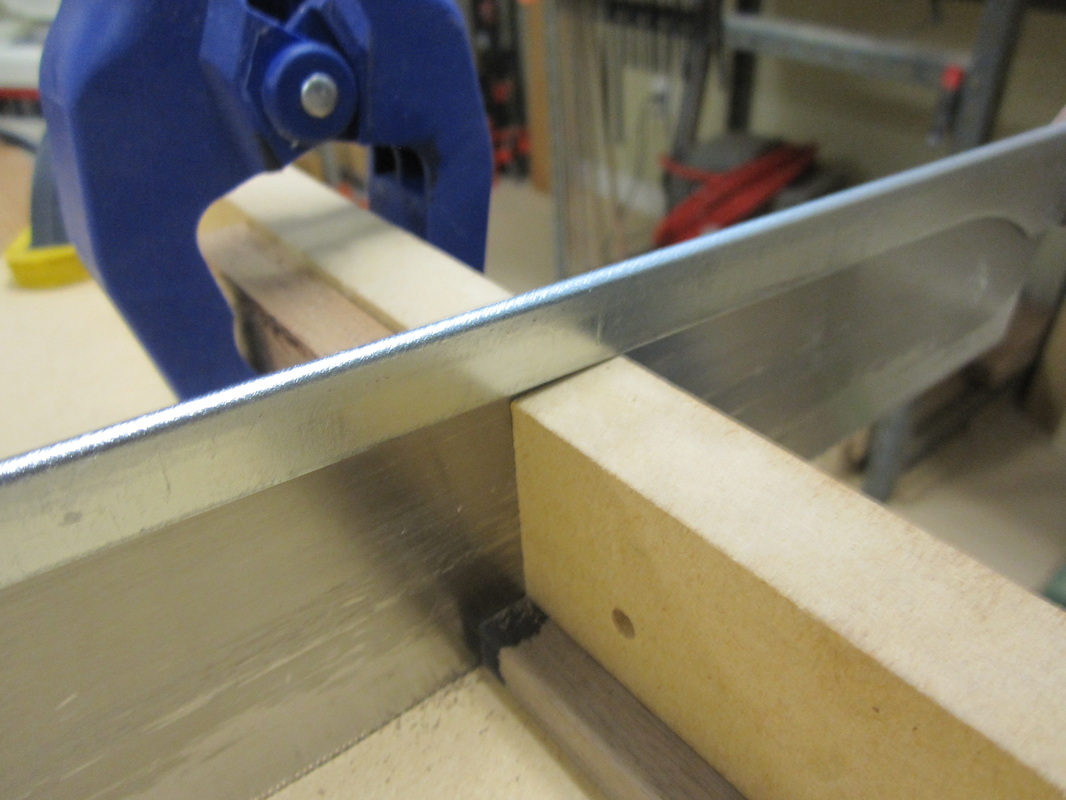
Not finished yet…. I still have to make all those little pegs and splines! By my count, there are thirty-eight 3/8” square pegs, about one-hundred and forty ¼” square pegs and four 3/8” wide splines. That’s another 182 parts, all hand-made! Original Greene & Greene pieces used ebony for the black accents but it is difficult to find, expensive and nasty to work with. Mine are made from black walnut and then I dip the finished pieces in a solution of vinegar and steel wool which reacts with the tannin in the walnut and turns it really black in a few seconds. I have previously used black India-ink with similar success. I made a jig to use with a small disc sander, to shape the ends of the pegs and then finish with finer grit sandpaper.
|
|
|
|
|
|
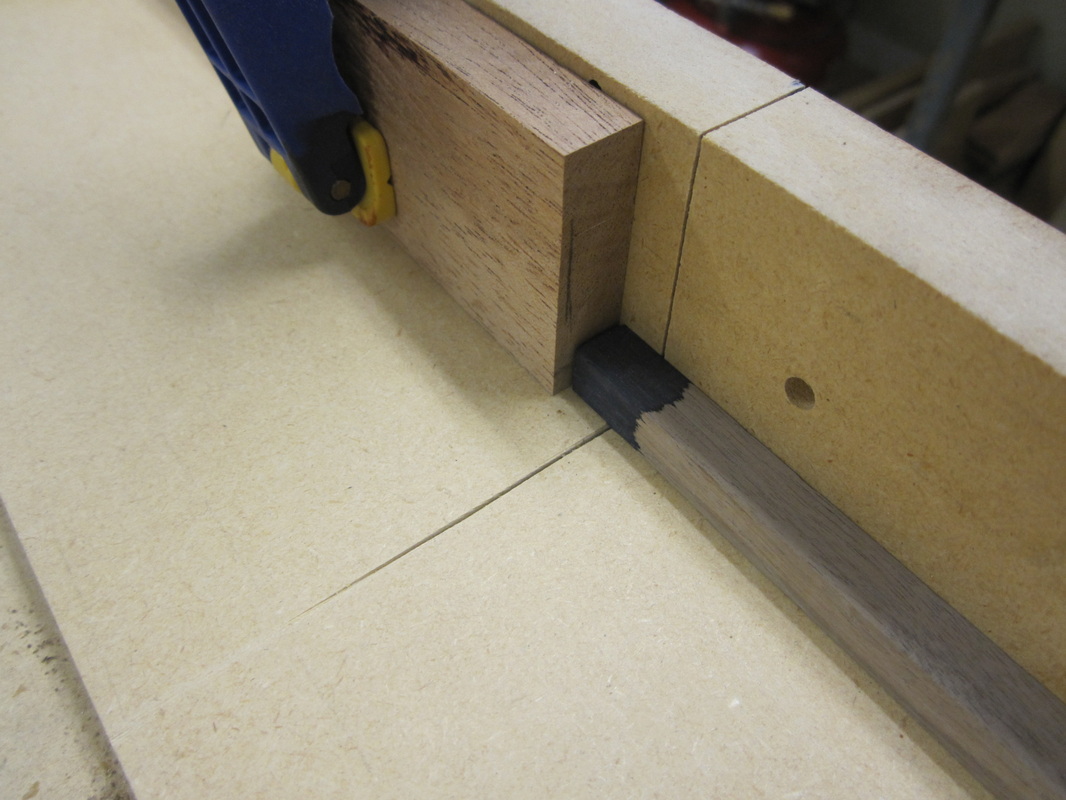
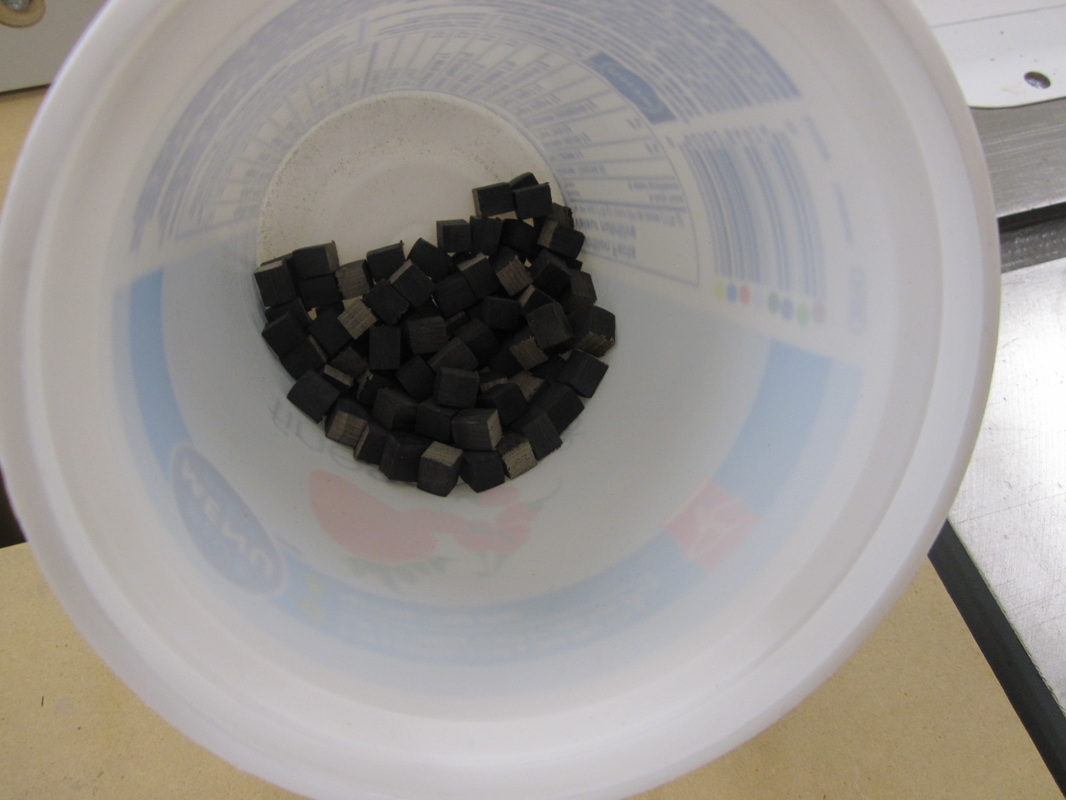
After blackening, the pegs are cut to length with my dozuki using a simple jig. One hundred and forty ¼” square pegs don’t look like much in the bottom of a yoghurt container….
|
|
|
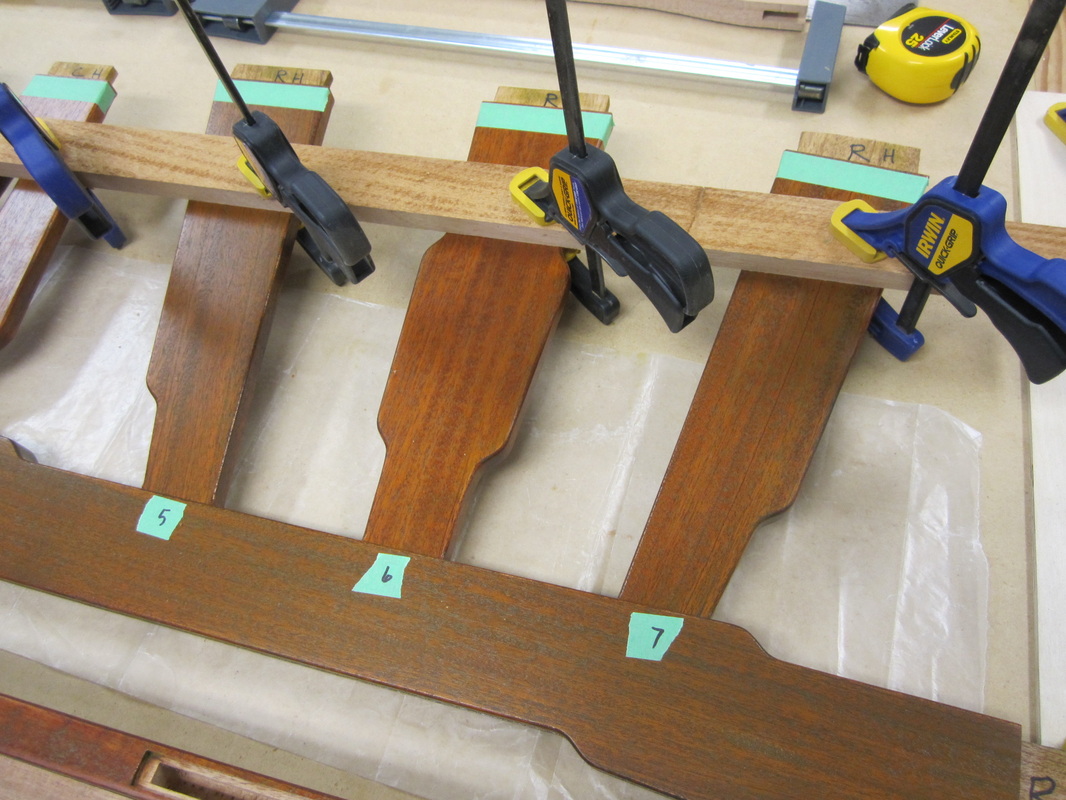
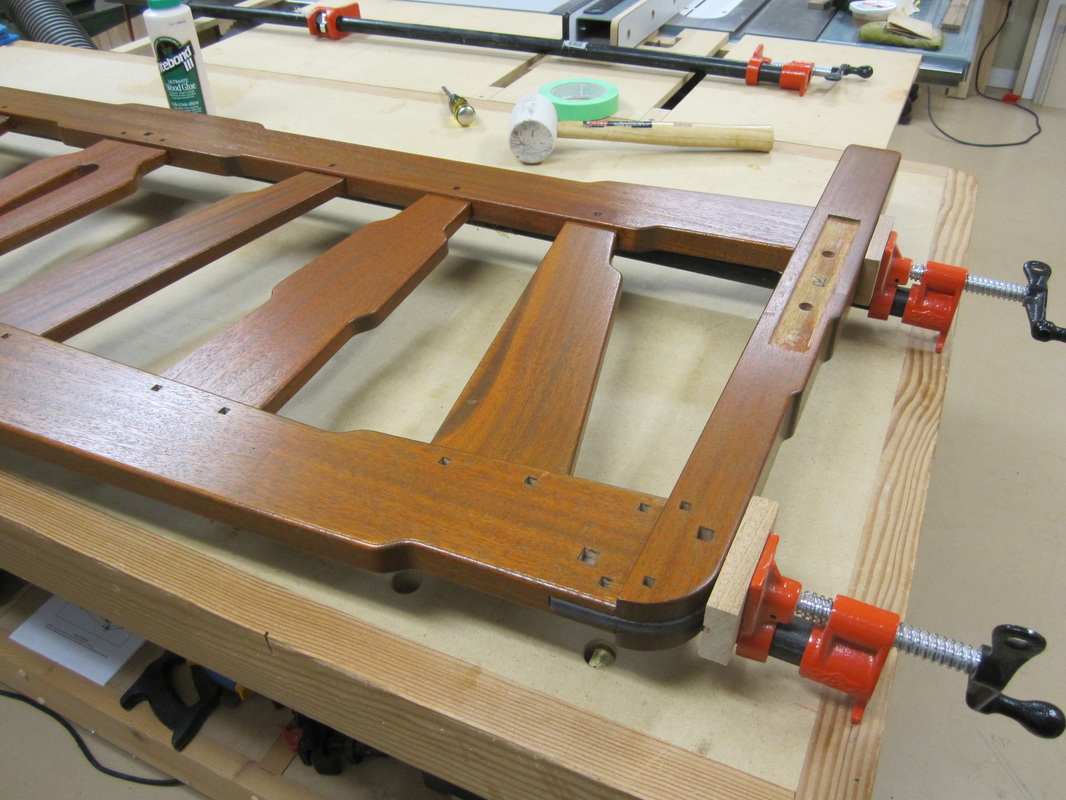
Next comes the really scary part, gluing it all together. I decided that the most reliable way to glue up was to do it in small stages so I started with three slats glued into the bottom rail and clamped in the correct position using the dry-fitted top rail to square it all up. Then the four other slats are glued into the bottom rail and again properly positioned by dry-fitting into the top rail.

|

|
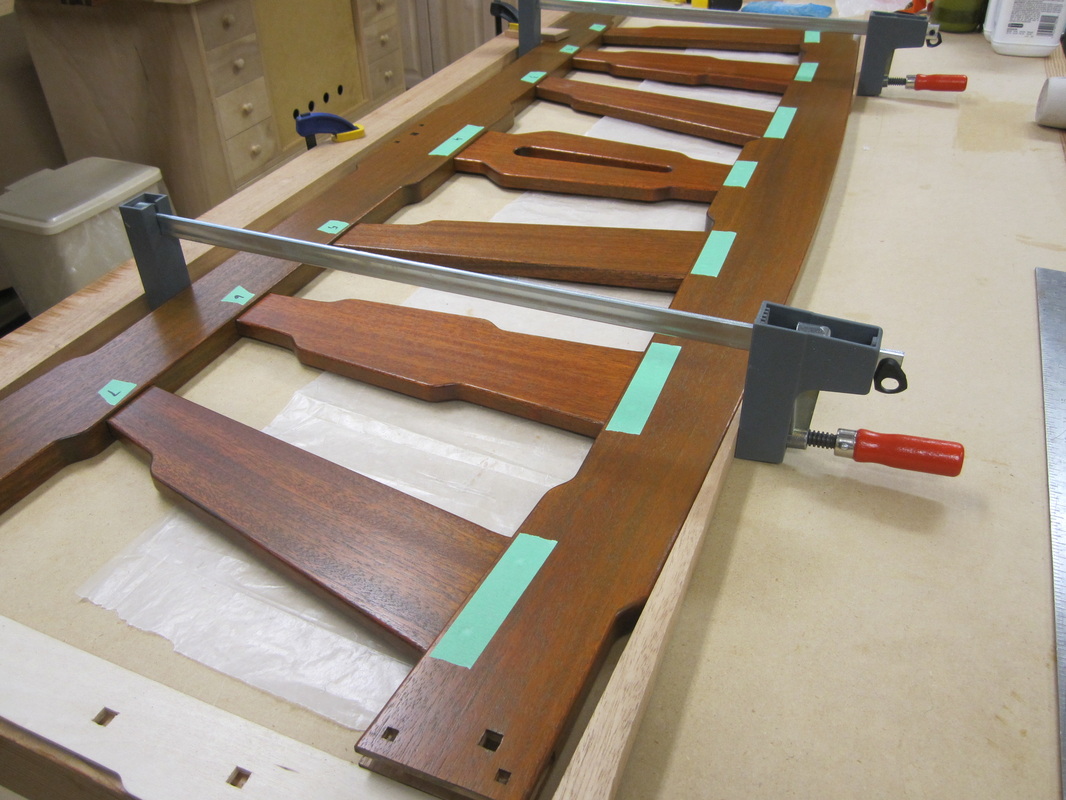
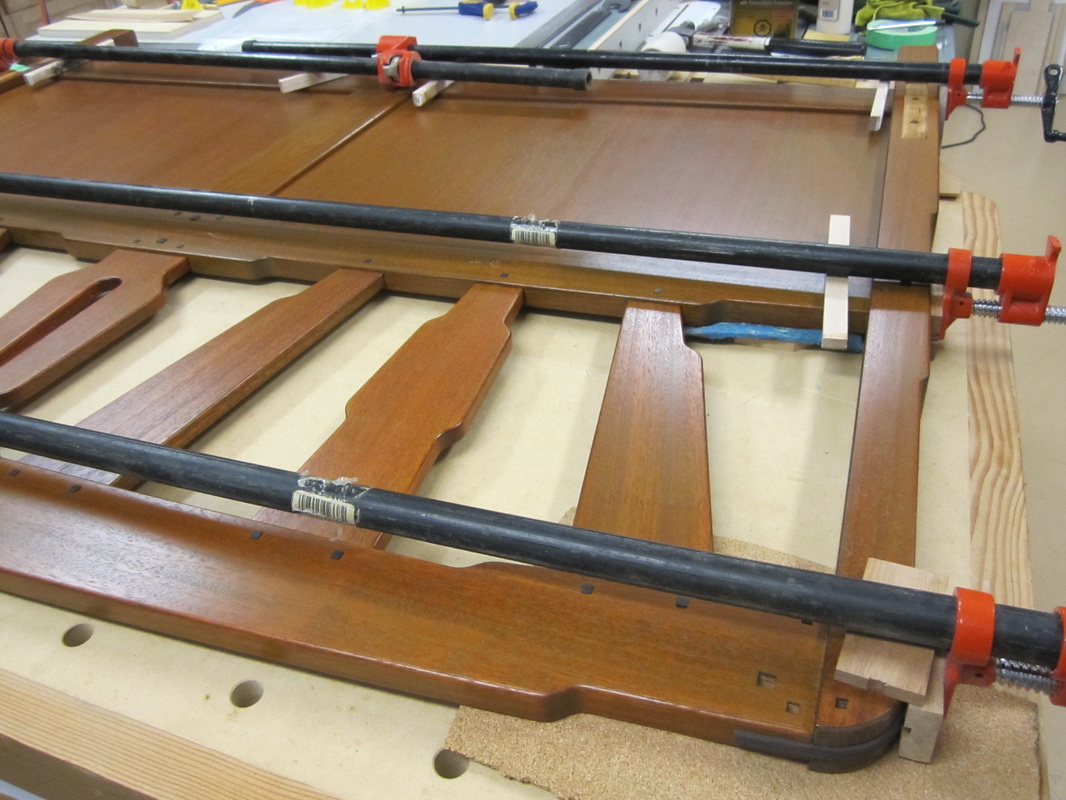
When the glue set, I clamped a piece of scrap across all the slats to hold them in place, removed the top rail and then applied glue to all seven slat tenons and mortises to join the top rail permanently. The tape on the slats was used to ensure that the housed tenons were engaged to sufficient depth and so that the tenons and bridle-joints to the legs would line up correctly on both sides.
|
|
The procedure is more or less the same for the foot-board and head-board but the head-board has a few additional steps for the lower rail divider and panels that must be glued into place before the legs can be glued. Again, I decided that gluing only one leg at a time and dry-fitting the other would give me time to make any adjustments before the glue set up. The spline for the bridle-joint at the top of each leg has to be glued into both the leg and the top rail at the same time and adjusted to provide roughly even protrusion at the top, side and bottom but fully closed against the mortise in the rail. I made small cauls with slots to allow me to clamp the legs without damaging the splines.
|
|
The pegs were then glued into place using a spacer to ensure that they were left proud of the surface. The peg holes adjacent to each side of the bridle-joint were cut through the spline using a chisel and longer “functional” pegs were used here to add strength to this critical joint. These pegs are cut to go about ¼” beyond the spline when driven from one end. Then small filler pegs are driven from the opposite end, to prevent blow-out.
|
|
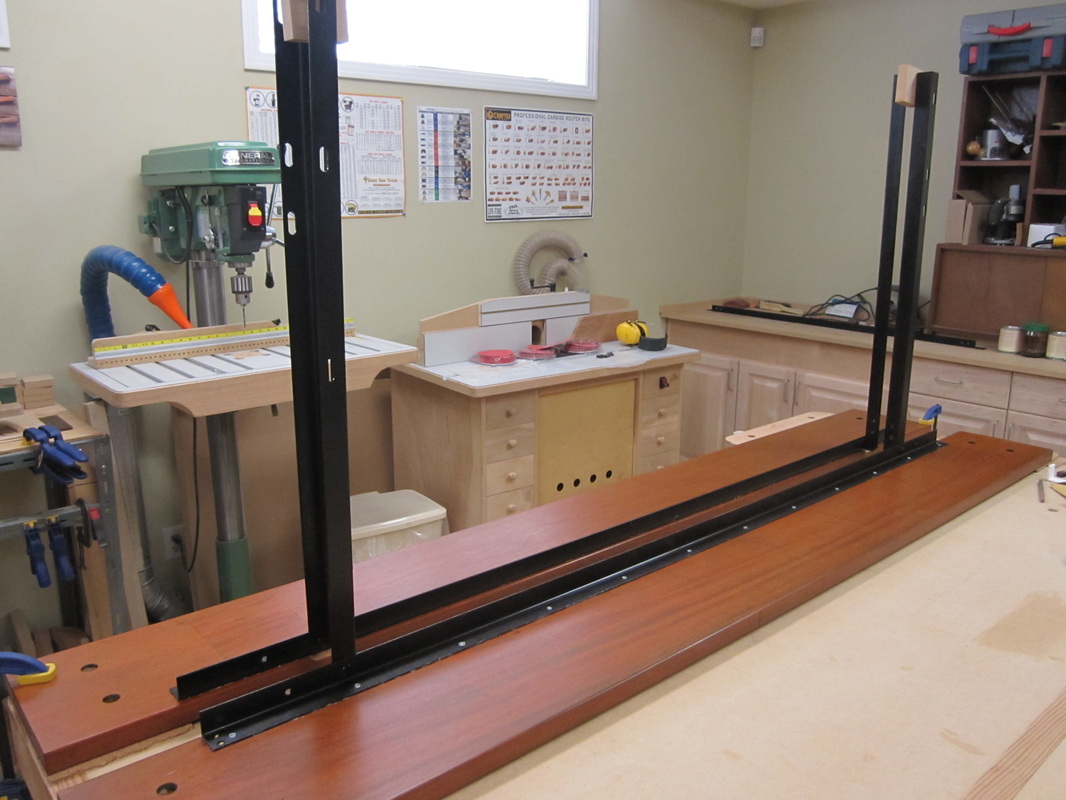
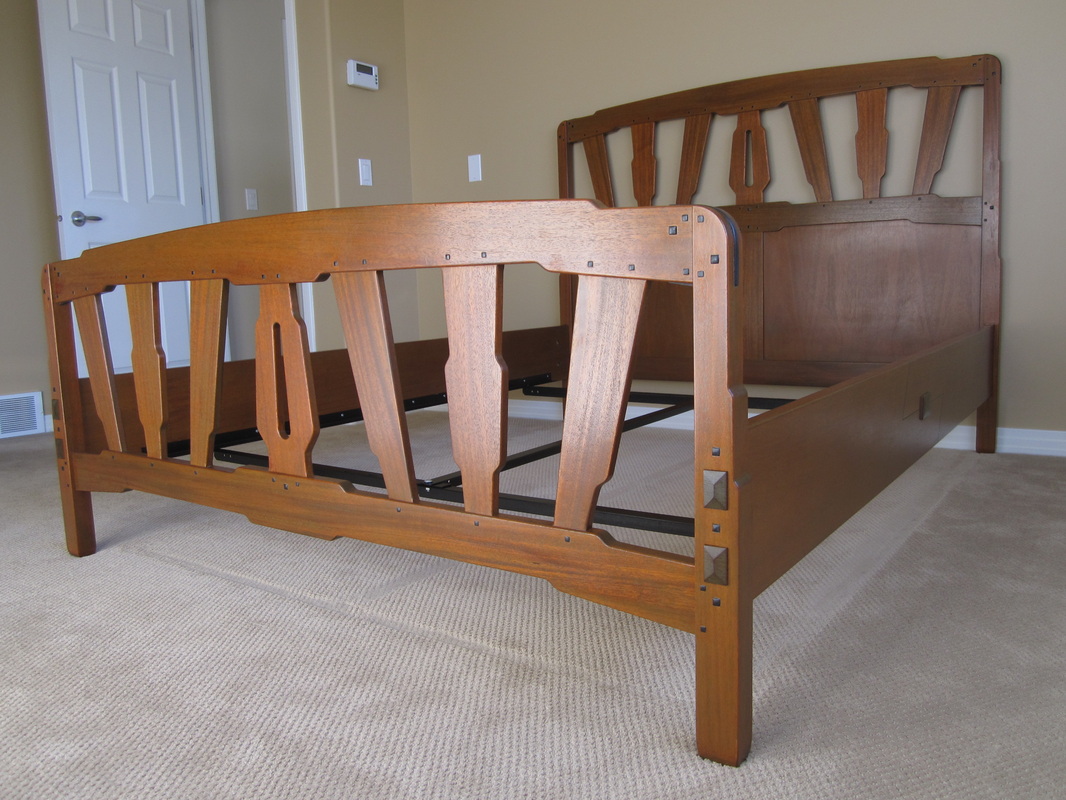
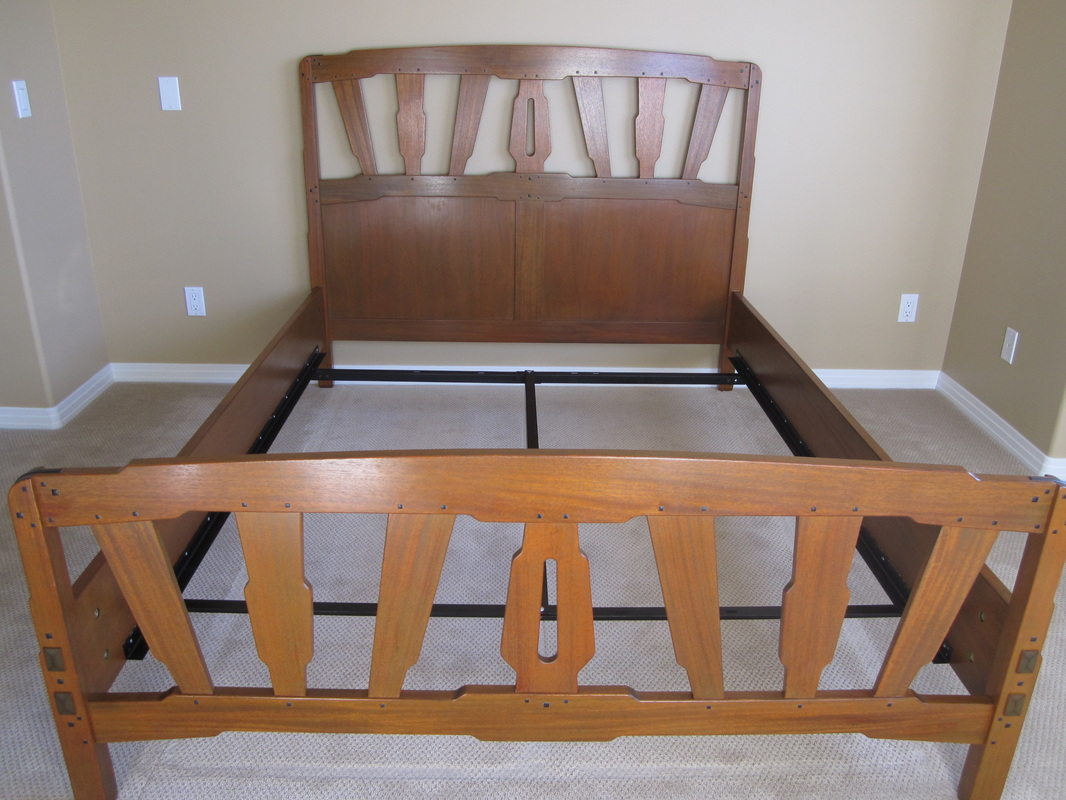
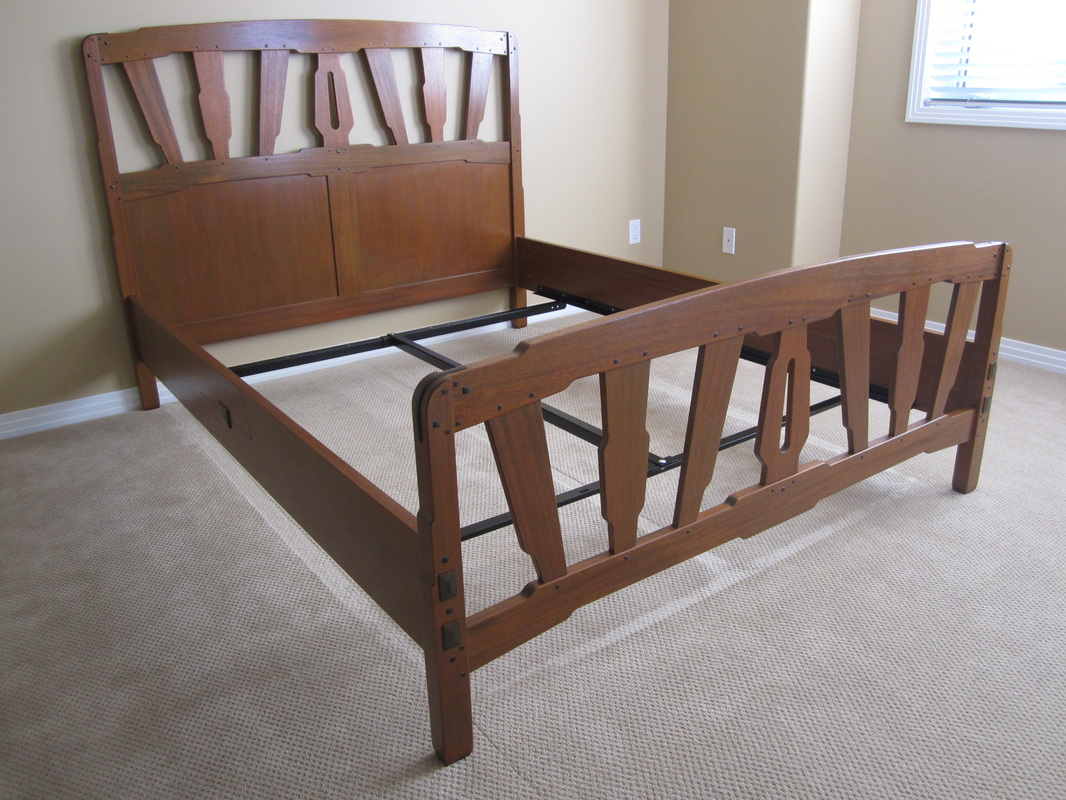
I salvaged the mattress support hardware from an old bed and attached it with screws and construction adhesive to the side rails, making some minor recesses to allow the cross-pieces of the hardware to hinge freely so that the bed can be moved easily in the future. After about six months of building and finishing, it was finally time to move all the pieces and set them up in my bedroom so I could see, for the first time, how the fully assembled bed would look.
|
|
I am happy that it turned out as well as it did and, despite some minor mishaps and frustration along the way, I am very pleased with the result. It may not be everyone’s taste but I think it is a reasonable attempt at interpreting the design language of Greene & Greene and creating something unique that, hopefully, will remain with my family for many years. In the process of making this piece, I have developed a new appreciation for those other brothers, John and Peter Hall, who made most of the Greene & Greene originals.
|
|

|

|
|
|
|